
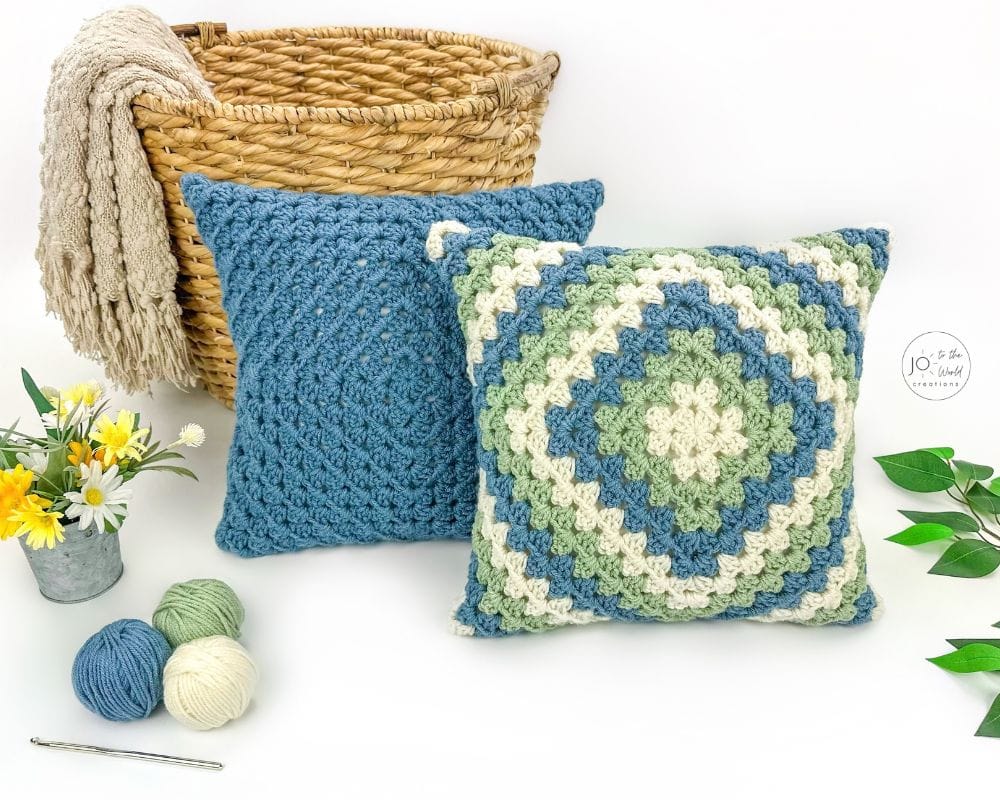
Continuous Granny Square Pillow – Free Crochet Pattern
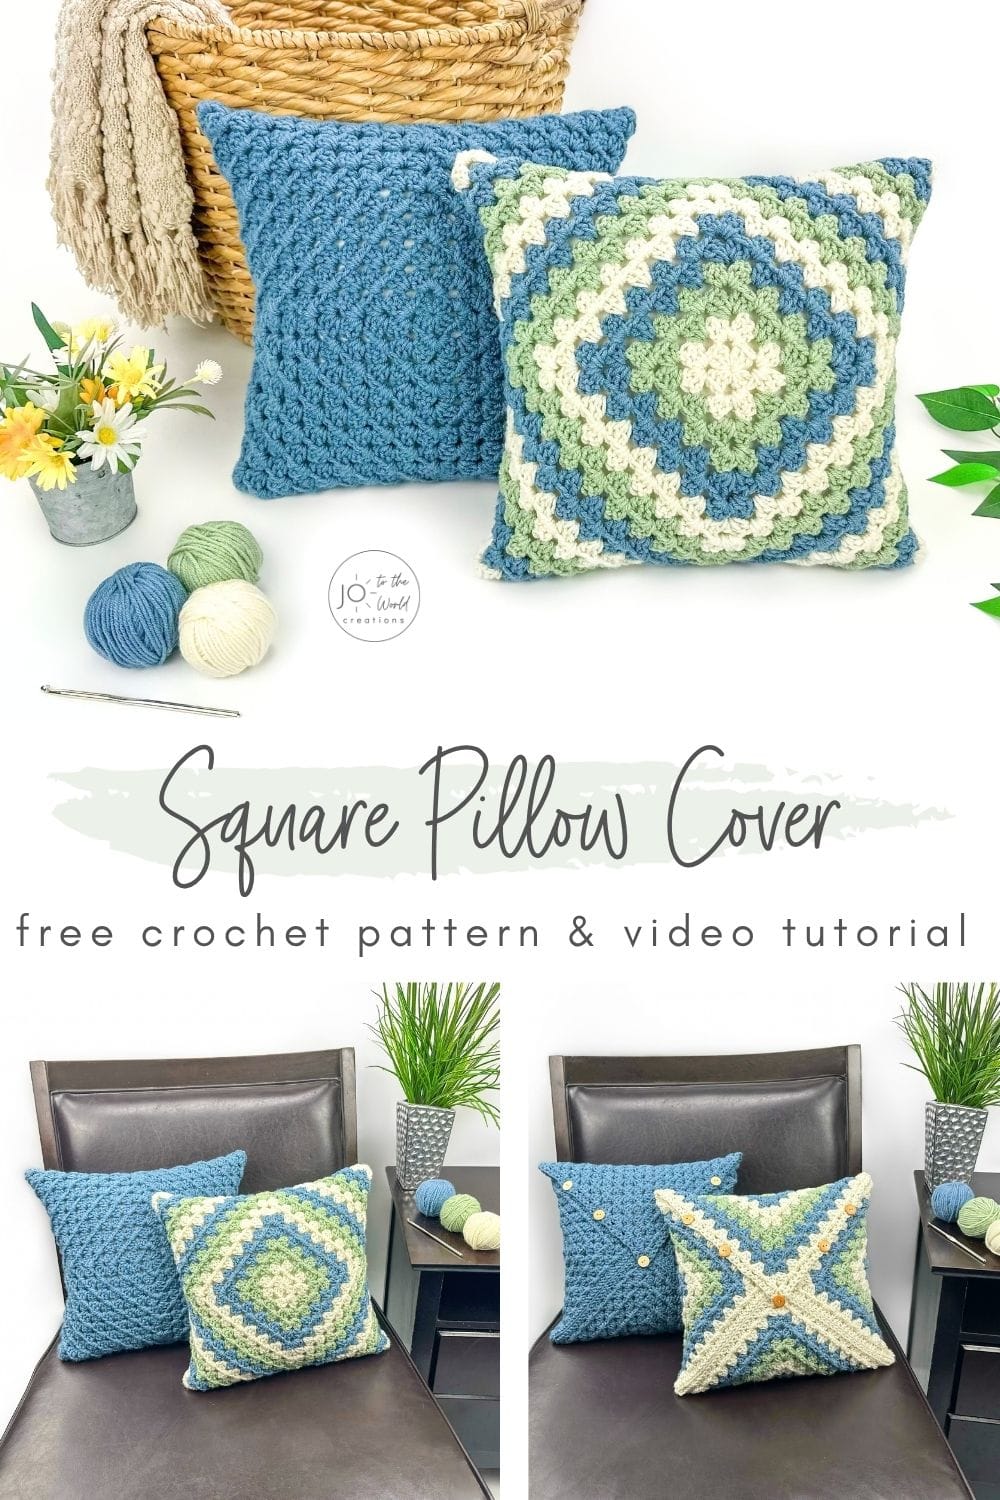
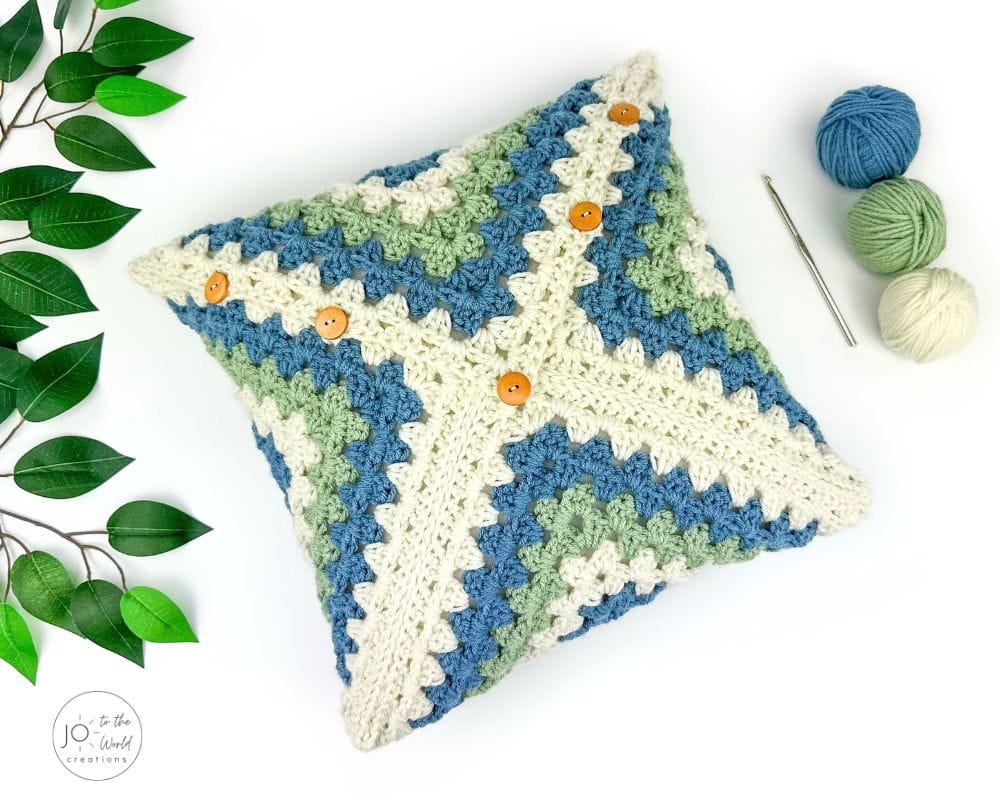
Learn how to crochet a removable pillow cover with this easy crochet pillow pattern and step-by-step video tutorial. It can be made to fit any size square pillow insert. You can use one, two, three or more colors. You can even make it as a Christmas pillow for the holidays or choose colors to match your decor!
Before we begin, I would like to thank you for visiting Jo to the World Creations, a site dedicated to helping you give the gift of crochet.
More free patterns (that make incredible crochet gifts) are on the way! Sign up for my emails using the form below and never wonder “What should I make for…” again!
Free Email Series
GET 3 FREE PDF CROCHET PATTERNS
Subscribe to my emails and get a free printable PDF crochet pattern emailed to you every day for the next 3 days!
You’ll also receive new crochet patterns and helpful resources to help you make the best crochet gifts for everyone in your life.

Easy Pillow Cover
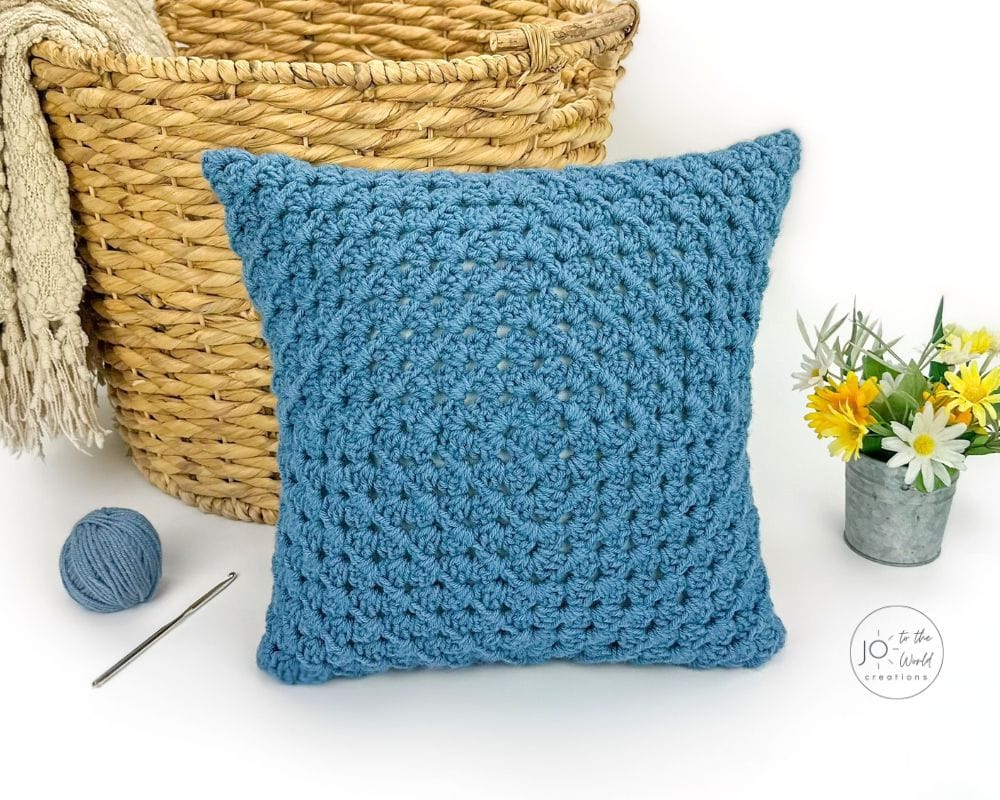
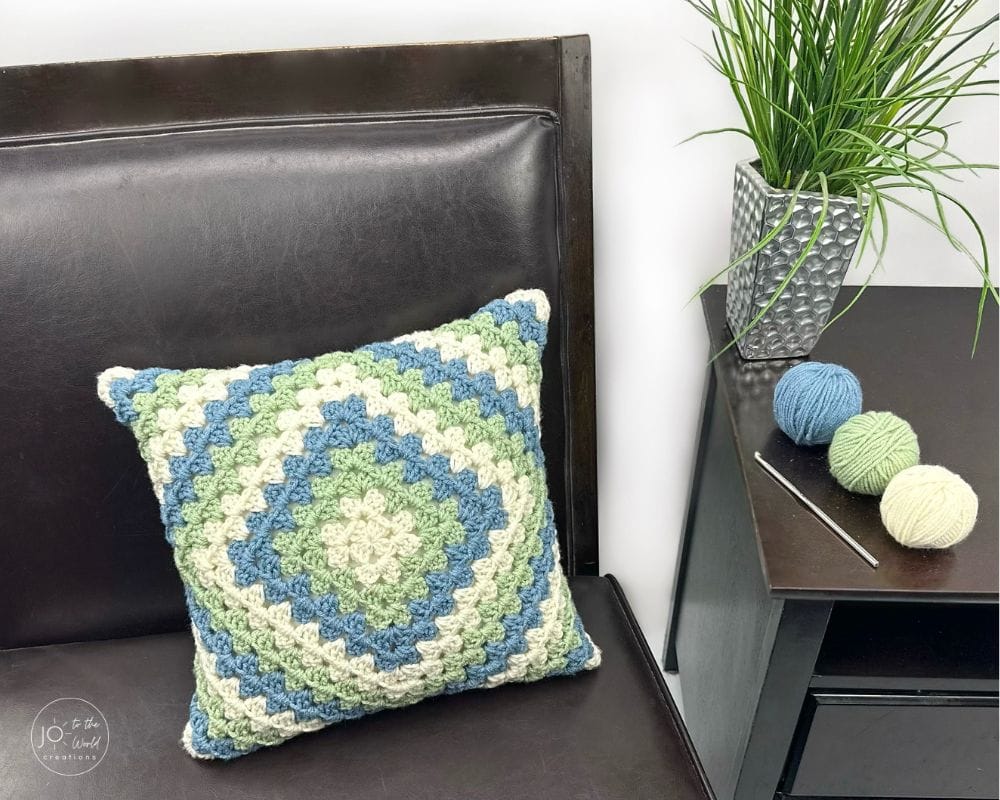
Learn how to crochet a granny square pillow with this easy Continuous Granny Square Pillow Crochet Pattern!
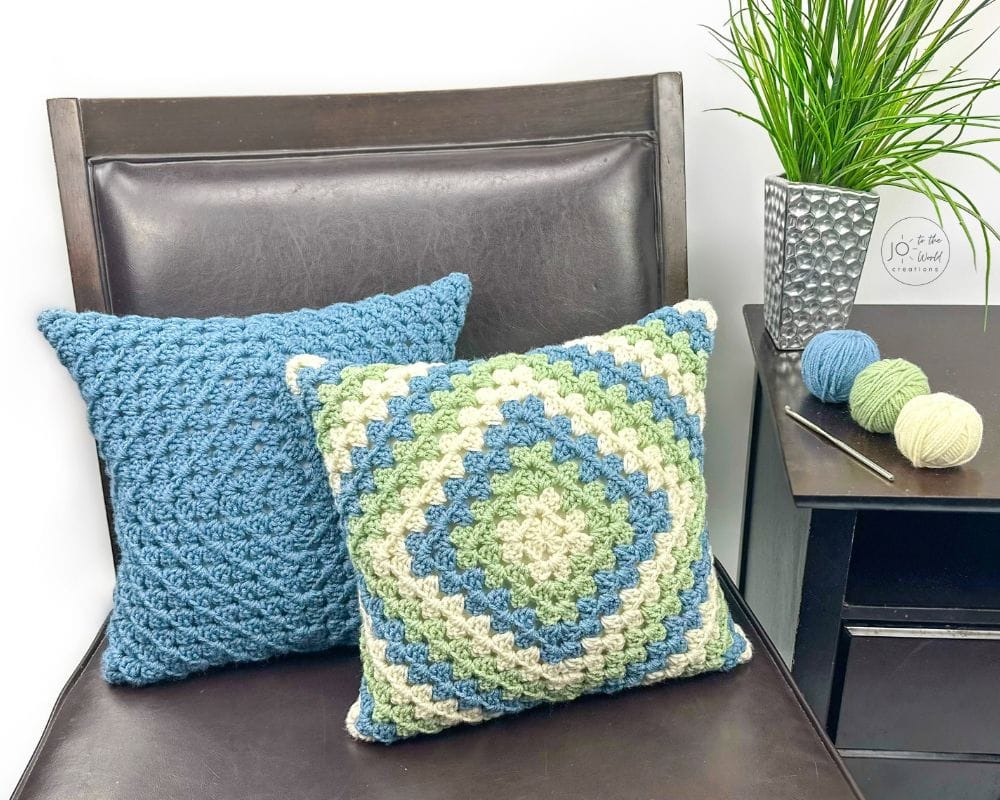
This removable square pillow cover can be made to fit any size square pillow insert such as 14″ x 14″, 16″ x 16″, 18″ x 18″, 20″ x 20″, etc. Simply continue repeating the same simple round until it fits your square pillow insert.
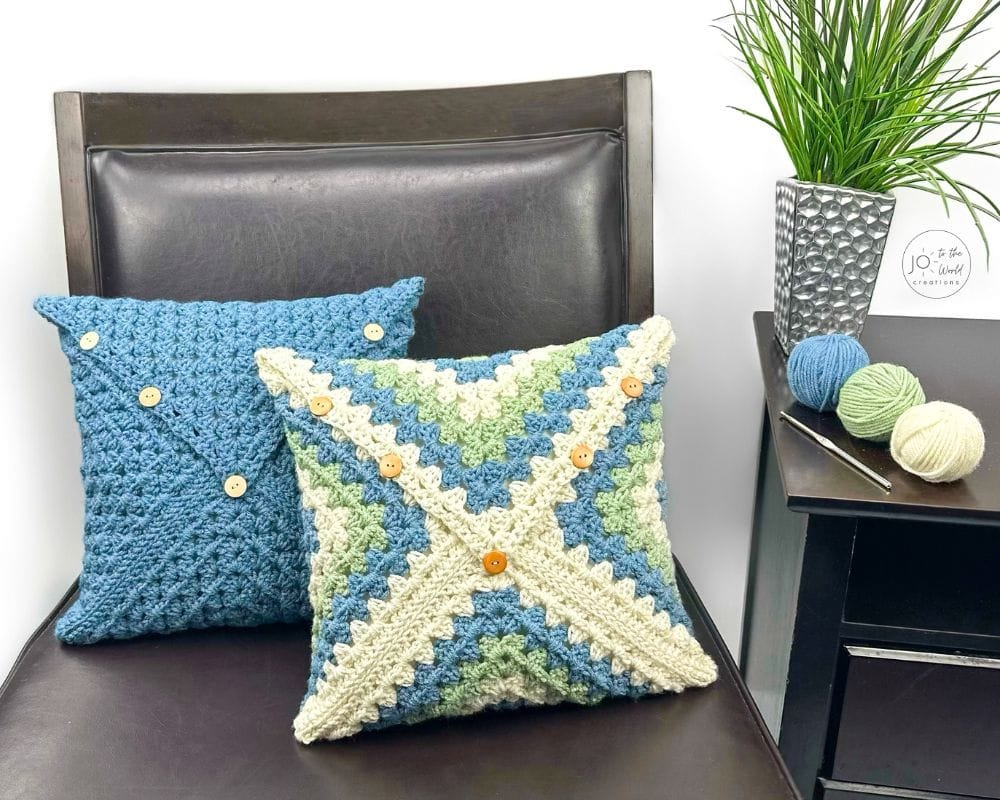
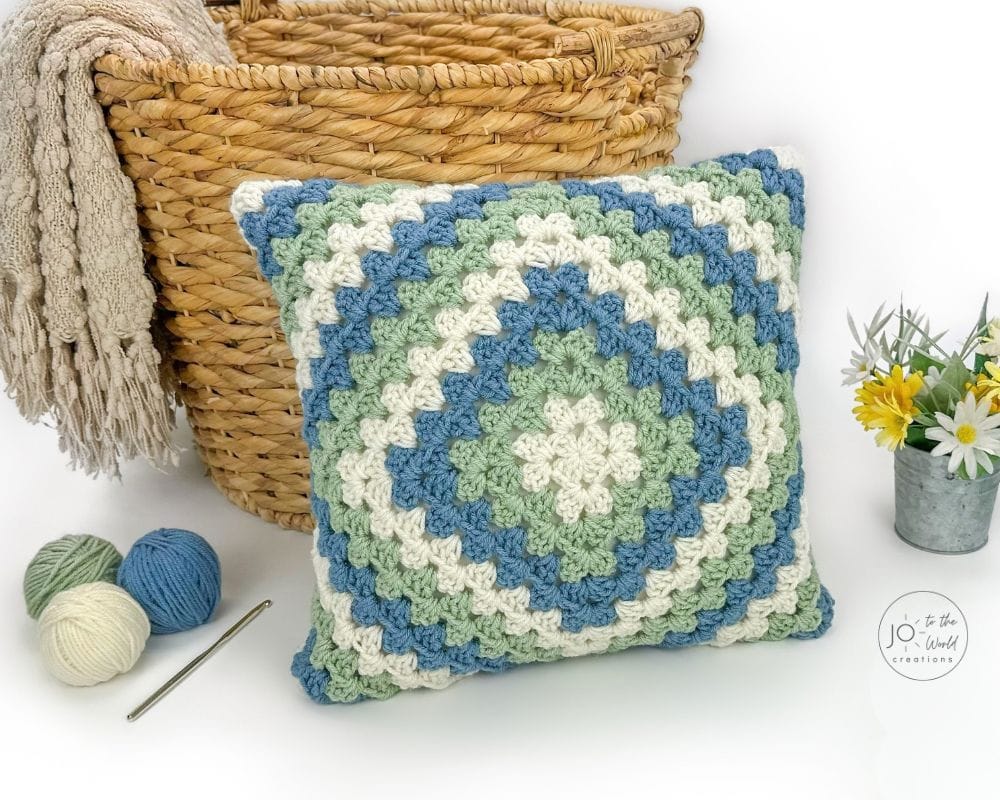
You can make your granny square pillow with any number of colors. The pillow cover has an envelope-style back with buttons, making it removable so you can easily change up your decor for different seasons.
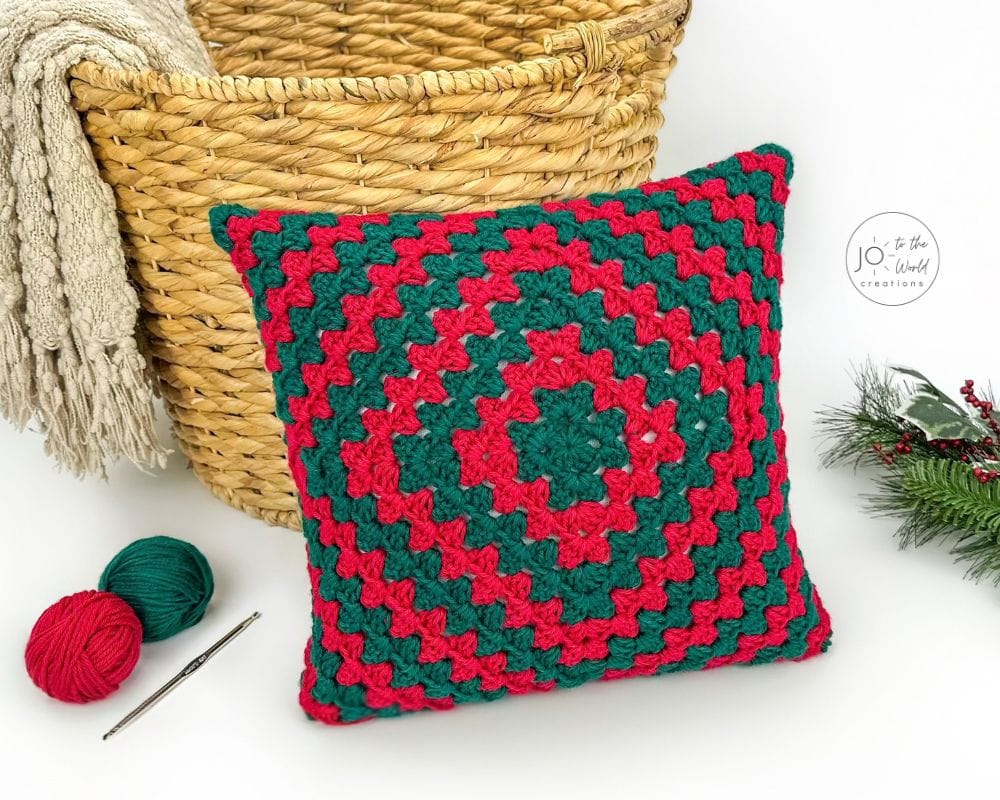
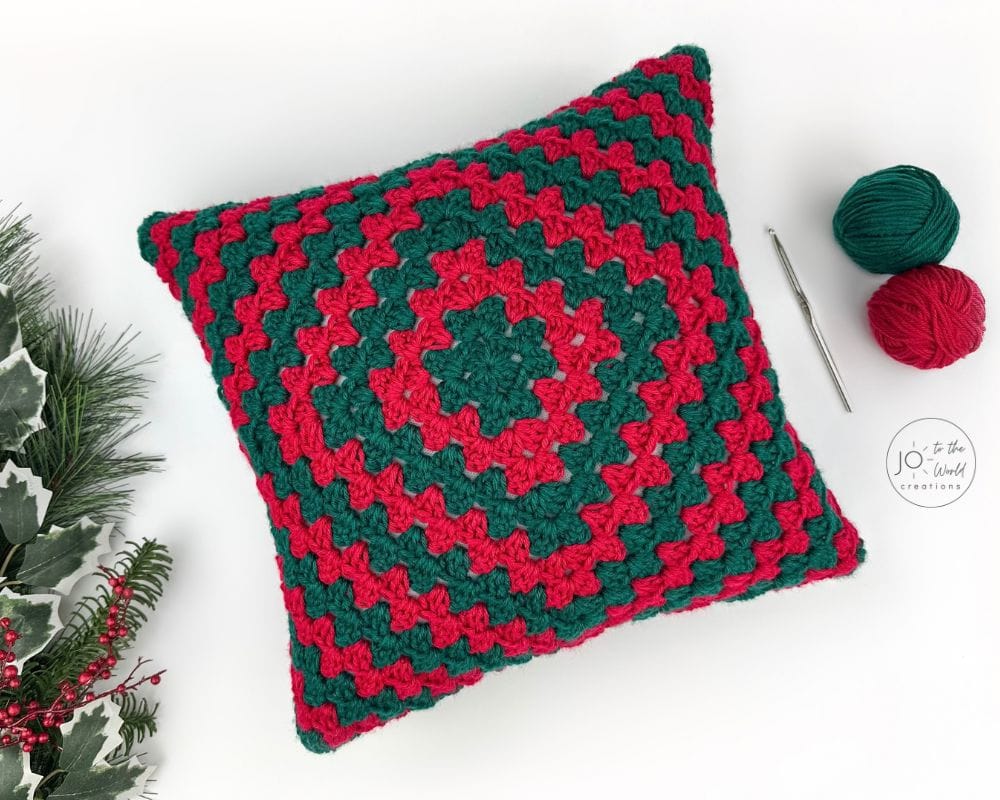
Whether you make it as a Christmas pillow like I did or choose colors to match your decor, you’ll be so proud to show off your new crocheted pillow!
The pattern includes step-by-step written instructions, helpful diagrams and photos as well as a full video tutorial showing how to crochet this classic pillow cover from start to finish.
Use the Table of Contents below to jump to any section of the pattern or keep scrolling down to view all the details, the video tutorial and the written instructions.
Get the PDF!
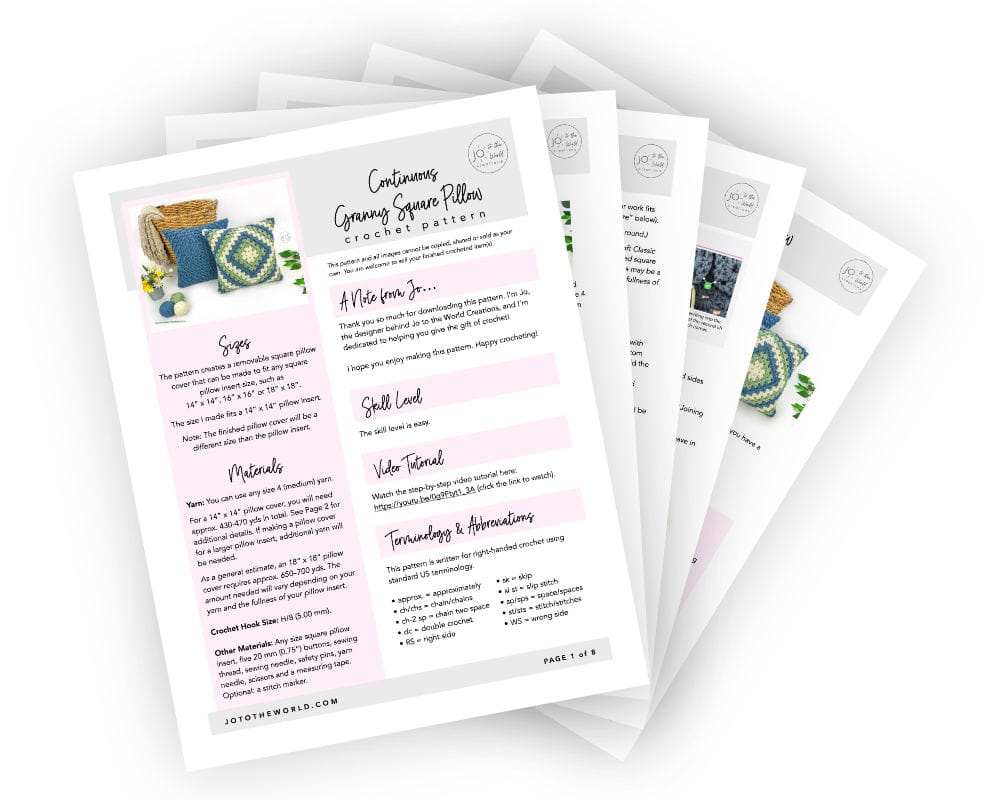
Purchase the printer-friendly, ad-free PDF of this pattern that you can instantly download! It includes everything from this free pattern but you can easily save, print and access it anytime!
All-Access Membership
For only $0.14 a day, you can get this pattern as a PDF and my entire library of 190+ print-ready, ad-free PDF crochet patterns!
Pattern Details
Skill Level
Easy
Size
The pattern creates a removable square pillow cover that can be made to fit any square pillow insert size, such as 14” x 14”, 16” x 16” or 18” x 18”.
The size I made fits a 14” x 14” pillow insert.
Note: The finished pillow cover will be a different size than the pillow insert.
Materials
Yarn: You can use any size 4 (medium) yarn.
For a 14” x 14” pillow cover, you will need approx. 430-470 yds in total. See the “Color Options” section below for additional details.
If making a pillow cover for a larger pillow insert, additional yarn will be needed.
As a general estimate, an 18” x 18” pillow cover requires approx. 650–700 yds. The amount needed will vary depending on your yarn and the fullness of your pillow insert.
Crochet Hook Size: H/8 (5.00 mm).
Other Materials: Any size square pillow insert, five 20 mm (0.75”) buttons, sewing thread, sewing needle, safety pins, yarn needle, scissors and a measuring tape. Optional: a stitch marker.
Terminology
This pattern is written for right-handed crochet using standard US terminology. If you’re more familiar with UK terms, here’s my US to UK Conversion Chart.
Abbreviations
- approx. = approximately
- ch/chs = chain/chains
- ch-2 sp = chain two space
- dc = double crochet
- RS = right side
- sk = skip
- sl st = slip stitch
- sp/sps = space/spaces
- st/sts = stitch/stitches
- WS = wrong side
Gauge
Because the pillow cover can be made to fit any square pillow insert size by repeating Round 5, matching an exact gauge is not important for this pattern.
For reference, after Round 3, my work measured 3.75” x 3.75”.
Pattern Notes
- Every time you make 3 dc sts in the same space, it counts as a cluster. The starting chains and the first 2 dc sts of each round count as your first cluster.
- Unlike some granny square patterns, you don’t make a ch 1 between clusters.
- “Sp between clusters” refers to the space between two groups of 3 dc sts from the previous round. Work into the space between the clusters, not into any stitches.
- Each round has four ch-2 sps. These ch-2 sps form the four corners of your square.
- You will turn your work at the beginning of each round. When working a right side (RS) round, the front of your work will be facing you. When working a wrong side (WS) round, the back of your work will be facing you. Turning after each round creates a more even-looking finished square.
- You may find it helpful to place a stitch marker in the top of the first dc st made in every round.
Color Options
You can make this pillow cover with one, two, three or more colors! You can change colors every round or every two, three, four or more rounds.
How to Change Colors:
At the end of the round (after joining), place the new color on your hook and pull it through the loop of the old color currently on your hook. Fasten off the old color (cut the yarn that’s attached to your skein). Proceed to the next round’s instructions.
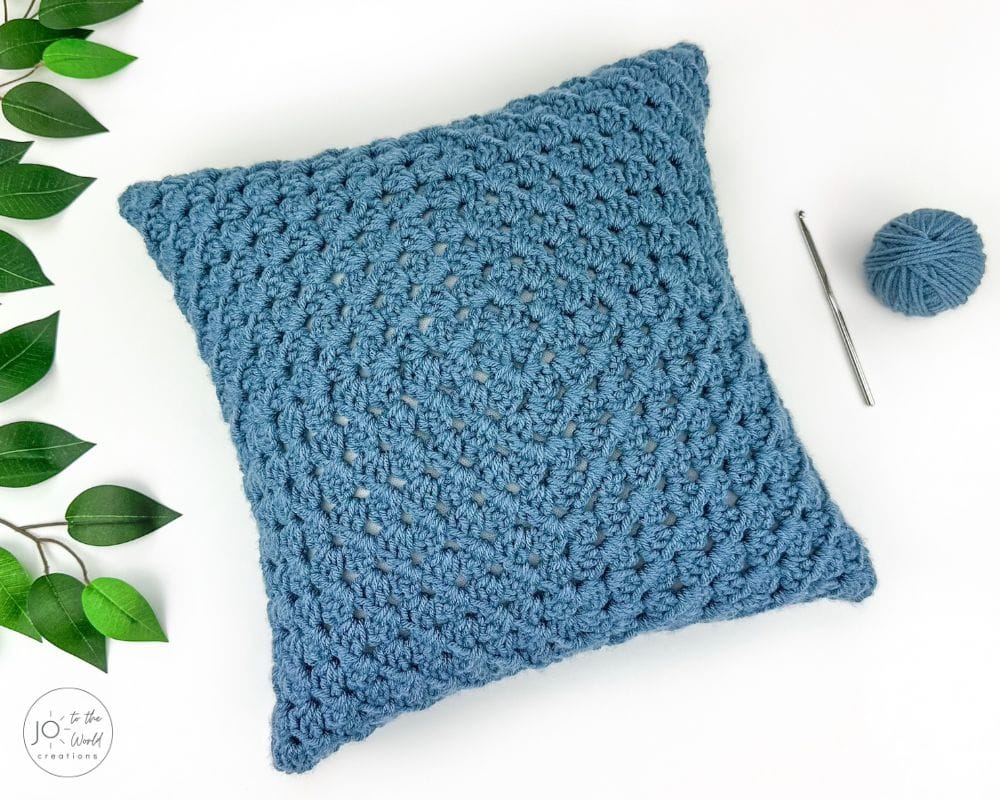
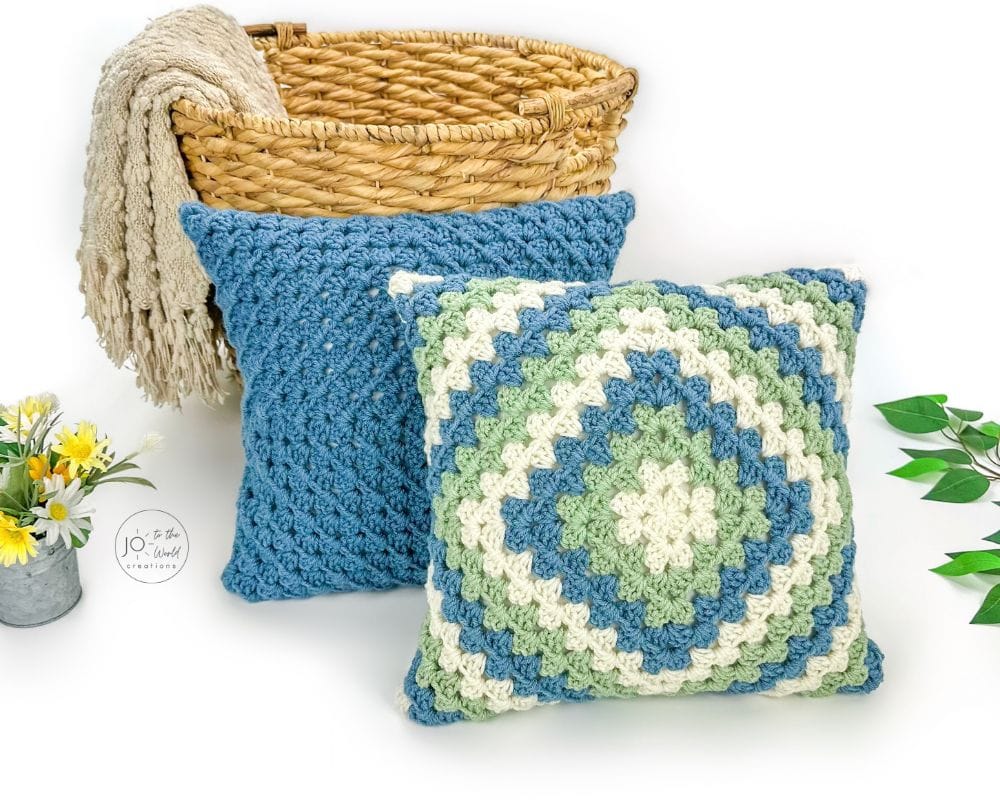
Pillow with One Color
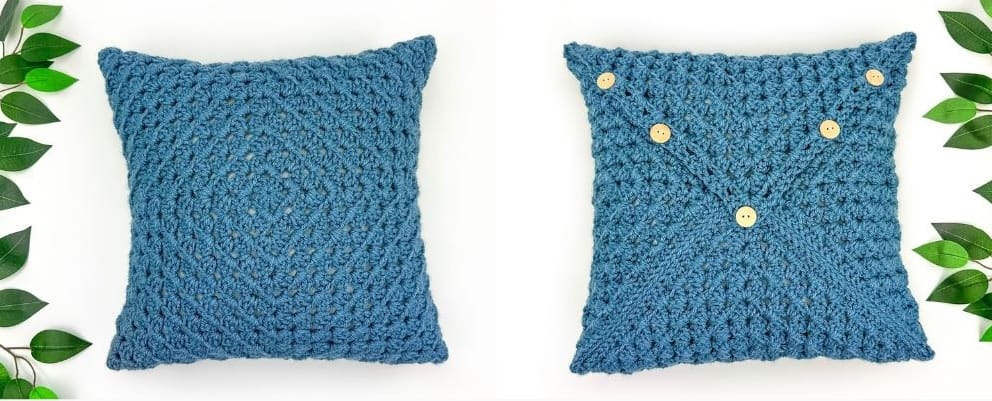
For the 14” x 14” pillow cover pictured above, I used approx. 430 yds of Soft Classic Solid by Loops & Threads in the color “Cornflower.” This yarn is size 4 (medium) and 100% acrylic. A skein is 354 yds / 324 m and 7 oz / 198 g. I used 2 skeins.
Pillow with Two Colors
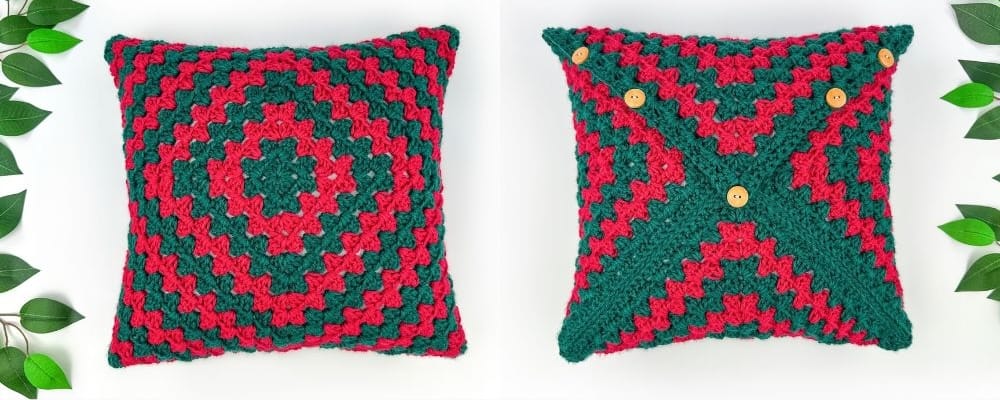
For the 14” x 14” pillow cover pictured above, I used Impeccable yarn by Loops & Threads. This yarn is size 4 (medium) and 100% acrylic. A skein is 285 yds / 260 m and 4.5 oz / 127.5 g. I used 1 skein of each color.
- Color A: “Dark Emerald” (green): approx. 270 yds
- Color B: “Cherry” (red): approx. 200 yds
I changed colors every 2 rounds: Start, Rounds 1 & 2 with Color A; Rounds 3 & 4 with Color B; Rounds 5 & 6 with Color A, etc. My last round was Round 22 with Color A. I used Color A for joining.
Pillow with Three Colors
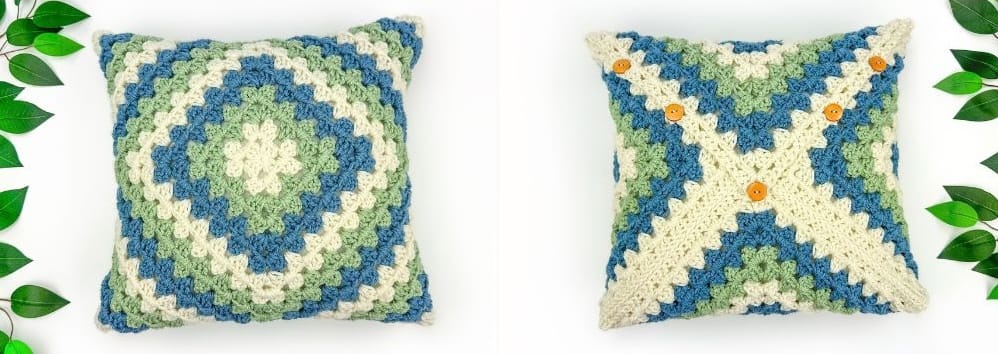
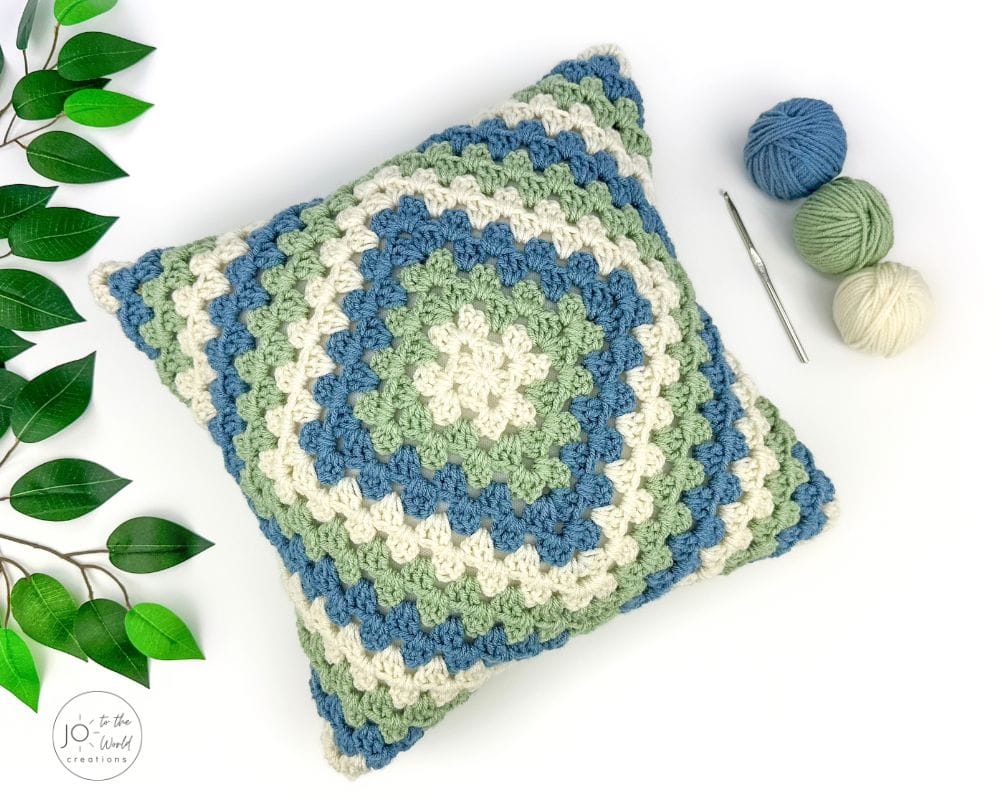
For the 14” x 14” pillow cover pictured above, I used Soft Classic Solid by Loops & Threads. This yarn is size 4 (medium) and 100% acrylic. A skein is 354 yds / 324 m and 7 oz / 198 g. I used 1 skein of each color.
- Color A: “Off White”: approx. 170 yds
- Color B: “Sage” (green): approx. 115 yds
- Color C: “Cornflower” (blue): approx. 145 yds
I changed colors every 2 rounds: Start, Rounds 1 & 2 with Color A; Rounds 3 & 4 with Color B; Rounds 5 & 6 with Color C; Rounds 7 & 8 with Color A, etc. My last round was Round 20 with Color A. I used Color A for joining.
Video Tutorial
Watch the step-by-step video tutorial below or keep scrolling down for the written instructions.

Just a Reminder!
This pattern is also available as a PDF, which includes everything listed here but as a printer-friendly, ad-free PDF that you can instantly download, save, print, make notes on and keep forever.
Get ALL my PDF Patterns!
Only $0.14 a day!
Join the All-Access Membership and instantly download the printable version of this pattern and ALL my 190+ easy-to-follow PDF crochet patterns.
Pattern Instructions
Pillow Cover Body
Start: Make a Magic Circle.
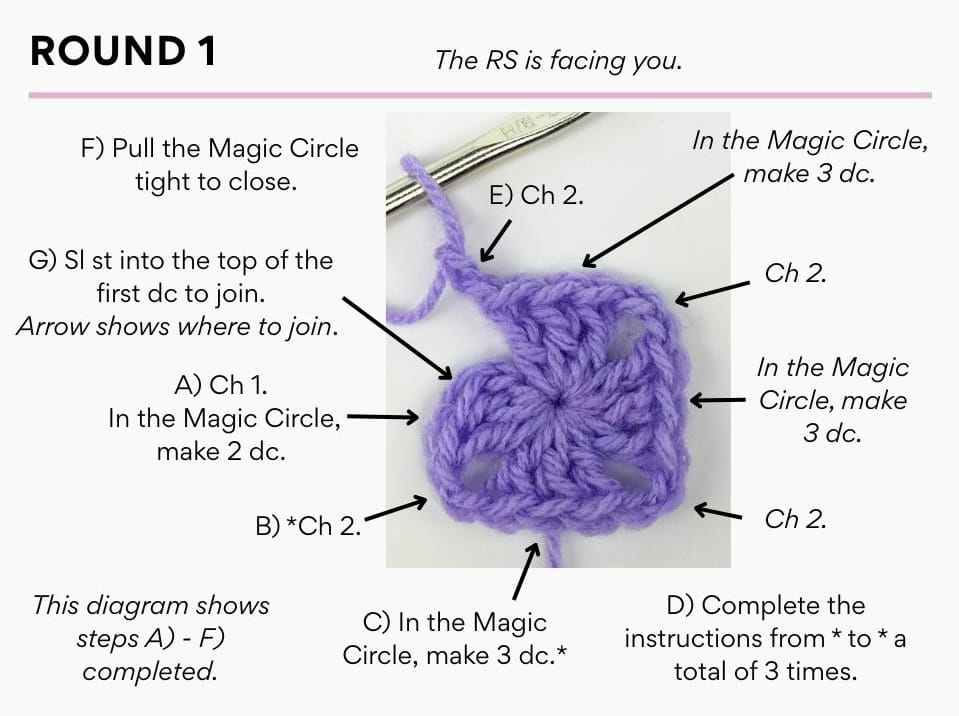
Round 1 (RS): Ch 1.
In the Magic Circle, make 2 dc.
*Ch 2. In the Magic Circle, make 3 dc.*
Complete the instructions from * to * a total of 3 times.
Ch 2.
Pull the starting tail of the Magic Circle tight to close.
Sl st into the top of the first dc to join.
(Stitch count: 4 clusters)
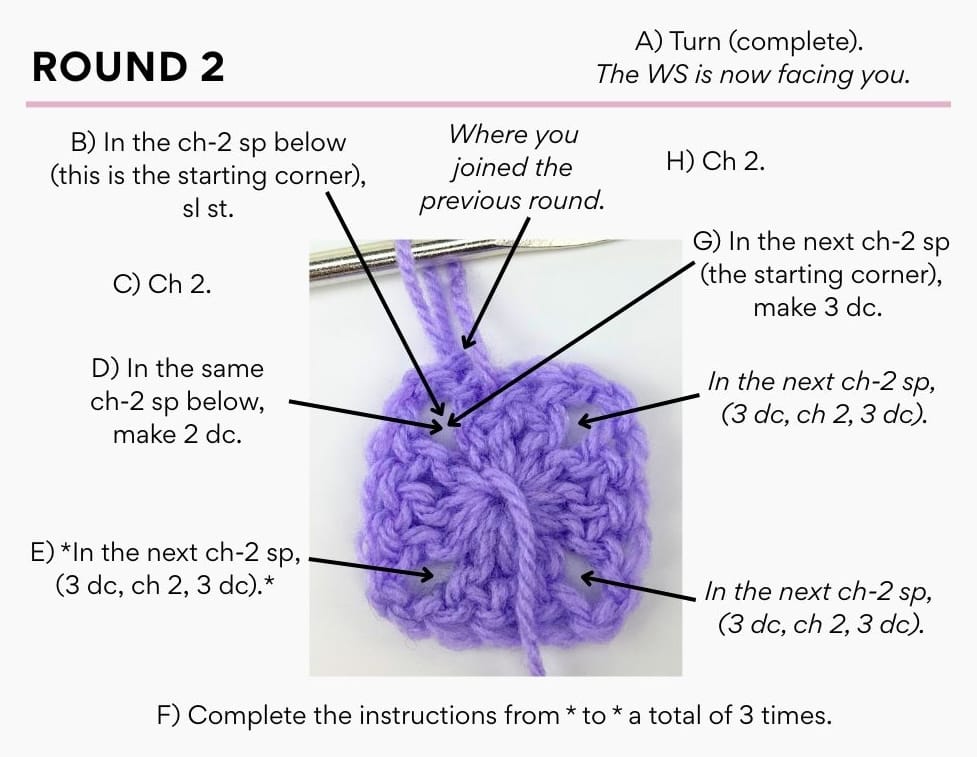
Round 2 (WS): Turn.
In the ch-2 sp below (this is the starting corner), sl st.
Ch 2.
In the same ch-2 sp below, make 2 dc.
*In the next ch-2 sp, (3 dc, ch 2, 3 dc).*
Complete the instructions from * to * a total of 3 times.
In the next ch-2 sp (the starting corner), make 3 dc.
Ch 2.
Sl st into the top of the first dc to join.
(Stitch count: 8 clusters)
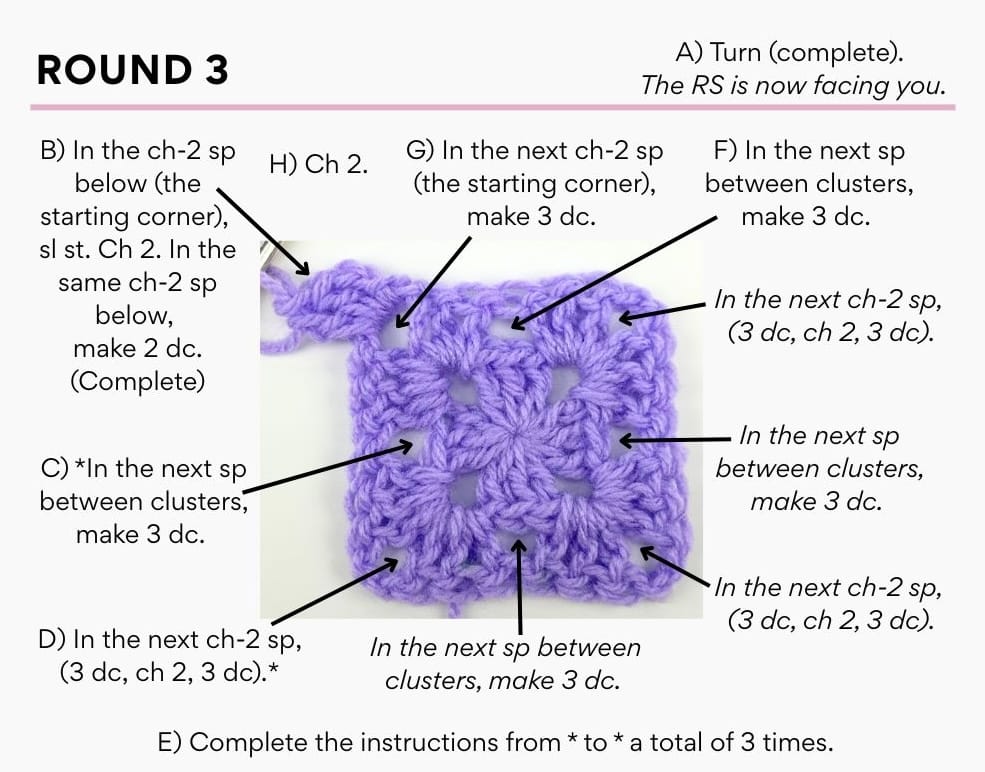
Round 3 (RS): Turn.
In the ch-2 sp below (the starting corner), sl st.
Ch 2.
In the same ch-2 sp below, make 2 dc.
*In the next sp between clusters, make 3 dc.
In the next ch-2 sp, (3 dc, ch 2, 3 dc).*
Complete the instructions from * to * a total of 3 times.
In the next sp between clusters, make 3 dc.
In the next ch-2 sp (the starting corner), make 3 dc.
Ch 2.
Sl st into the top of the first dc to join.
(Stitch count: 12 clusters)
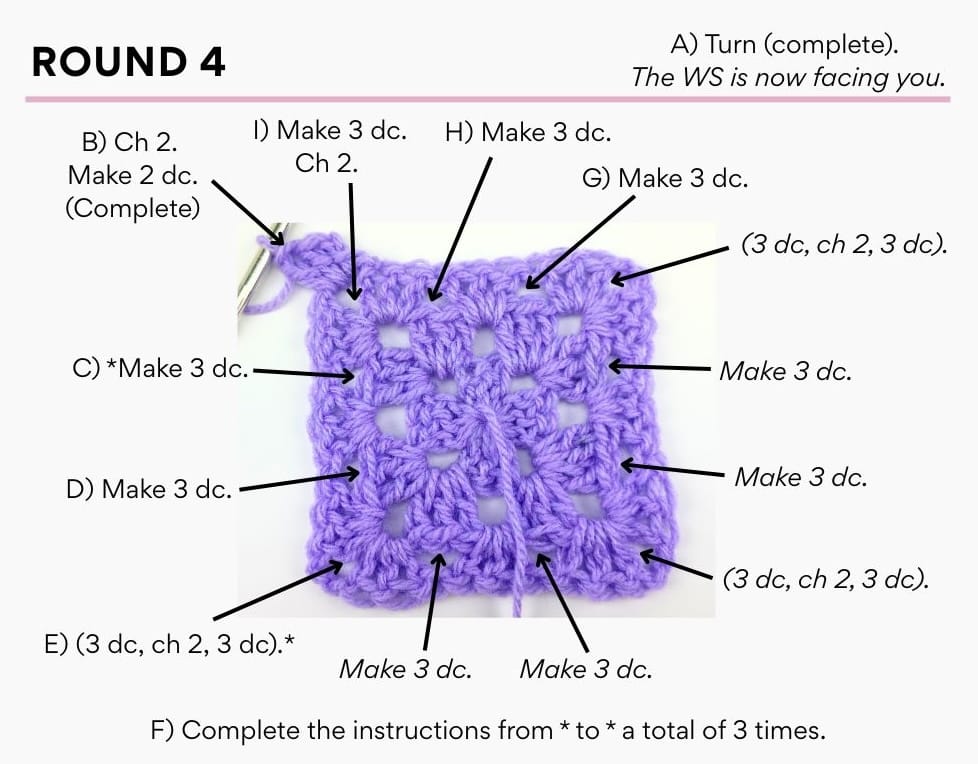
Round 4 (WS): Turn.
In the ch-2 sp below (the starting corner), sl st.
Ch 2.
In the same ch-2 sp below, make 2 dc.
*In the next sp between clusters, make 3 dc.
In the next sp between clusters, make 3 dc.
In the next ch-2 sp, (3 dc, ch 2, 3 dc).*
Complete the instructions from * to * a total of 3 times.
In the next sp between clusters, make 3 dc.
In the next sp between clusters, make 3 dc.
In the next ch-2 sp (the starting corner), make 3 dc.
Ch 2.
Sl st into the top of the first dc to join.
(Stitch count: 16 clusters)
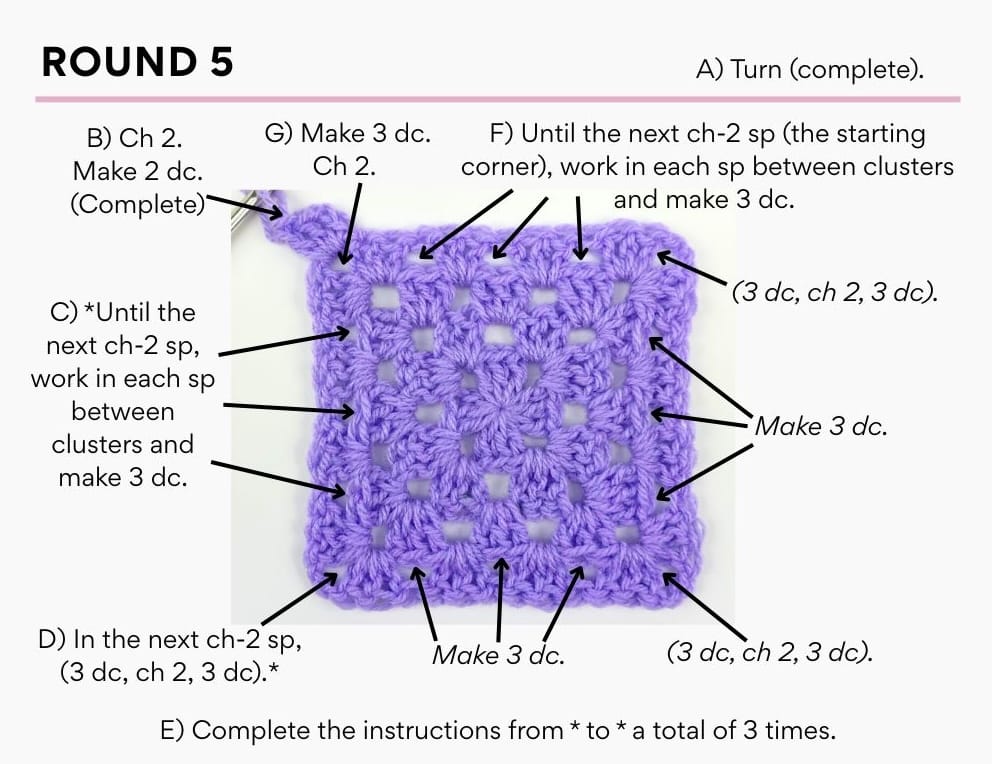
Round 5 (RS): Turn.
In the ch-2 sp below (the starting corner), sl st.
Ch 2.
In the same ch-2 sp below, make 2 dc.
*Until the next ch-2 sp, work in each sp between clusters and make 3 dc.
In the next ch-2 sp, (3 dc, ch 2, 3 dc).*
Complete the instructions from * to * a total of 3 times.
Until the next ch-2 sp (the starting corner), work in each sp between clusters and make 3 dc.
In the next ch-2 sp (the starting corner), make 3 dc.
Ch 2.
Sl st into the top of the first dc to join.
(Stitch count: 20 clusters)
Rounds 6 and on: Repeat Round 5 until your work fits over your pillow insert (see “Checking the Size” below).
(The stitch count increases by 4 clusters each round.)
When making a 14” x 14” pillow cover with Soft Classic yarn, I completed 20 rounds in total. My finished square measured 22” x 22”. Note: your finished square may be a different size depending on the actual size and fullness of your pillow insert.
Checking the Size
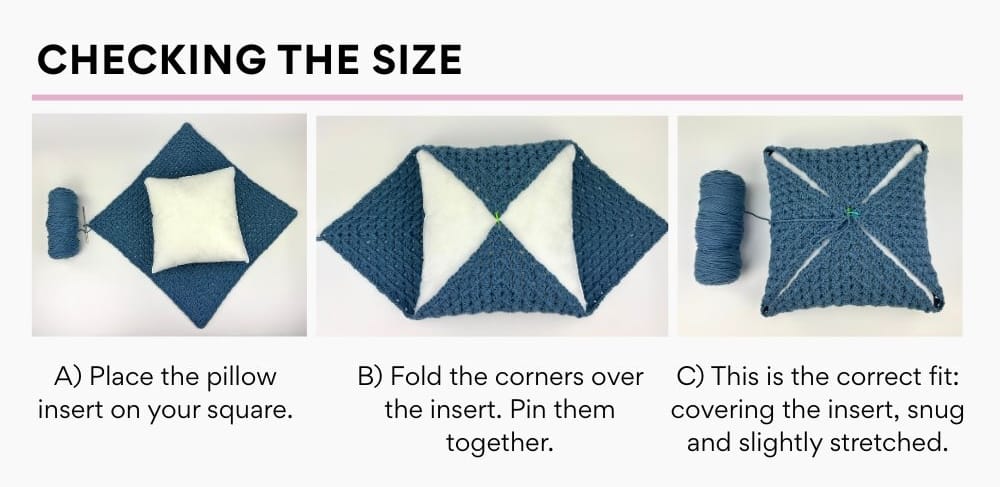
Place your pillow insert in the center of your work, with the corners of your work positioned at the top, bottom and sides of the pillow insert (see image below). Fold the corners of your work over the pillow insert, similar to folding an envelope. Pin the corners together to hold them in place.
Your work should cover the pillow insert, fit snugly and be slightly stretched. It should not be so tight that the stitches are pulling or the pillow insert is being compressed. Slight gaps where the sides meet are normal.
If your work is too small, remove the pins and repeat Round 5 until it fits as described above.
You can end after completing either a RS round or a WS round. Once you’ve reached your desired size, remove the pins and fasten off (meaning to cut the yarn that’s attached to your skein and pull the end through the loop that was on your hook). Weave in all loose ends.
Joining
Joining – Start
You will join the two sides with a flat slip stitch joining technique, which is a quick way to create a flat, polished-looking seam that securely holds the sides in place.
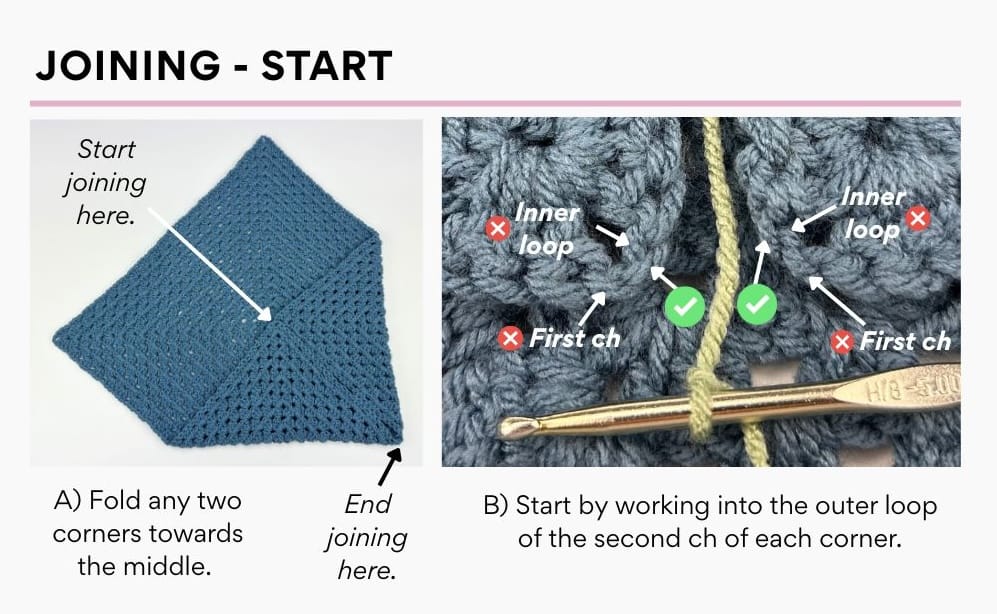
With the WS of your finished work facing up, fold any two corners towards the middle. Rotate your work so the ch-2 sp of each corner is facing you.
Make a slip knot and place it on your hook. Always keep your working yarn in between the two sides and under the loops on your hook.
You will start by working into the outer loop of the second of two chains in each corner. The outer loops are the loops furthest away from the middle of your square. They are also known as the back loops.
Make the first flat slip stitch:
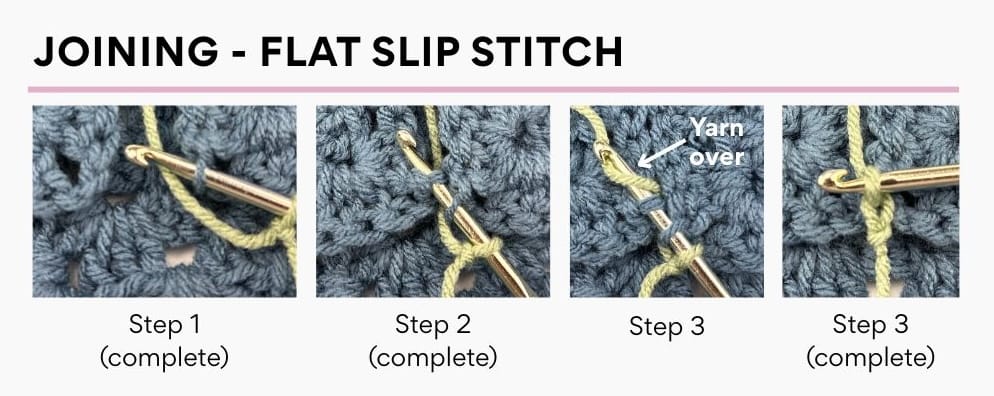
Step 1: Starting with the side on your right, insert your hook into the outer loop of the second ch. Note: insert your hook into the stitch from right to left so the hook comes out in between the two sides. You will have two loops on your hook.
Step 2: Next, work into the side on your left. Insert your hook into the outer loop of the second ch. Note: insert your hook into the stitch from the left to the right so the hook comes out in between the two sides. You will have three loops on your hook.
Step 3: Note: ensure your working yarn is in between the two sides and under the loops on your hook. Yarn over and pull the yarn through the three loops on your hook.
Your first flat slip stitch has now been made.
Continue Joining
Note: If you come across the sl st that joined the final round of the Pillow Cover Body, skip over it and do not work into it.
Work into the outer loops of each corresponding* stitch on both sides, making flat slip stitches to join them:
Step 1: Starting with the side on your right, insert your hook into the outer loop of the next st. Note: insert your hook into the stitch from right to left so the hook comes out in between the two sides. You will have two loops on your hook.
Step 2: Next, work into the side on your left. Insert your hook into the outer loop of the next st. Note: insert your hook into the stitch from the left to the right so the hook comes out in between the two sides. You will have three loops on your hook.
Step 3: Note: ensure your working yarn is in between the two sides and under the loops on your hook. Yarn over and pull the yarn through the three loops on your hook.
Your next flat slip stitch has now been made.
*Corresponding means the same stitch on both sides. For example, join the third stitch of the side on your right to the third stitch of the side on your left.
Continue working into the outer loops of each corresponding stitch, making flat slip stitches until the two sides meet. You may have one stitch left. If so, don’t work into it.
Once the two sides are joined, fasten off.
Joining – Other Side
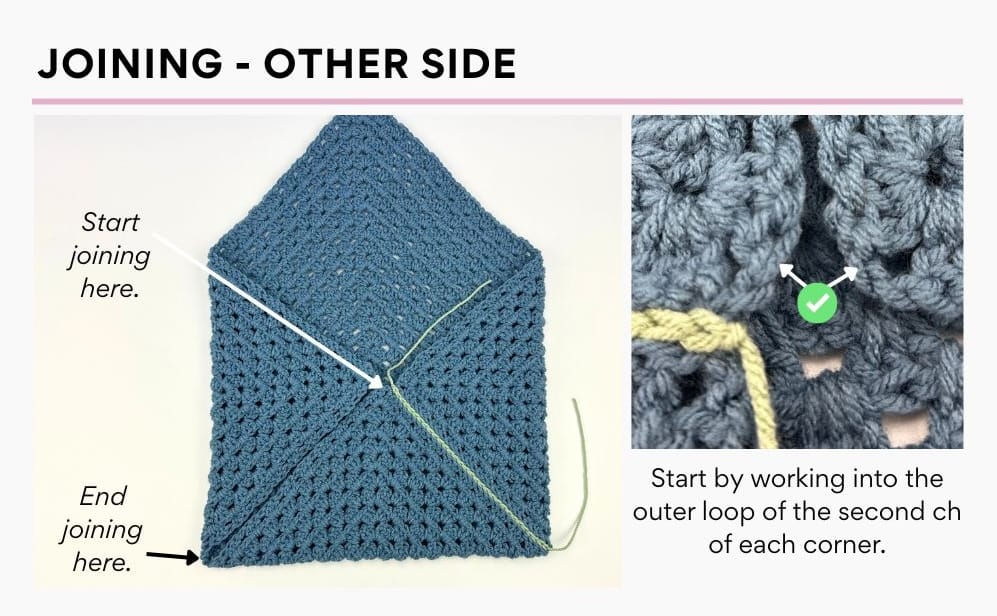
Fold the corner to the left of your two joined sides towards the middle.
Repeat the joining instructions, starting with “Joining – Start,” to join these two sides.
Once the other side is joined, fasten off and weave in all loose ends.
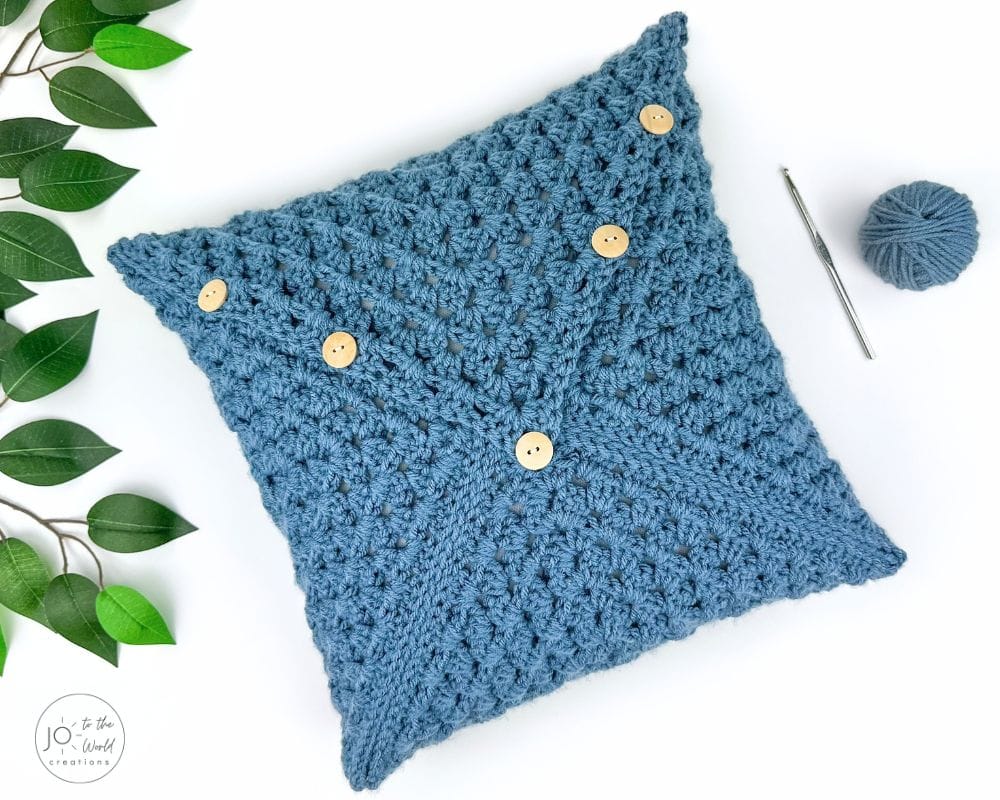
Buttons
Using a sewing needle and sewing thread, attach five 20 mm (0.75”) buttons.
Attach the center button at the bottom of the corner ch-2 sp (on top of the 6 dc sts made in the corner).
Place the other four buttons evenly apart along the second last round of the Pillow Cover Body, on top of a cluster.
When the top flap is closed, the sps between clusters serve as buttonholes and go over the buttons.
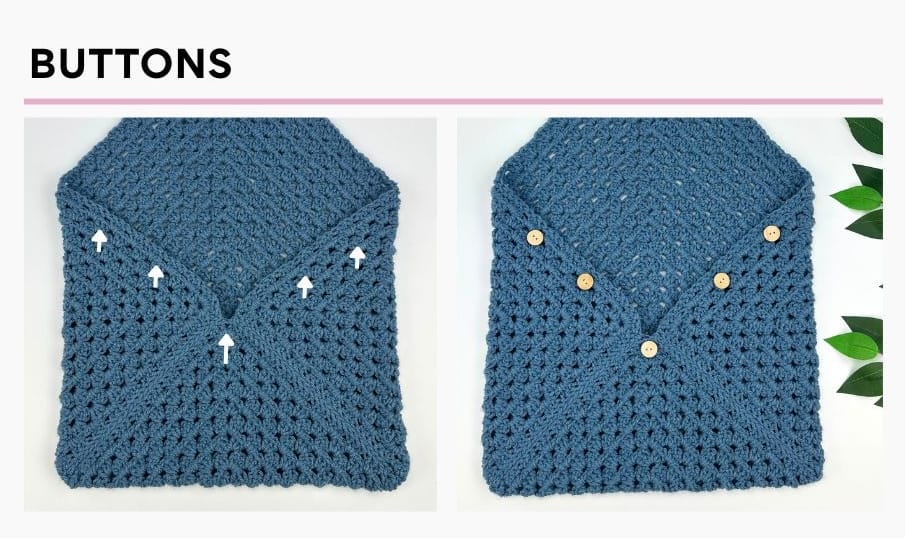
For my 14” x 14” pillow cover, I placed the buttons as shown above. If you made your pillow cover a different size, adjust the placement of the four other buttons so they are evenly spaced and in the same position on both sides.
Place your pillow insert inside and now you have a new pillow cover!
More Granny Square Patterns
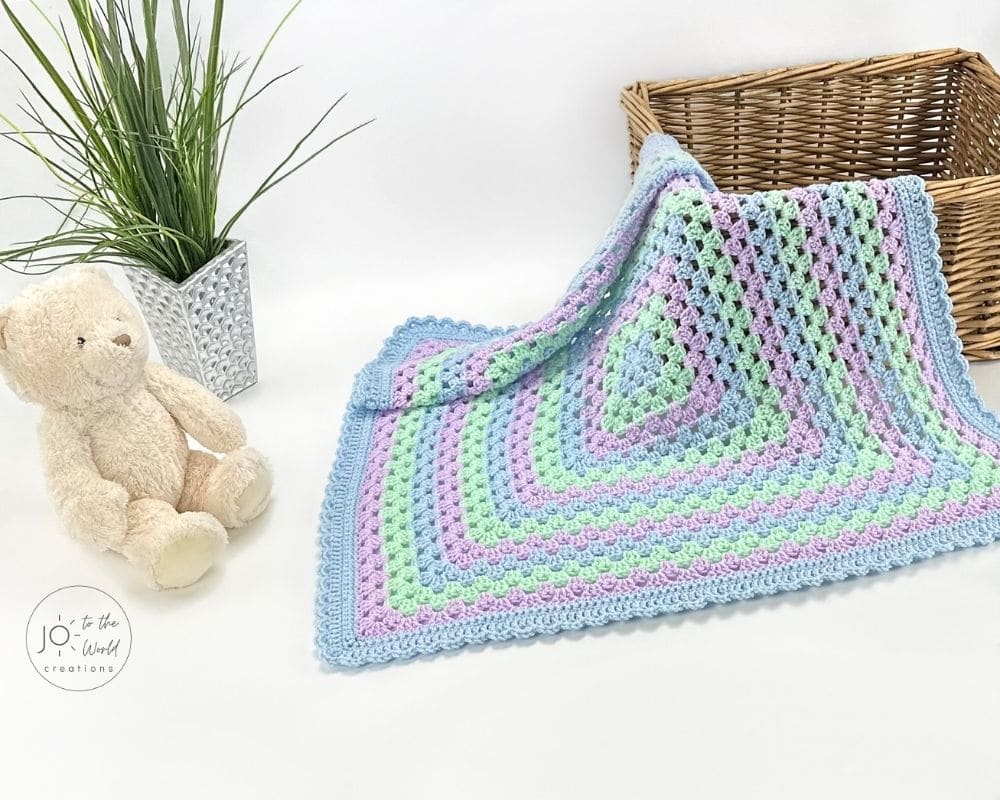
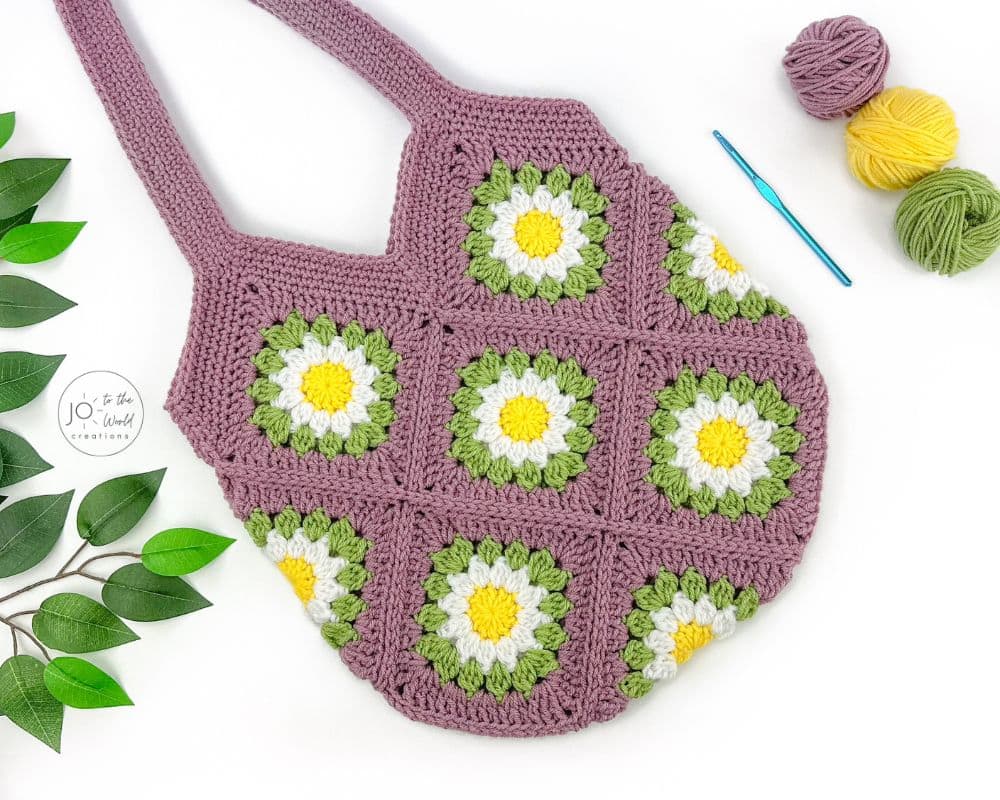
I have lots more really fun granny square patterns! A few of my favorites are below. Looking for more pillow patterns? View all my crochet pillow patterns.



I’m Jo, the designer behind Jo to the World Creations, and I’m dedicated to helping you make the perfect crochet gift! For over six years, I’ve been designing and sharing easy-to-follow free crochet patterns that you can make for every gift occasion.
All of my crochet patterns are original, personally designed and crocheted by me, professionally tech edited and never AI-generated. Happy crocheting!
join 94,500+ crocheters
Subscribe to my YouTube channel for free step-by-step video tutorials and helpful crochet tips.
Subscribe on YouTube →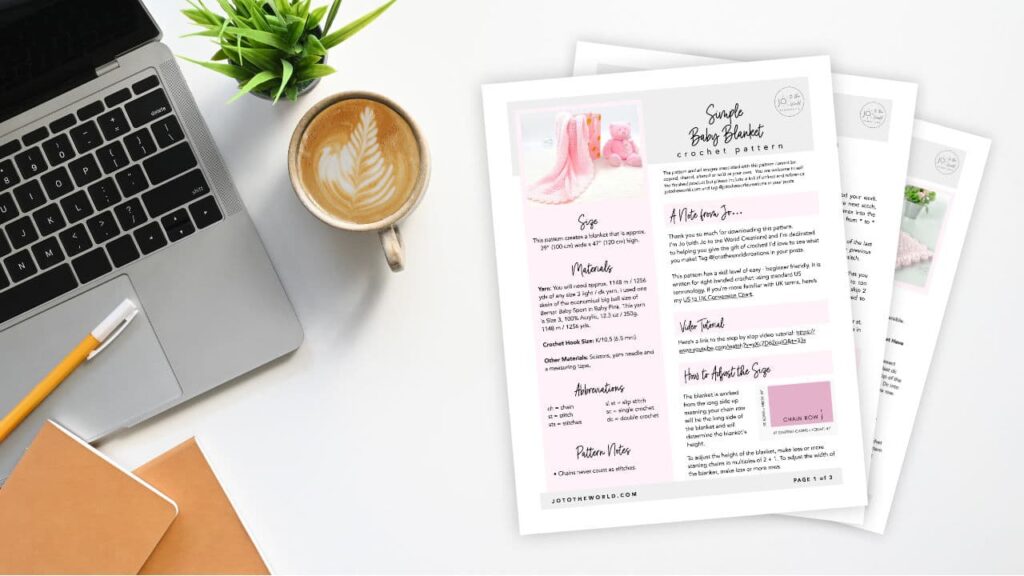
Download. Print. Keep.
Get Instant Access to ALL Printable Patterns
Make your crocheting more enjoyable, relaxing and productive with printable PDF patterns.
- 190+ premium crochet patterns.
- Download, save and print from any device.
- No ads or popups!
Not sure yet? Take a look at the Pattern Library and see all the patterns you can download once you’re a member.

Save with Pattern Bundles
For a limited time, I’ve grouped some of my most popular crochet patterns and I’m offering them as pattern bundles where you can get the printable versions for one low, discounted price. Check out these incredible Crochet Pattern Bundles.
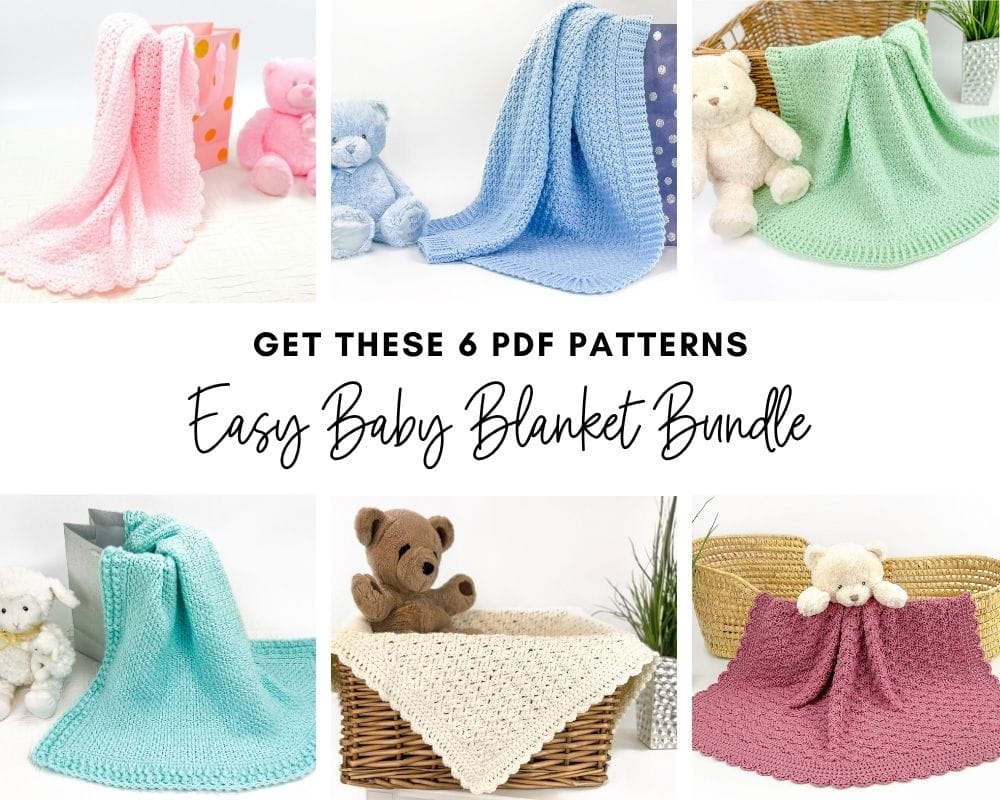
Easy Baby Blanket Bundle
With this Easy Baby Blanket Bundle, you’ll get SIX easy crochet baby blankets as printable downloads. Each pattern includes step-by-step instructions and a full video tutorial.
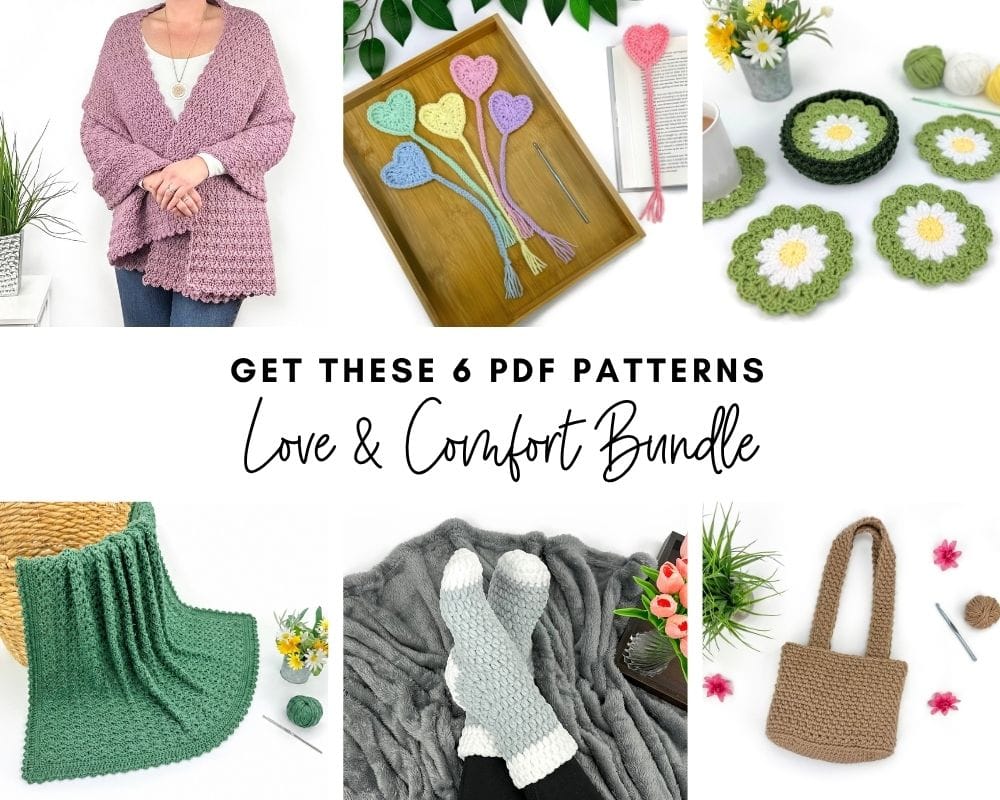
Love and Comfort Bundle
The Love and Comfort Bundle includes SIX meaningful patterns designed to comfort a loved one, brighten someone’s day or simply remind someone they’re loved.
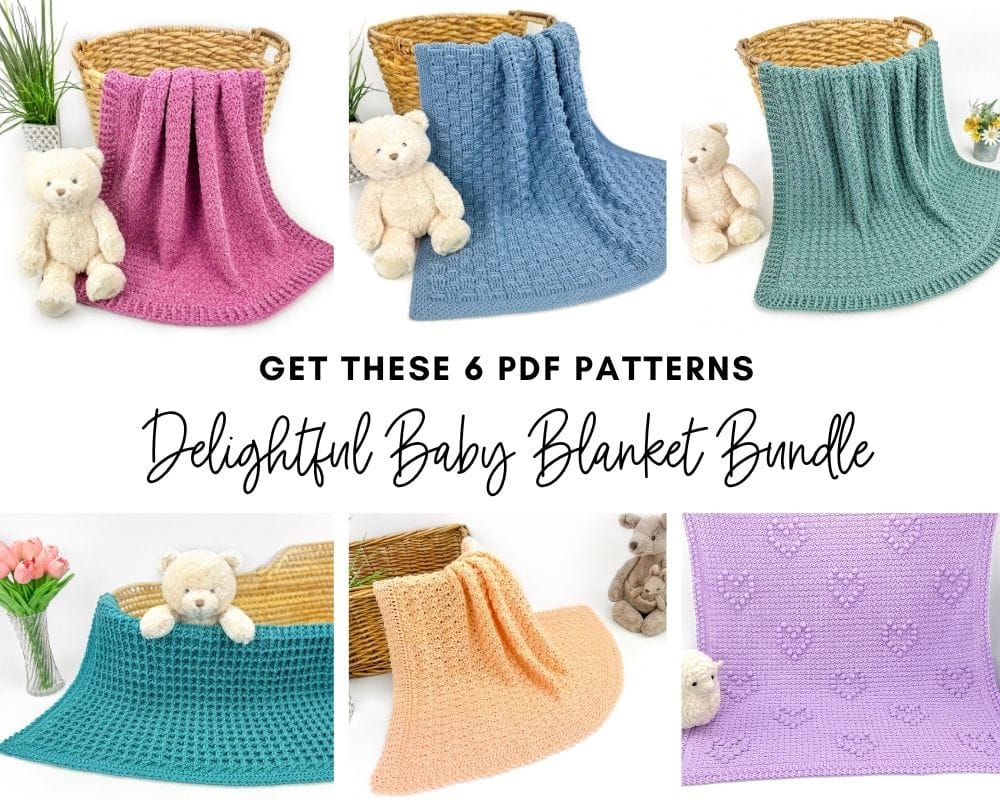
Delightful baby blanket Bundle
All your favorite baby blanket patterns in one bundle! This collection features SIX blankets (all with video tutorials) that are a delight to crochet and will be cherished forever.
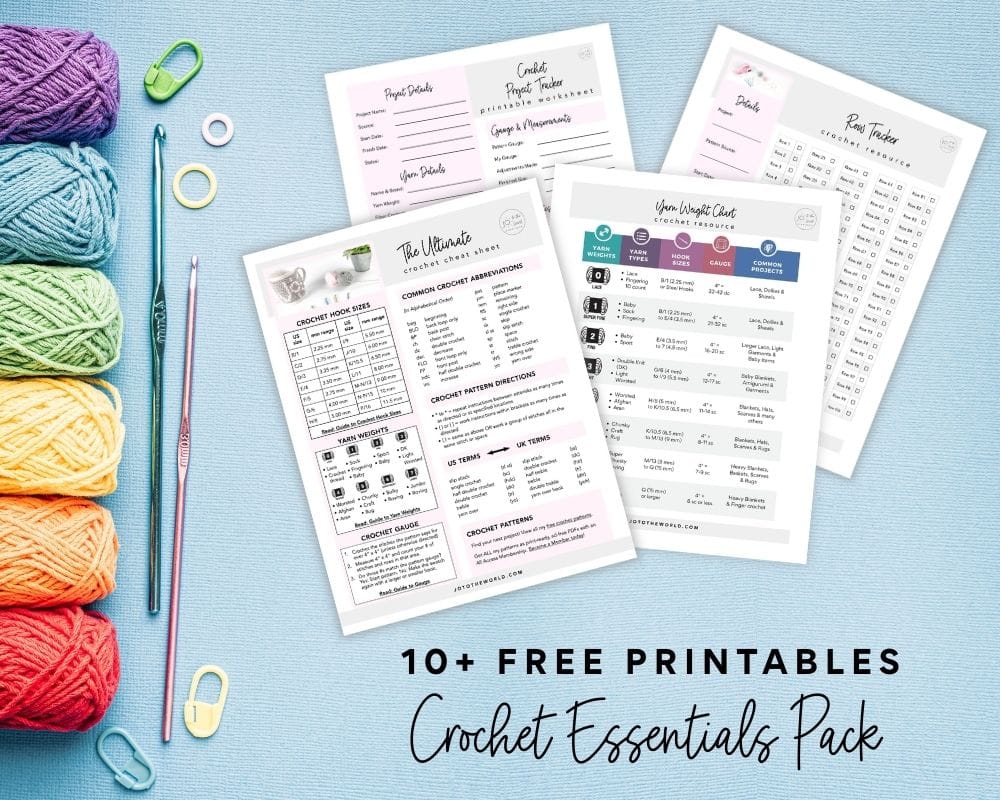
Free Crochet Printables
Subscribe to my emails and get 3 free printable crochet patterns as well as 10+ free printable crochet cheat sheets, guides and progress trackers.
Plus, you’ll receive free patterns for crochet gifts delivered right to your inbox!
Featured Crochet Patterns






Pattern Collections



Free Patterns for Crochet Gifts
Never miss a pattern! Get all my secrets to making incredible crochet gifts as well as new free crochet patterns and exclusive deals when you sign up for my newsletter (it’s free!).