
How to Single Crochet (sc) Step-by-Step with Photos & Videos
Learn how to do a single crochet (sc) stitch in the chain and in rows with this complete guide and photo + video tutorial. Plus tips & how to count your stitches. All your sc questions answered!
Before we begin, I would like to thank you for visiting Jo to the World Creations, a site dedicated to helping you give the gift of crochet.
More free patterns (that make awesome crochet gifts) are on the way! Sign up for my emails, follow me and never wonder “What should I make for…” again!
FREE PATTERNS FOR CROCHET GIFTS
Delivered to your inbox
AND GET A FREE PDF OF THE LOVE PILLOW
& A FREE CROCHET CHEAT SHEET
Unsubscribe at any time.
Delivered Socially
Follow Me on

What is Single Crochet?
Single crochet is one of the most basic and widely used stitches in crochet. It is a very easy and popular stitch used in an extensive number of crochet patterns. You can single crochet in flat projects, which are worked in rows (you turn your work after each row) or round projects, which are worked in a continuous spiral, without turning.
Single crochet is a US (American) crochet term. In UK crochet terminology, the exact same stitch is referred to as double crochet (dc). There is no single crochet in UK crochet terminology. Learn more in this US to UK Crochet Term Conversion Chart.
What Does SC Mean?
“Sc” is the abbreviation for single crochet. In crochet patterns, almost all stitches have an abbreviation to make the pattern less wordy. A single crochet stitch is abbreviated as “sc.” There are no periods after the letters (it’s not abbreviated “s.c.” but rather “sc”).
Single Crochet Symbol
In crochet pattern charts, a single crochet stitch is most often indicated with an “X” or “+” symbol. Both the X and the + symbols are commonly used in crochet charts for single crochet stitches.
Single Crochet Stitch
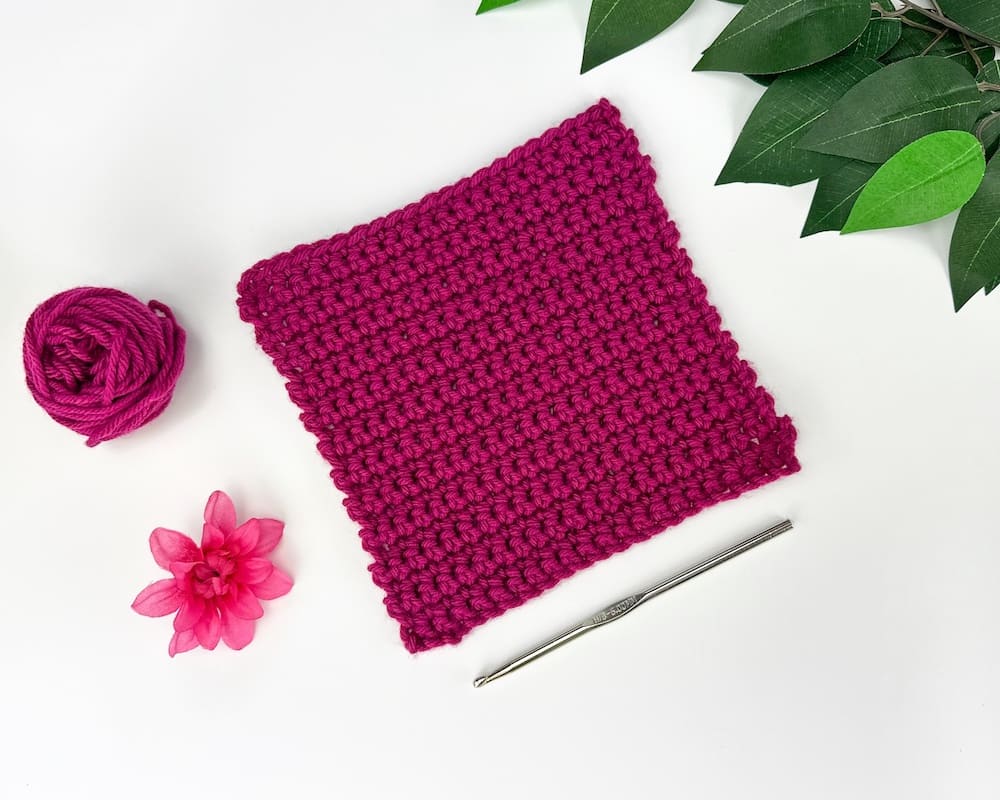
You can make entire projects using only single crochet stitches. When making a project with only single crochet stitches, you’ll have a dense fabric with few holes. Because of the tightness of single crochet stitches, the corners often curl up. It is recommended to block your finished work to help with this curling.
The single crochet stitch is one of the smallest stitches.
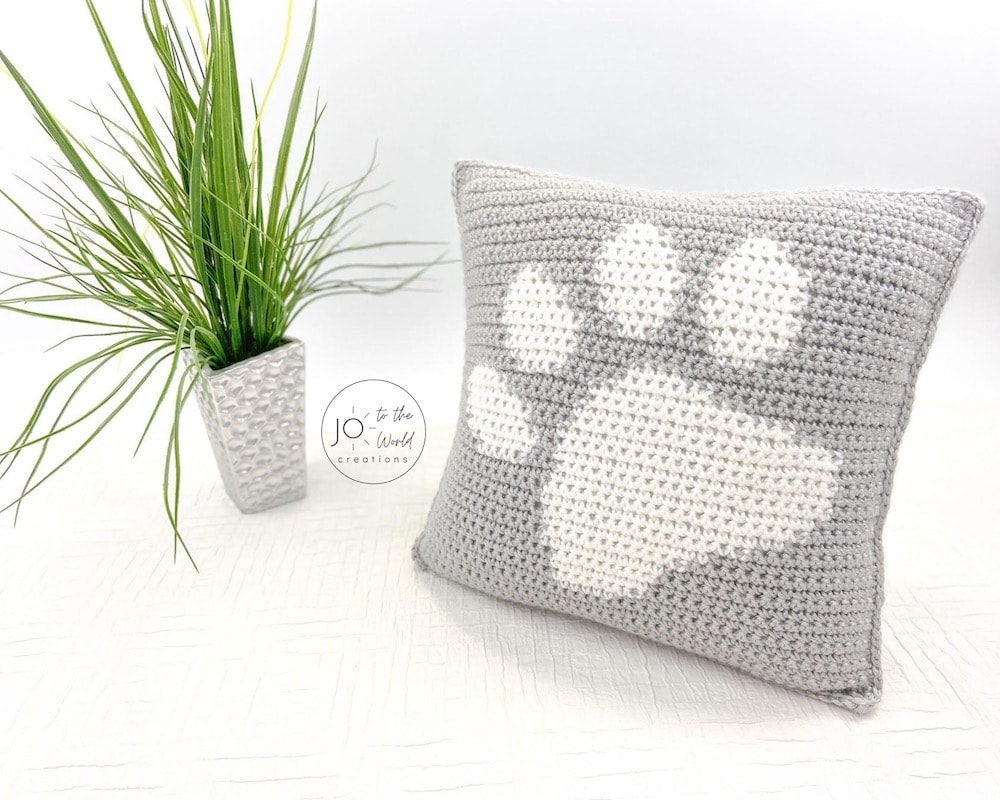
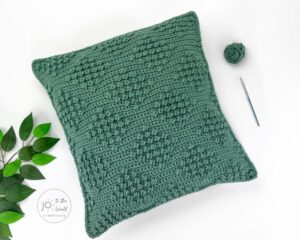
Single crochet stitches are often used in colorwork, which is when you work with two or more colors to create a design such as this Paw Print Pillow.
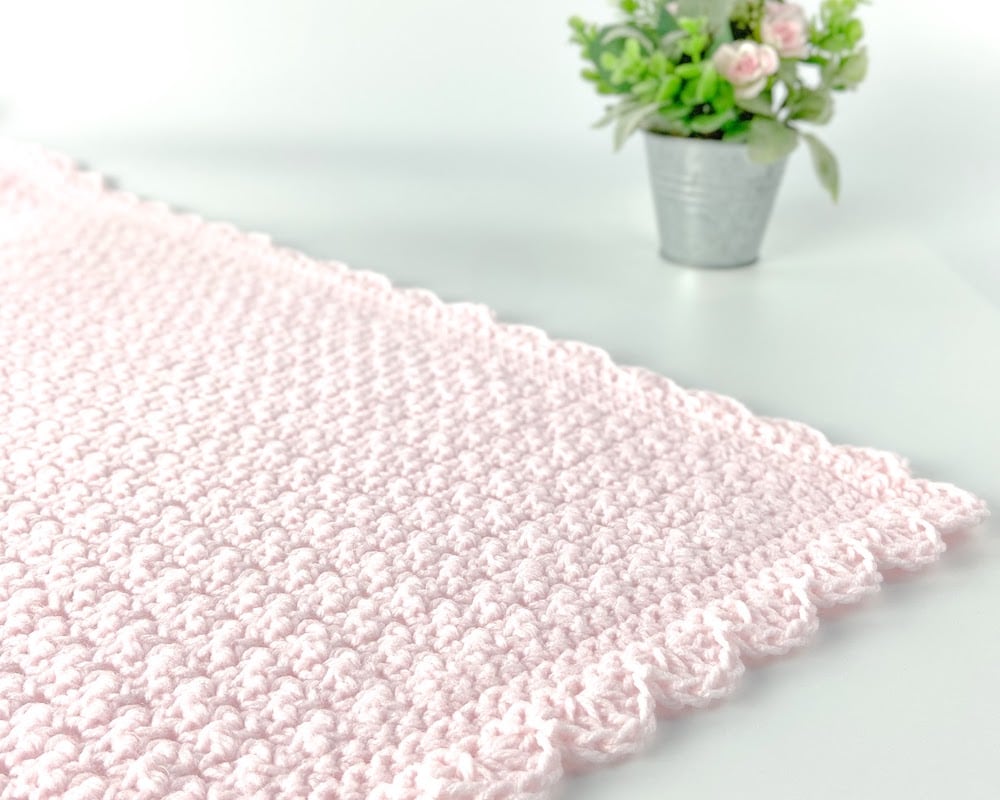
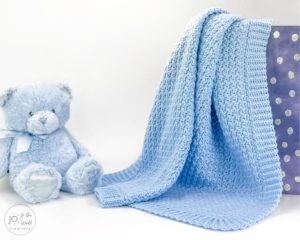
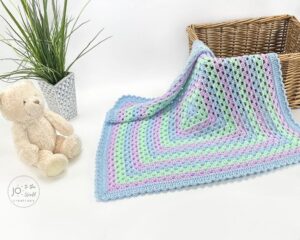
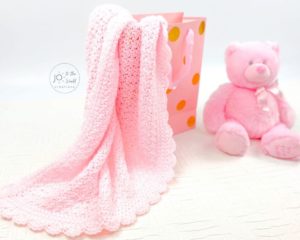
The single crochet stitch is also often used to create borders around a blanket such as in this Simple Baby Blanket Pattern where 5 rounds of single crochet stitches are made before a round of shells.
In addition to the basic single crochet stitch, there are slight variations you can make to slightly change the appearance of your work using single crochet stitches such as working into the back or front loop when you make your stitch. You can also increase your work by making two or more single crochet stitches in the same stitch or decrease your work by making two or more single crochet stitches together. And you can also work a single crochet around the stitch below instead of into the top of it. We’ll cover all of these single crochet stitch variations below.
Materials Needed
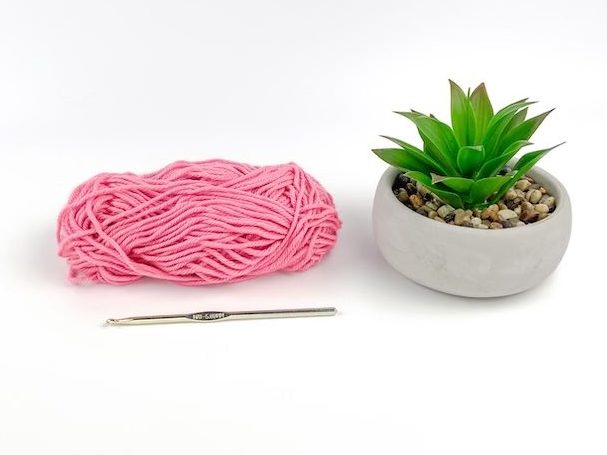
There are two essential crochet supplies you will need to make a single crochet stitch:
- A Crochet Hook – When practicing a single crochet stitch, you can use any size crochet hook. For beginners, I recommend using an Aluminum crochet hook in the size H/8 (5.00 mm) or I/9 (5.50 mm). Learn more about crochet hook sizes.
- Yarn – You can also use any weight yarn. For beginners, I recommend using a size 3 (light) or size 4 (medium) yarn for practicing. Learn more about yarn weights & types.
If working on an actual pattern, there may be other materials you will need such as scissors to cut your yarn, a yarn needle to weave in your ends and a measuring tape. See my recommended crochet supplies.
Fundamentals
In order to make a single crochet stitch, you first need to make a row of starting chains that you will work into. Starting chains are the foundation row for most crochet patterns. Here is how to start a crochet chain in more detail. Once the starting chains are made, you can then make your stitches into those starting chains. Before you do this, you’ll want to know how to hold your crochet hook and how to hold your yarn when crocheting.
If you are practicing a single crochet stitch, you can make any number of starting chains.
With your starting chains made, you will be working in the second chain from the hook. “Ch” is the abbreviation for chain in crochet.
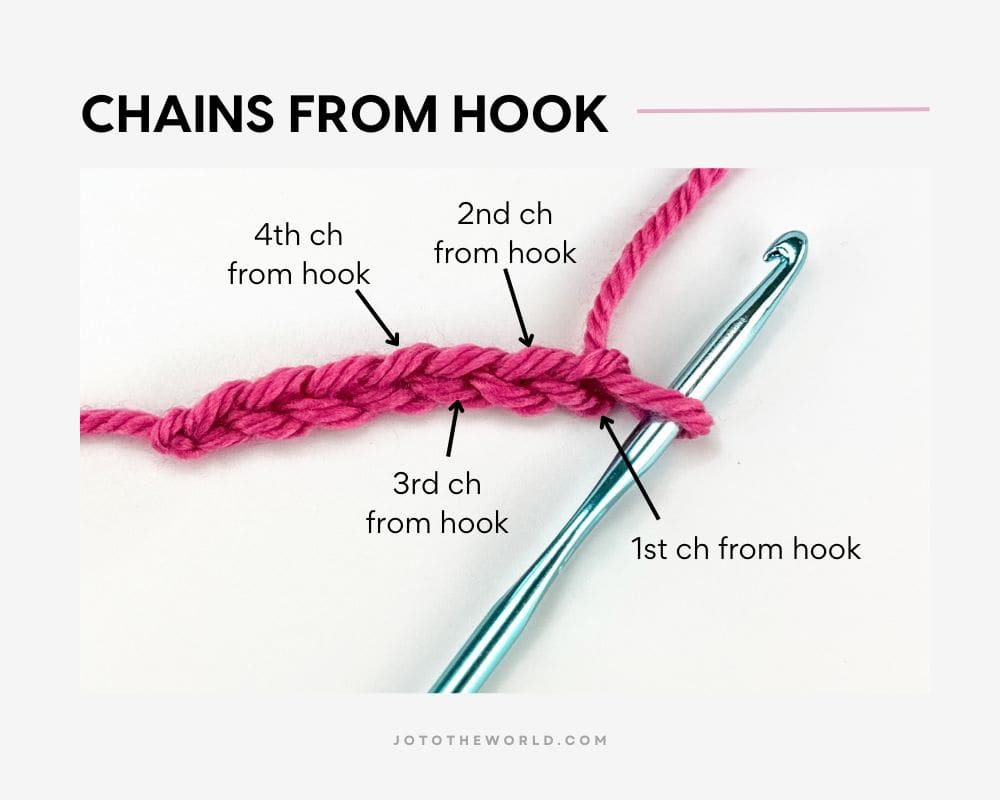
The loop on your hook does not count as the first chain. Connected to the loop on your hook is the first chain from your hook (shortened in crochet to say “1st chain from hook”). The next chain is the “2nd chain from hook.” Unless the pattern says otherwise when making a single crochet stitch into the chain row, make your first stitch into the second chain from the hook.
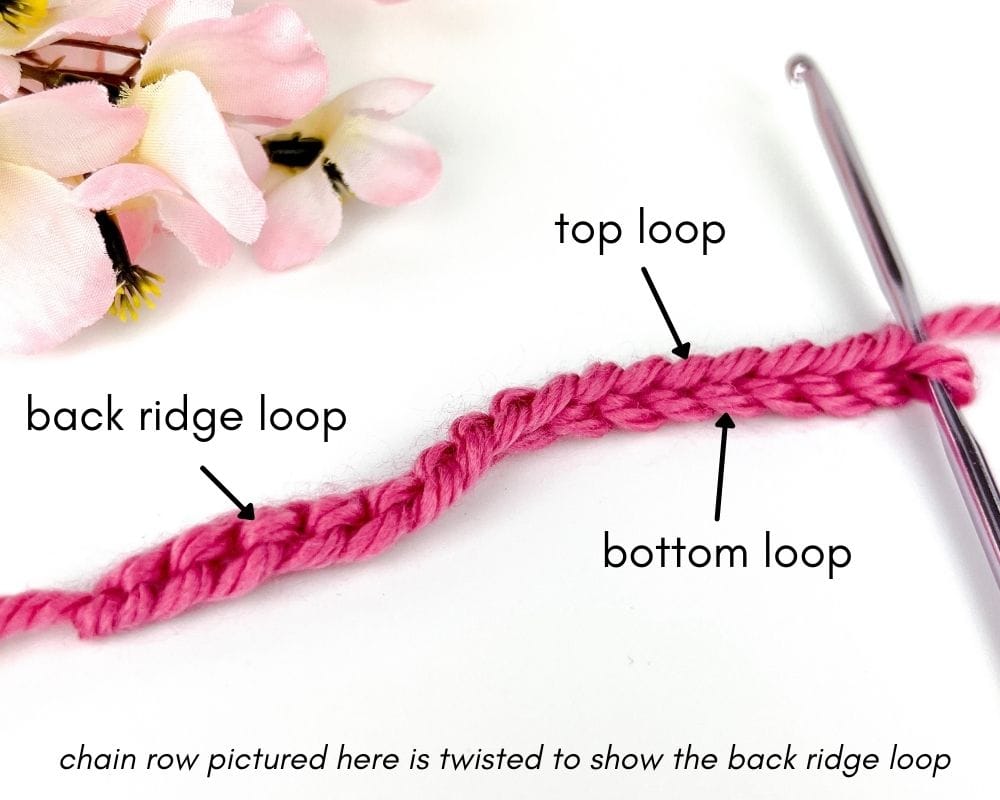
In the 2nd chain from hook, there are a few places you can work into. “Working into” means where to first insert your hook. Unless the pattern says to work into a specific place in the chain (i.e. the back ridge loop), you can decide what part of the chain you want to work into.
- The Top Loop – Working into the top loop means inserting your hook under the top loop and over the bottom loop. This is a good place to start for beginners. For many crocheters, this is the default place to work into the chain when the pattern doesn’t call for a specific place.
- The Back Ridge Loop (also called the back bumps or back ridges) – Working into the back ridge loop means slightly twisting the chain row so you can see the backs of the chain. Insert your hook into the little bump along the back. Note that if you plan on making baby blankets with a border, you should learn how to work into the back ridge loop early in your crochet journey.
- The Bottom Loop – rarely used.
Where you insert your hook doesn’t change the single crochet stitch. It just changes the initial placement of where your hook goes into the chain. For this tutorial, we will focus on working in either the top loop or the back ridge loop.
Parts of a Crochet Hook
Before we make a single crochet stitch, let’s familiarize ourselves with the different parts of the hook:
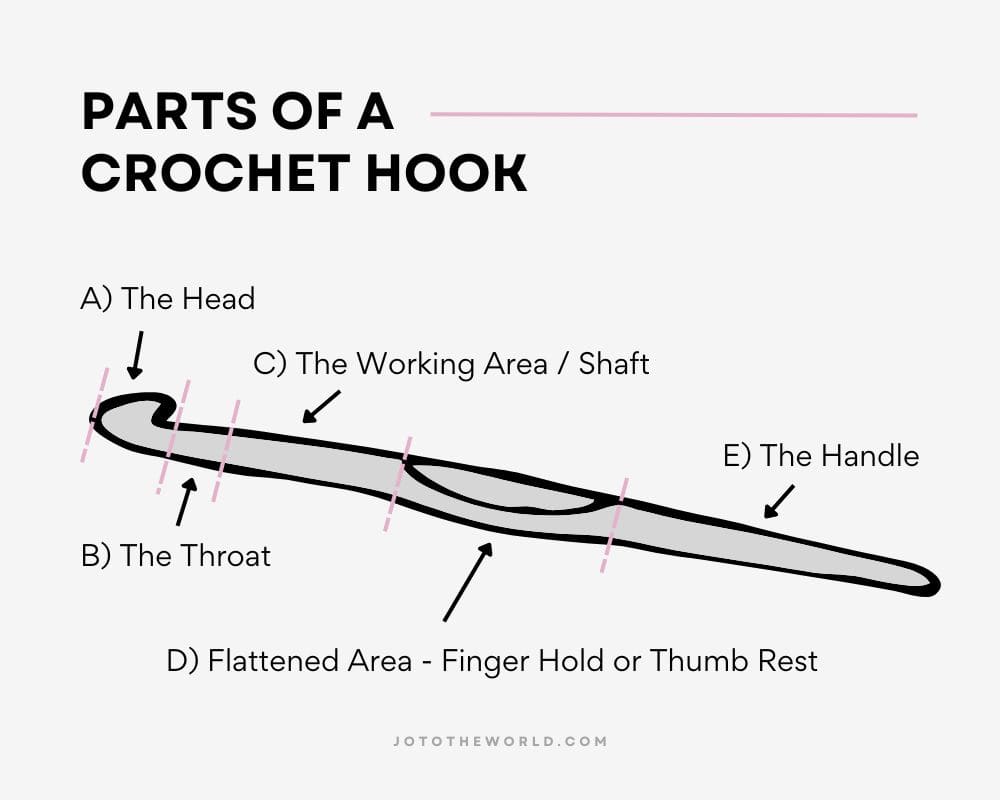
A crochet hook is made up of 5 parts:
- The Head – the tip of the hook that you will insert into stitches.
- The Throat – what catches the yarn and guides it onto the working area/shaft.
- The Working Area / Shaft – holds the loops you are working on. The shaft is also where the crochet hook is measured and determines the size of your stitches.
- Flattened Area – the place you can put your finger or thumb depending on how you grip your hook.
- The Handle – is the bottom part of the hook and controls the overall movement of the hook.
These parts of the hook are referenced in the step-by-step guide on how to single crochet below.
Single Crochet Video Tutorial
Here is a video tutorial showing how to single crochet into the chain row (top loop and back ridge loop), in rows and in the front and back loops. Or you can keep scrolling down for written instructions with photos.

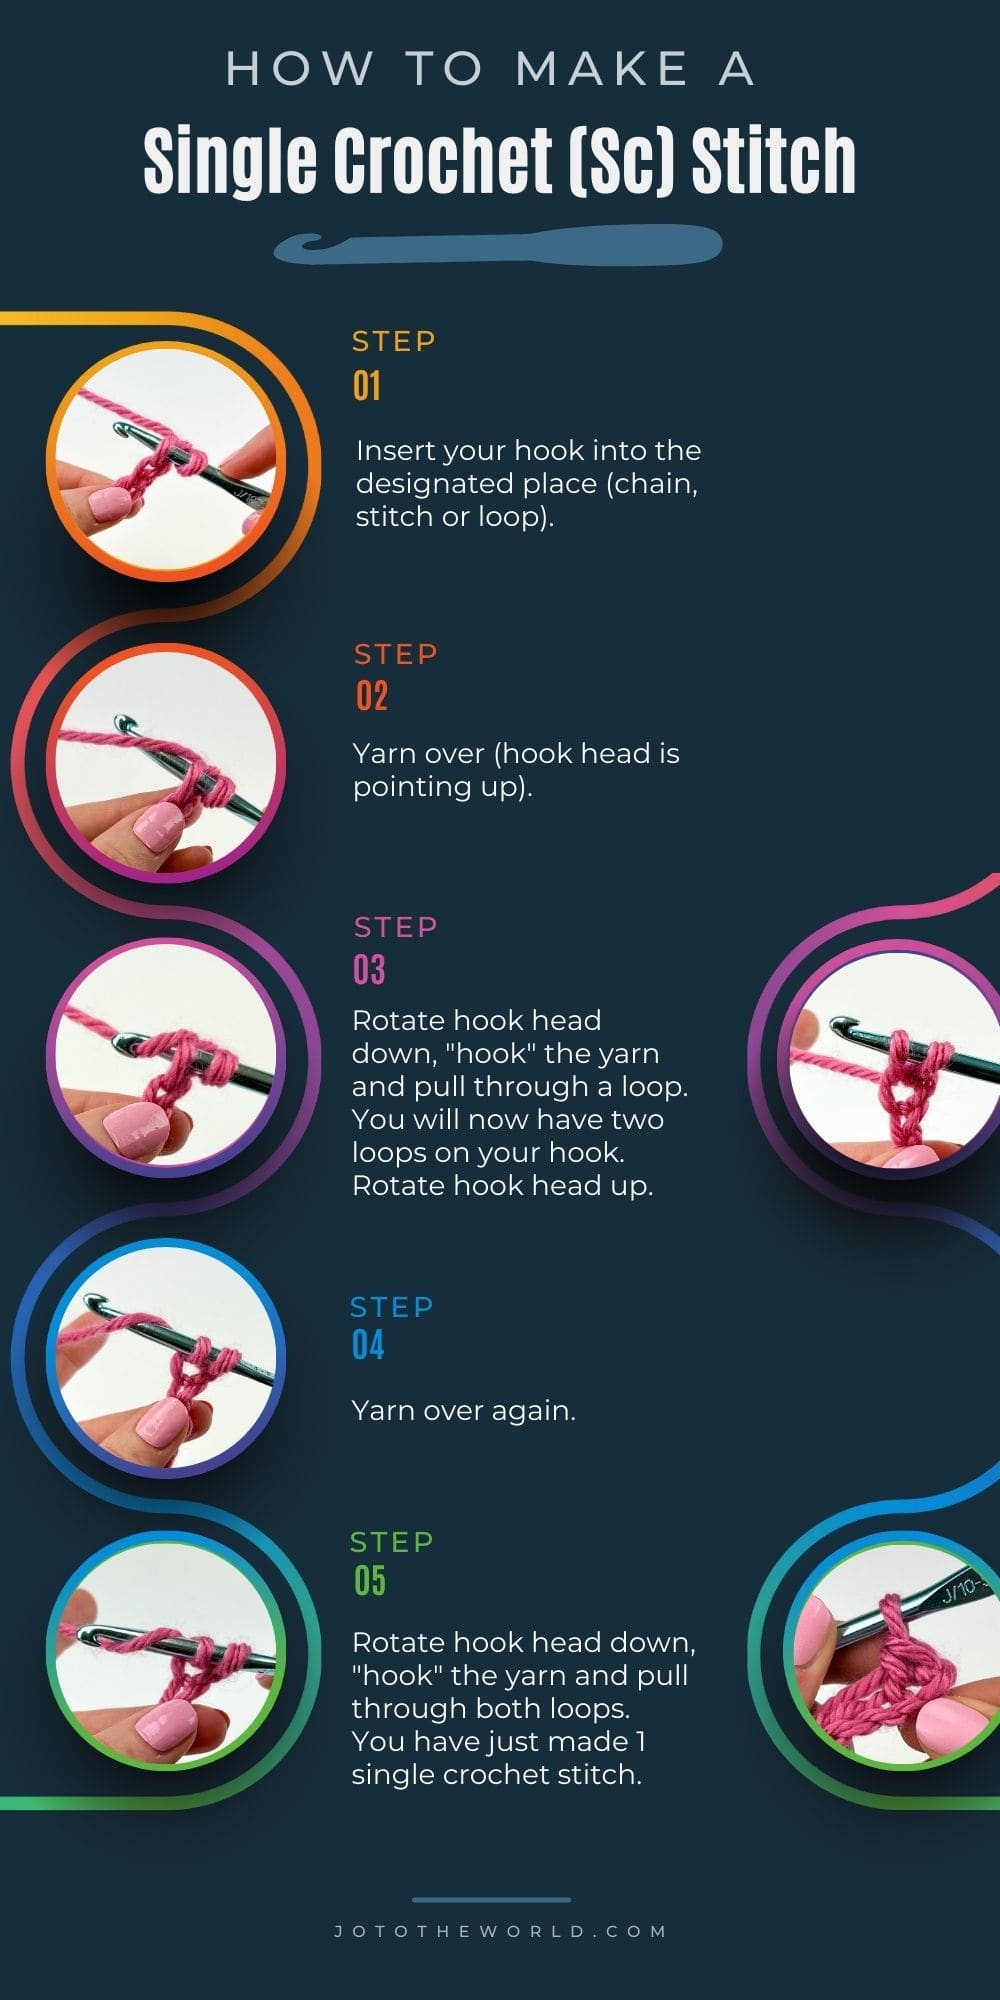
How to Single Crochet – Step-by-Step With Photos
Now that you have your slip knot and starting chains made, we can now make our first single crochet stitch.
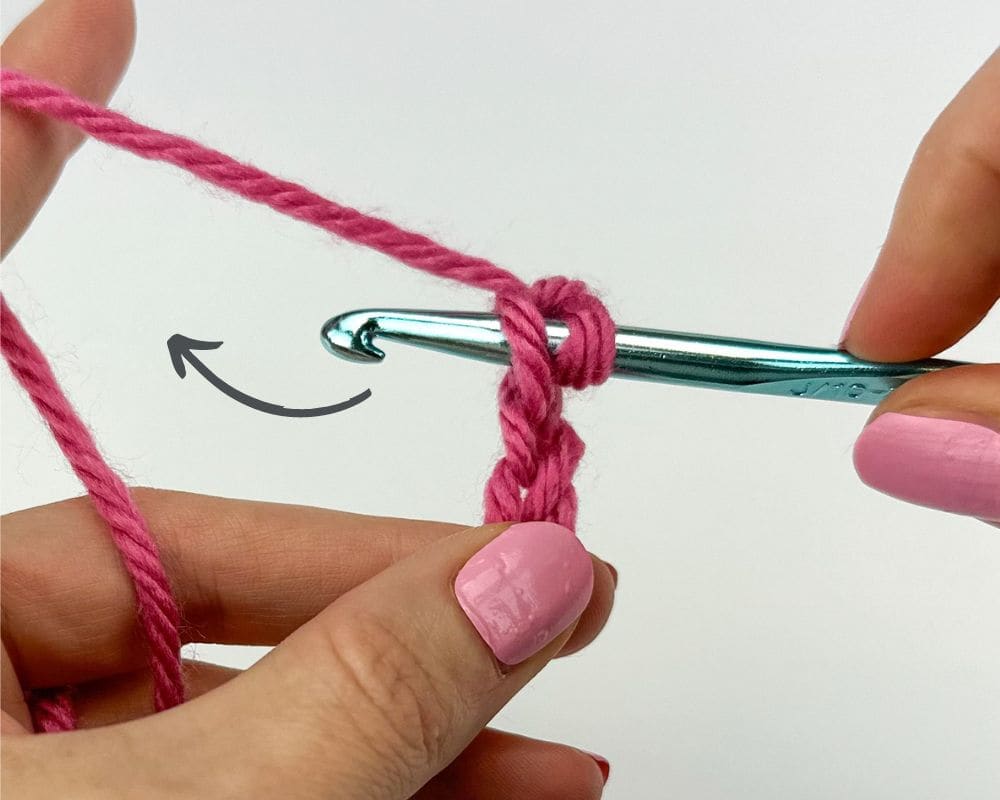
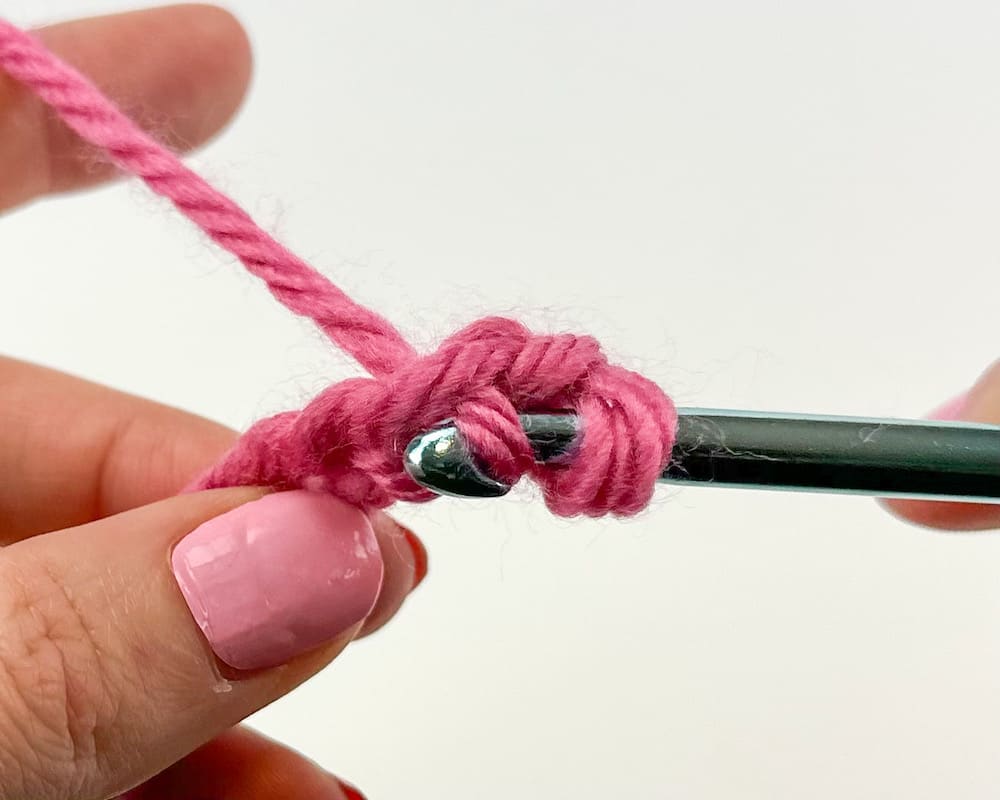
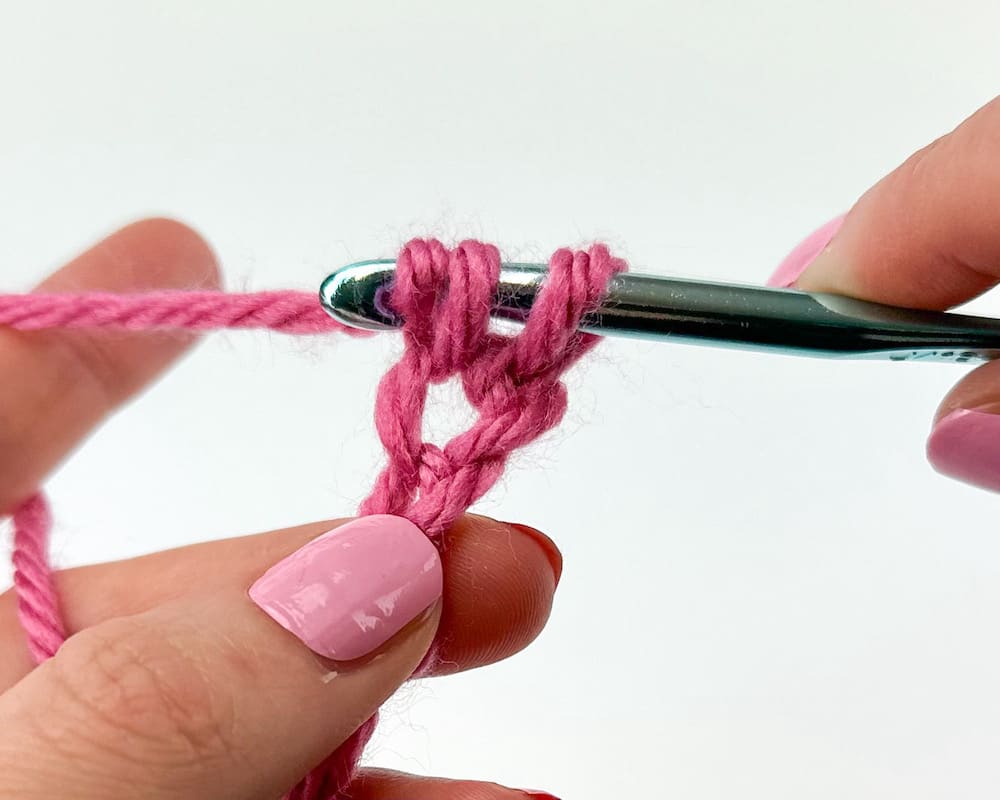
1. Insert Your Hook Into The Chain
With the head of your hook facing you, insert your hook into the second chain from the hook.
If working into the top loop of the chain, you will insert your hook from front to back under the top loop so you will have one strand of yarn over your hook (in addition to the loop currently on your hook). You will notice two strands below your hook with one crossing over the other.
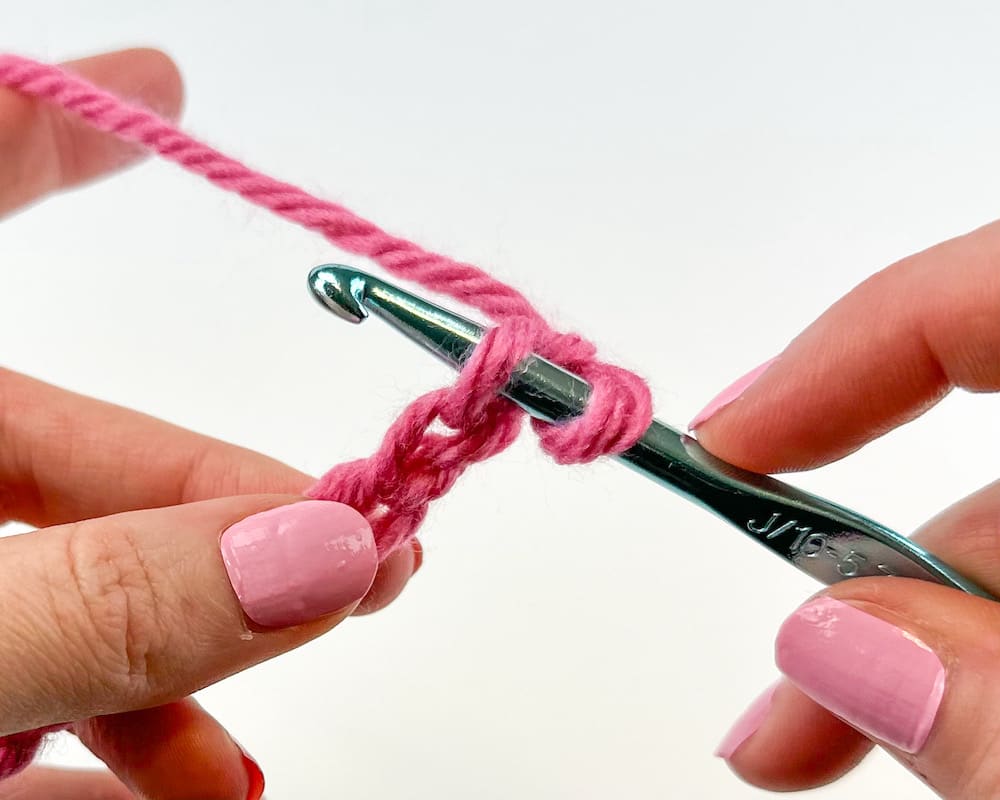
If you are working into the back ridge loop, you will insert your hook from front to back into the bump along the back. There will be one strand of yarn now over your hook (in addition to the loop currently on your hook). There will be two strands below your hook – one slightly higher and one slightly lower than the loop you’ve worked into.
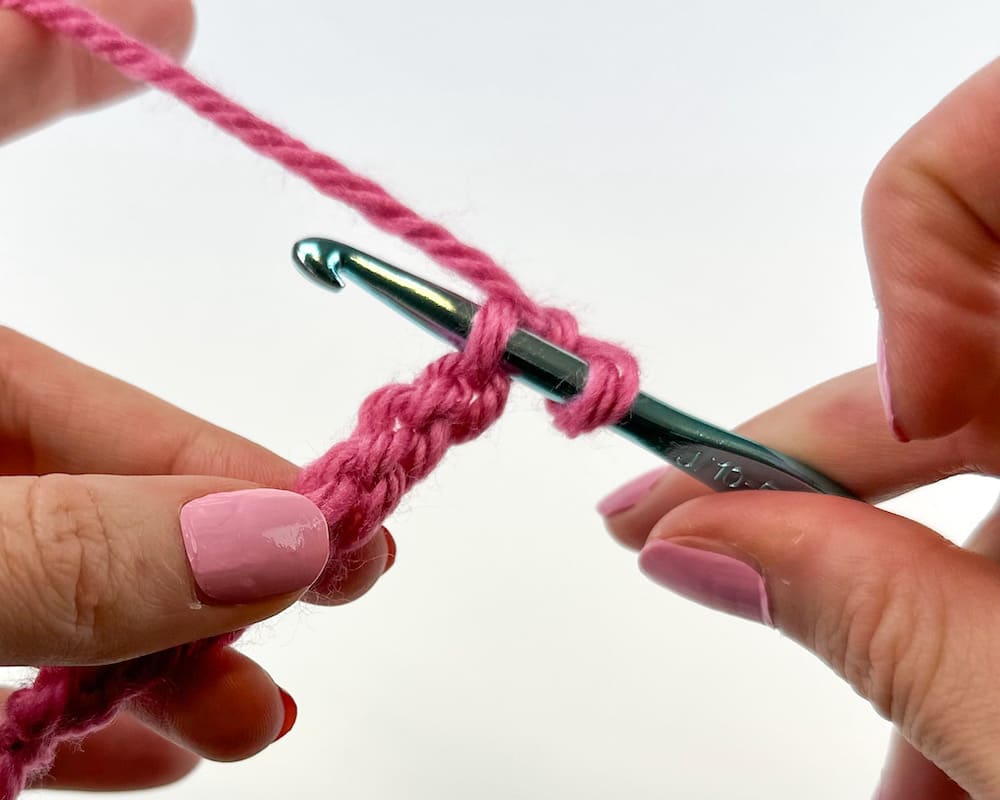
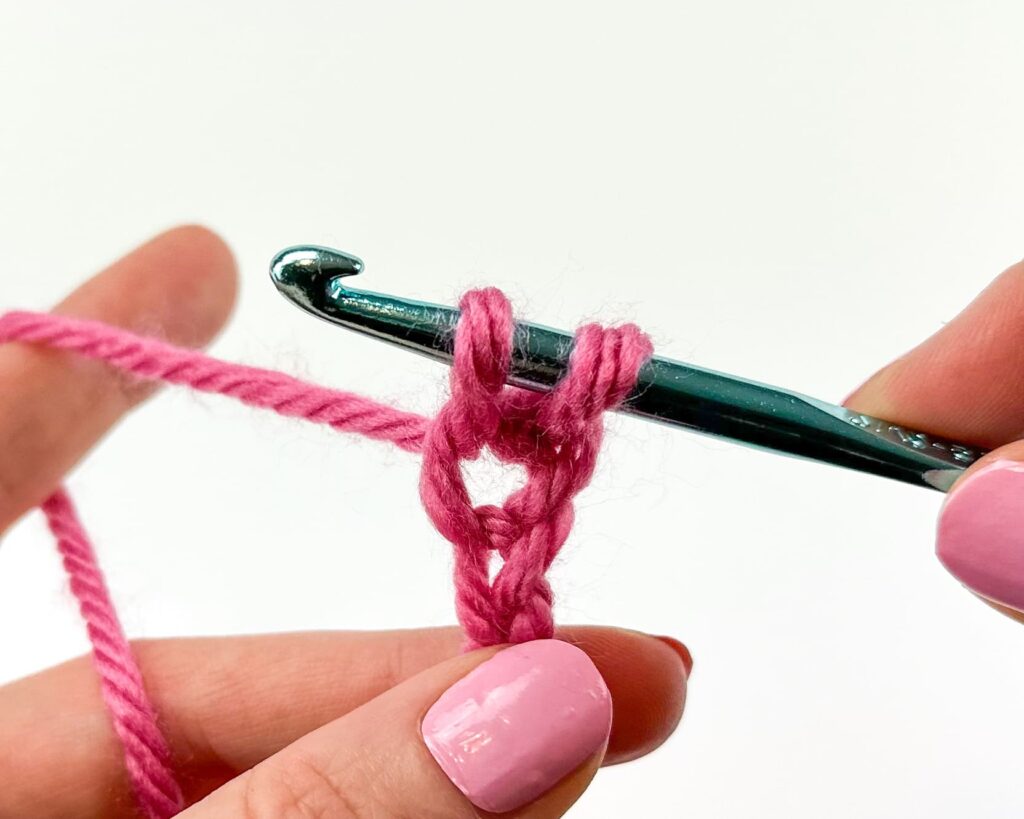
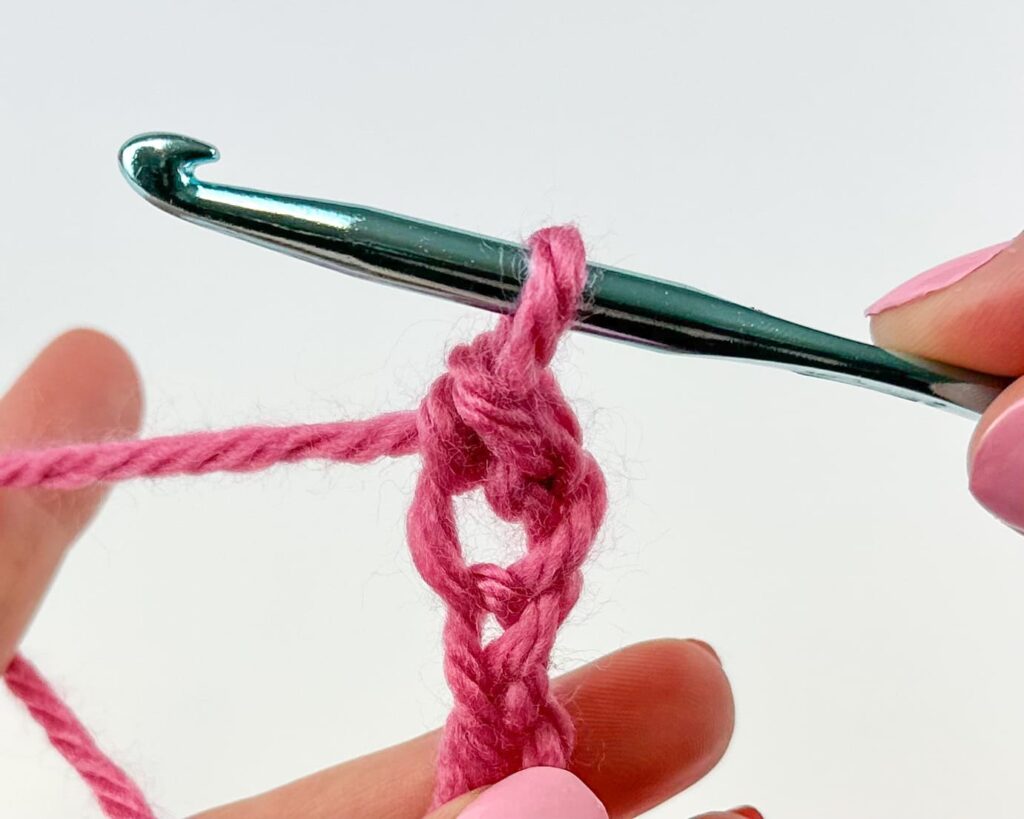
2. Yarn Over
Yarn over, which is abbreviated YO, is the process of having the yarn go over your hook. To yarn over, move your hook under the yarn.
Rotate the head of the hook so it is pointing up.
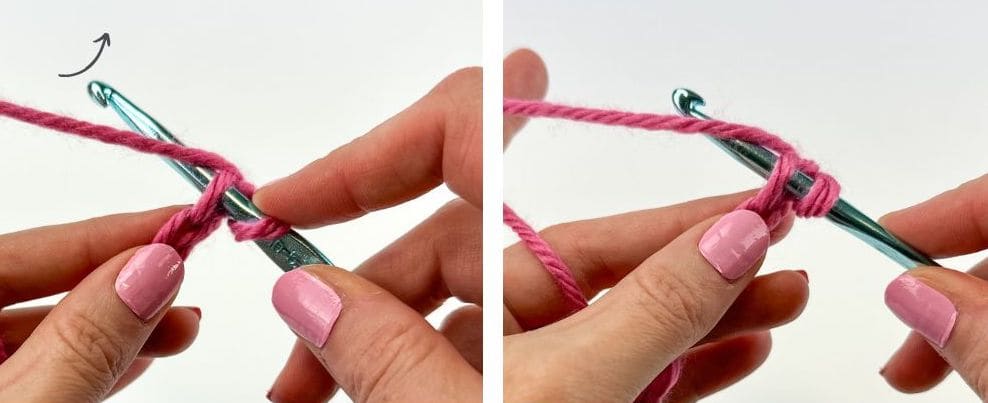
The yarn should fall on the working area/shaft of your hook from right to left with the yarn coming onto your hook from the bottom right and leaving your hook from the top left.
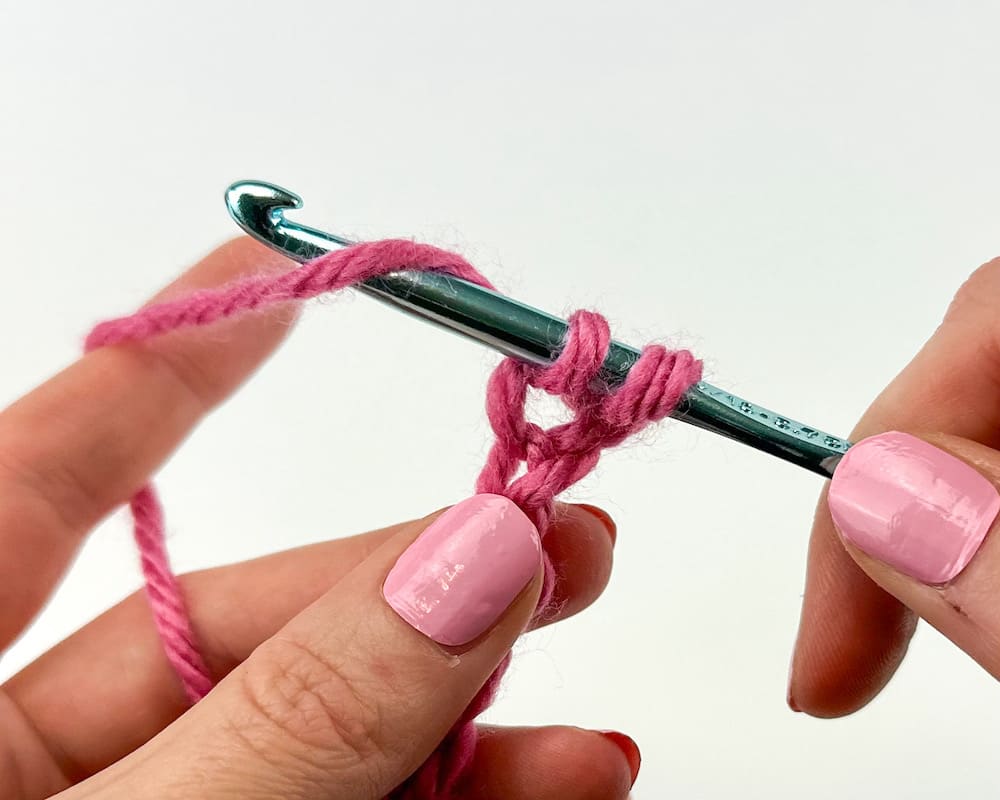
3. Pull Through A Loop
Pull through a loop means to “hook” the yarn that is overtop of your hook and bring it all the way through the place (the loop/stitch) where you’ve inserted your hook.
The head of your hook should currently be facing up toward the ceiling. Rotate the hook (facing you) and point it towards the floor so that the head of the hook is now facing down.
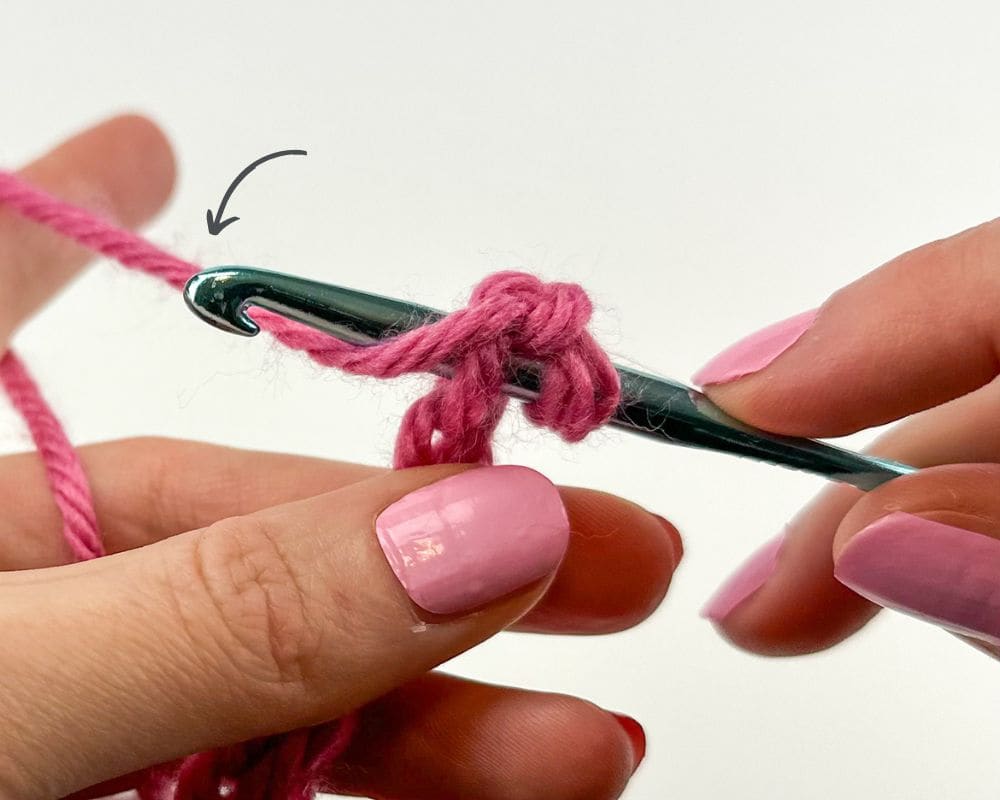
With the hand that is holding your hook, bring the hook (with hook’s head still pointing down) towards the place where you inserted your hook and “hook” the yarn so that it gets caught in the hook’s throat.
Now pull your hook through the place where you’ve inserted your hook. For this step, only pull your hook through the place (the loop/stitch) where you’ve inserted your hook – not the starting loop.
Once it’s through the place where you’ve inserted your hook, rotate your hook so that the head is pointing up (toward the ceiling).
You will now have two loops on your hook (the starting loop, which is closest to your hand and the new loop you just pulled through).
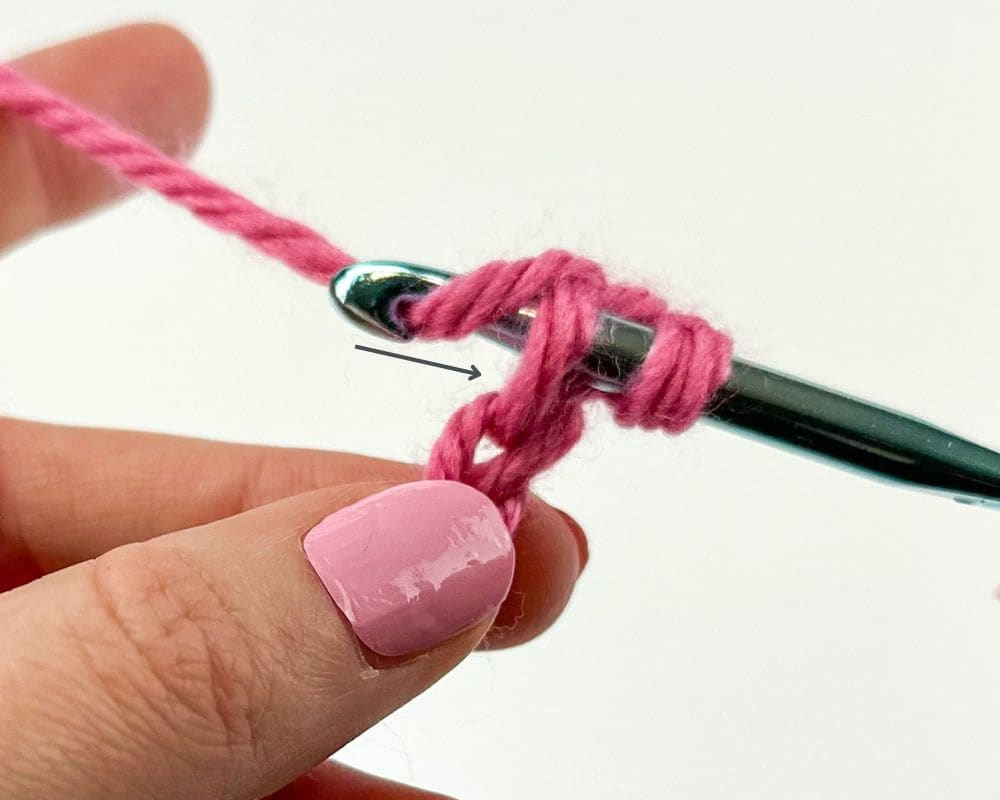
4. Yarn Over Again
Now yarn over again – bring the hook underneath the strand of yarn so it falls on the working area/shaft of your hook.
The yarn should fall onto the hook from the right at the 10 o’clock position and leave the hook at the 4 o’clock position.
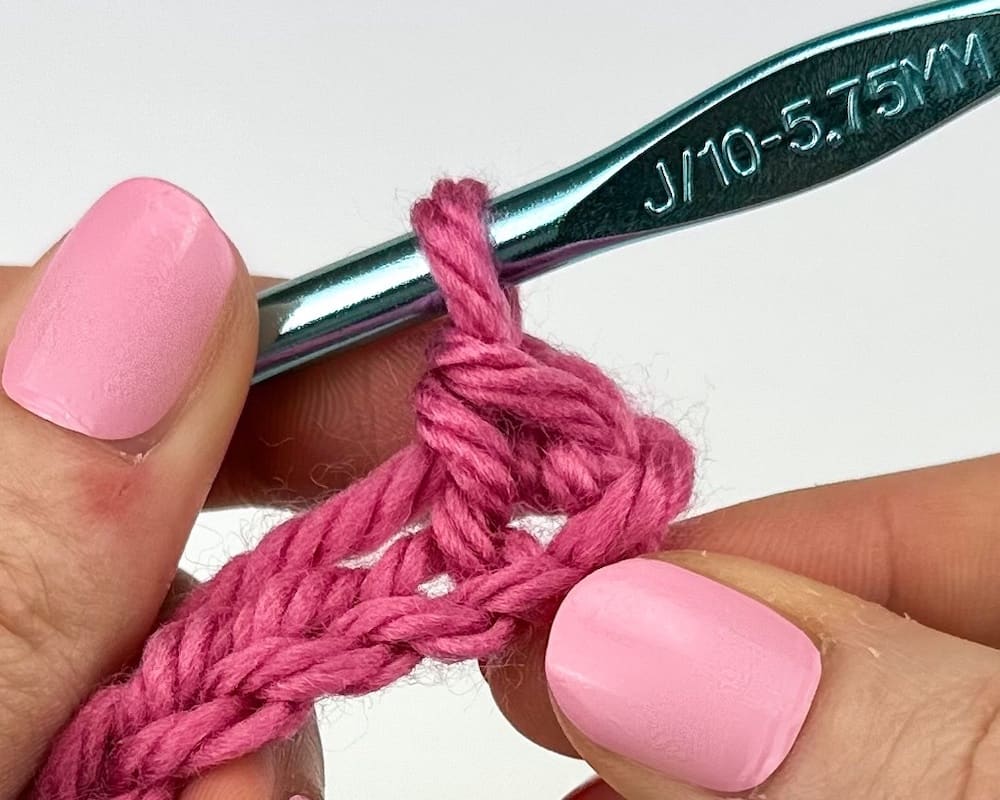
5. Pull the Yarn Through Both Loops
Rotate the hook so the head is pointing down.
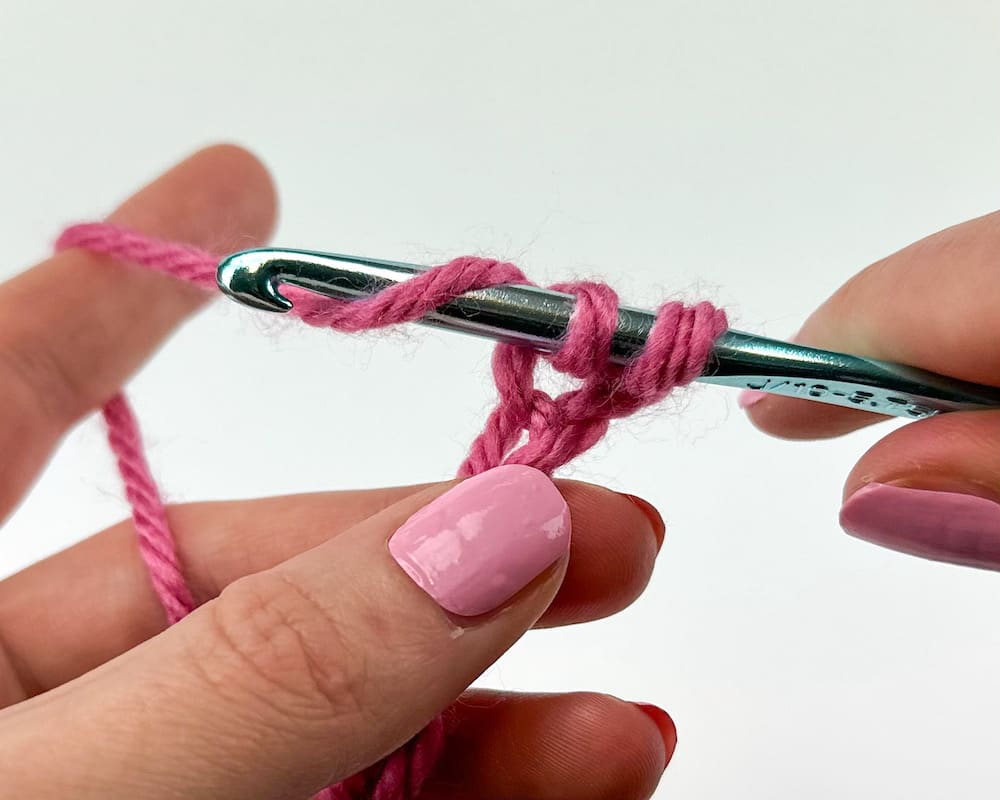
“Hook” the yarn so that it gets caught in the hook’s throat. Now pull the yarn through the two loops on your hook.
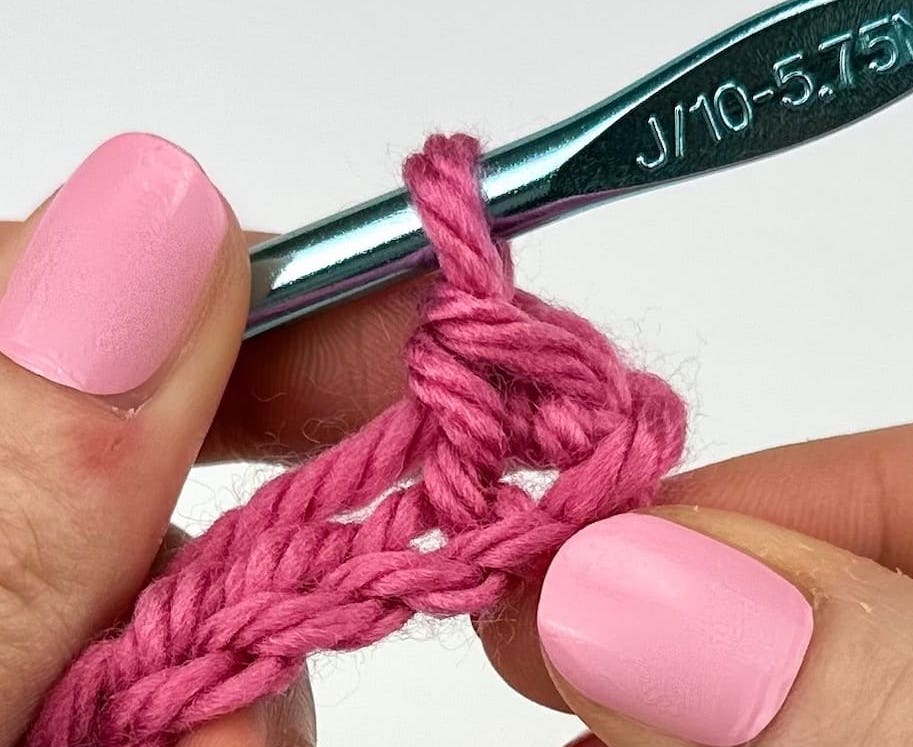
You will now have a new loop on your hook.
You’ve just created your first single crochet stitch!
How to Single Crochet in the Next Chain
To make a single crochet in the next chain, insert your hook in the next chain (the 3rd chain from the hook).
If working into the top loop of the chain, you will insert your hook from front to back under the next top loop so you will have one strand of yarn over your hook (in addition to the loop currently on your hook). You will notice two strands below your hook with one crossing over the other.
If you are working into the back ridge loop, you will insert your hook from front to back into the next bump along the back. There will be one strand of yarn now over your hook (in addition to the loop currently on your hook). There will be two strands below your hook – one slightly higher and one slightly lower than the loop you’ve worked into.
You will repeat these steps (described above in more detail):
- With your hook inserted now into the next chain stitch, yarn over.
- Pull through a loop (2 loops on the hook).
- Yarn over.
- Pull yarn through all 2 loops on hook (you will now have 1 new loop on your hook).
That now completes your second single crochet stitch. Repeat these steps in each of the starting chains.
How to Make a Single Crochet Stitch (Cheatsheet)
Every time you want to do a single crochet stitch, follow these steps:
- Insert your hook into the designated stitch.
- Yarn Over.
- Pull through a loop (2 loops on hook).
- Yarn Over.
- Pull yarn through the 2 loops on the hook. You’ve just made a single crochet stitch!
Counting Single Crochet Stitches
In order to count your stitches, it’s important to understand the anatomy of a single crochet stitch.
Anatomy of a Single Crochet Stitch
Top of the Single Crochet Stitch
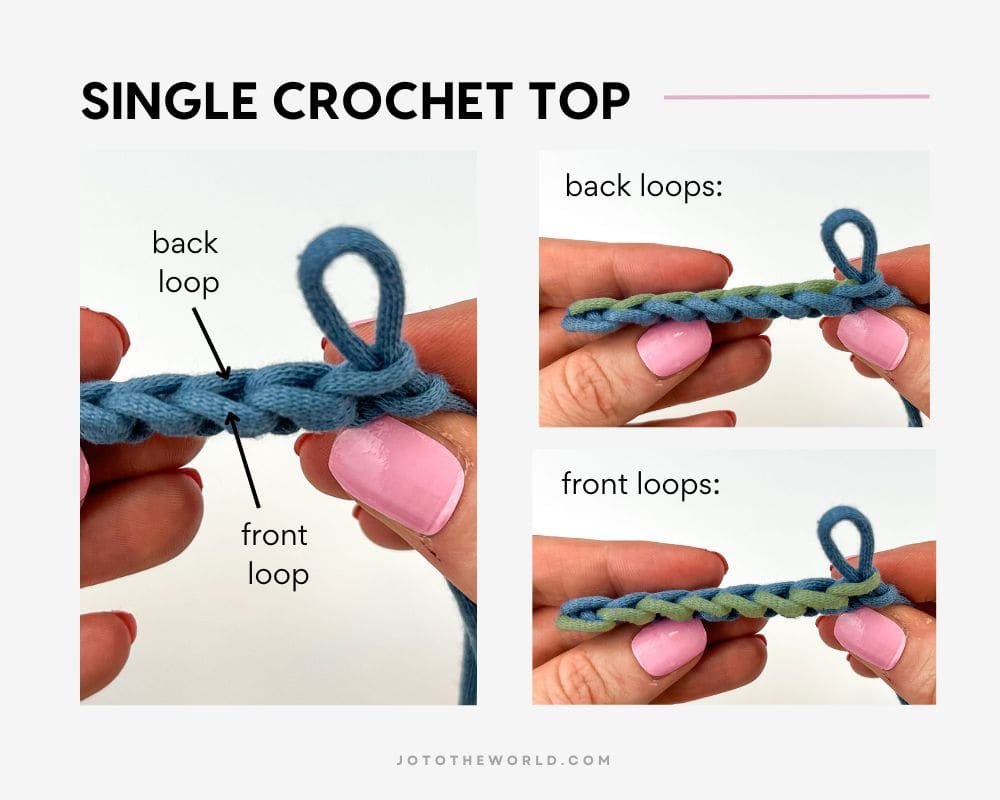
At the top of the stitch, there are two loops – the loop closest to you, which is called the front loop and the loop furthest away from you, which is called the back loop. The front and back loops change depending on which side of your work is facing you.
Single Crochet Stitch Body
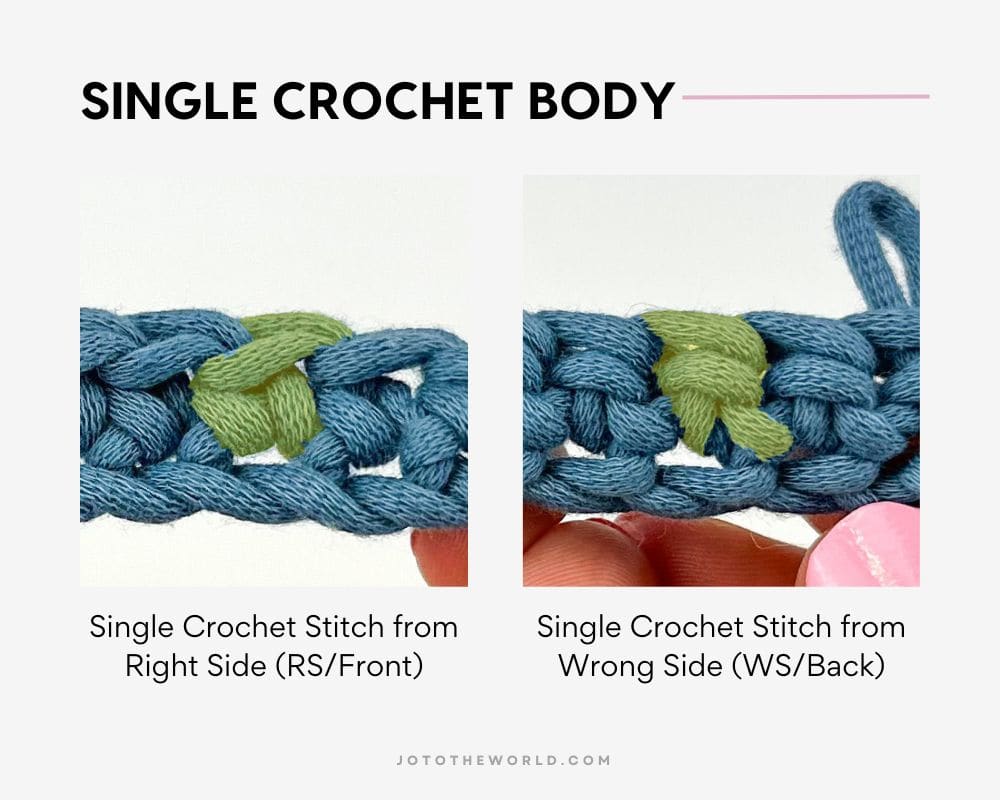
There is also the stitch body which looks slightly different depending on which side you look at. When looking at a single crochet stitch from the Right Side (the front of your work), the stitch body has two short legs. From the Wrong Side (the back of your work), the stitch body kind of looks like a person from the waist down, wearing a belt. You can see the belt and two short legs.
How to Count Single Crochet Stitches
When making your first single crochet stitch into the second chain from the hook that means we skipped the very first chain. If we made single crochet stitches into each stitch (after skipping the first chain), we should have one less stitch than starting chains after finishing the first row.
For example, if we had 9 starting chains to start and make a single crochet stitch into the second chain from the hook and in each of the remaining starting chains, we should have a total of 8 single crochet stitches after finishing the row (which is Row 1).
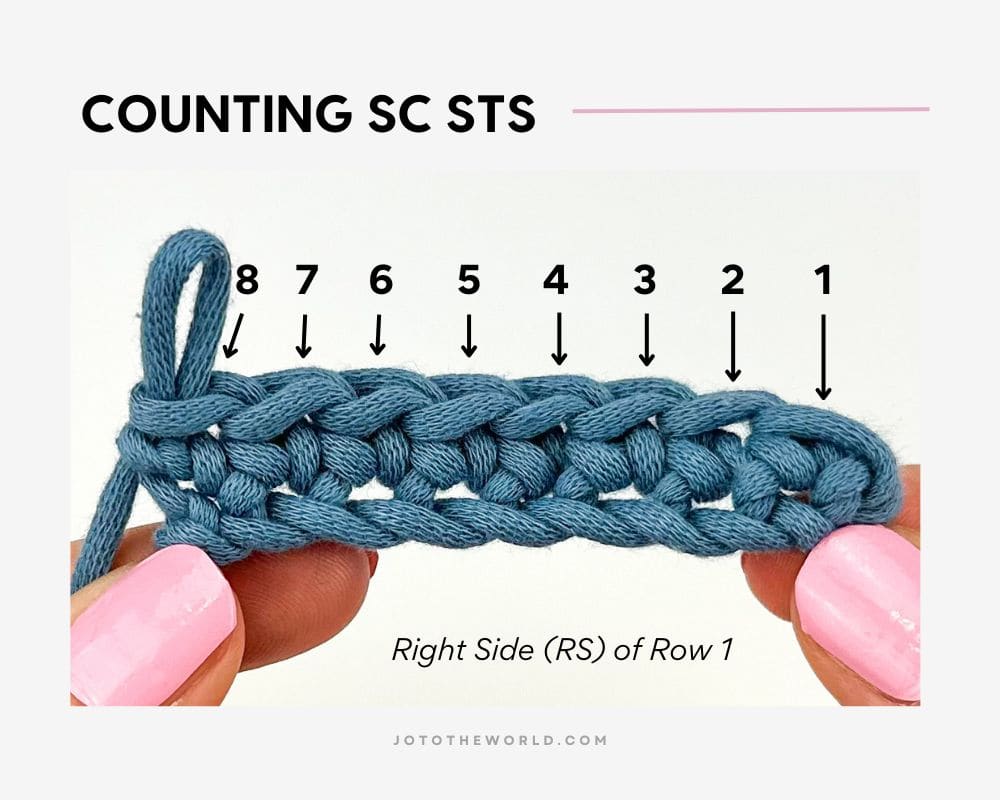
Note: always follow the pattern instructions for where to work your first stitch and the stitch count for the row.
It’s always good to count your stitches at the end of each row to ensure you have the correct number.
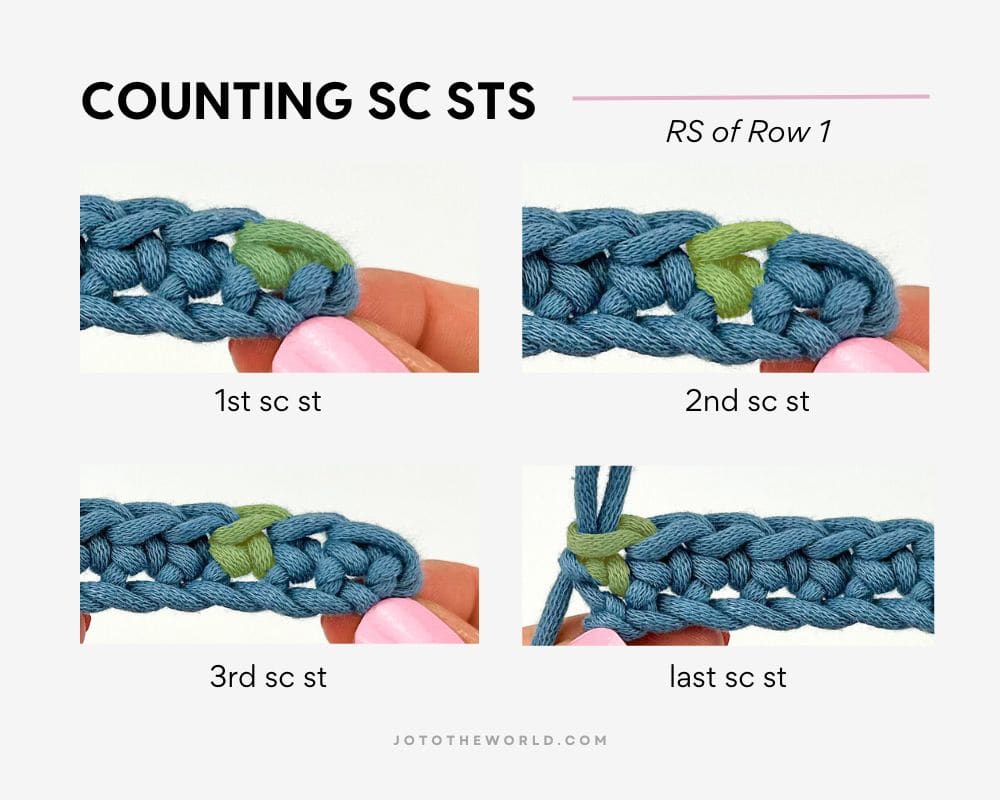
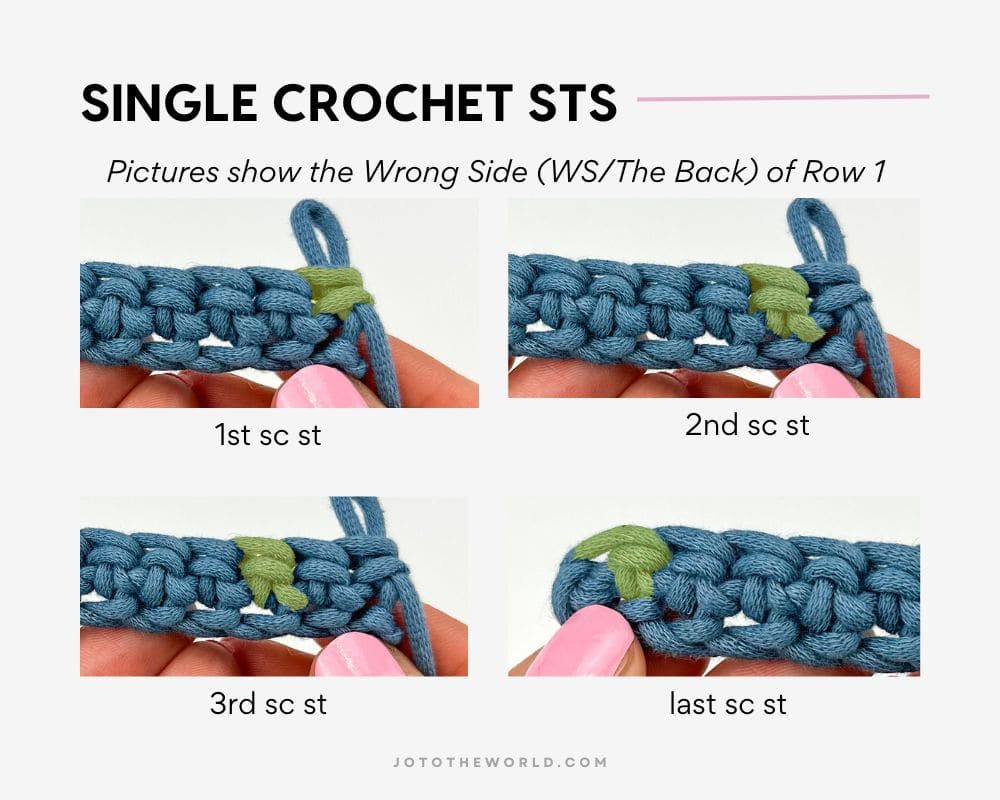
Counting stitches can be difficult for beginners as it’s hard to know which stitch is which, especially for the first and last stitch in the row. In the image below, I’ve shaded the 1st, 2nd, 3rd and last stitch so you clearly differentiate the stitches.
Here are some tips for counting single crochet stitches in a project:
- Learn the anatomy of the stitch so you can tell stitches apart.
- Make a small swatch with a set number of stitches and compare it with your project.
- Use a stitch marker for the first stitch of a row and then after every 5 or 10 stitches.
- Use a stitch counter like the one referenced in my recommended crochet supplies.
How to Single Crochet in Rows
After finishing a row in crochet (or starting a new row), you will turn your work – meaning to flip it over like you are turning a page in a book. Also, you will make a specified number of chain stitches at the end or beginning of a row. This helps you “move up” to the next level/row.
Working into the chain stitches only happens on the first row. For the second row, you will be working into the stitches you made in the first row. For the third row and on, you will work into the stitches made in the previous row.
How to Single Crochet in the Second Row
After turning your work and making a specified number of chains, your first stitch of Row 2 will be working into the last stitch you completed in Row 1. Note that some patterns will have different instructions and will tell you if you need to skip the first stitch.
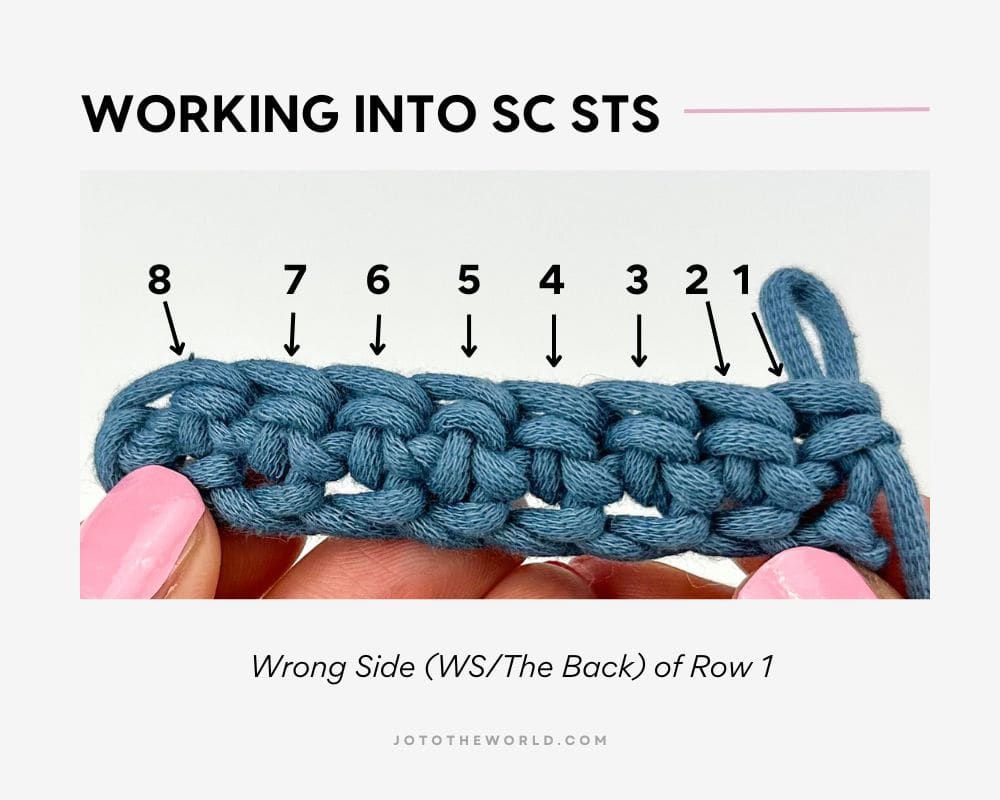
Just like counting stitches can be difficult when learning how to crochet, beginners often struggle with knowing which stitches to work into. In the image below, I’ve shaded the 1st, 2nd, 3rd and last stitch so you clearly differentiate the stitches.
How to Single Crochet into Stitches
Now that you are working into stitches and not chains, you no longer need to worry about top loop / back ridge loops as those are parts of the chain. You will need to know how to work into a single crochet stitch.
When working into a single crochet stitch, you will insert your hook under the top of the stitch, under both loops. There is a gap underneath the two loops at the top. This is where you insert your hook. Make sure you are working under the two loops at the top and not the belt, which is part of the single crochet stitch.
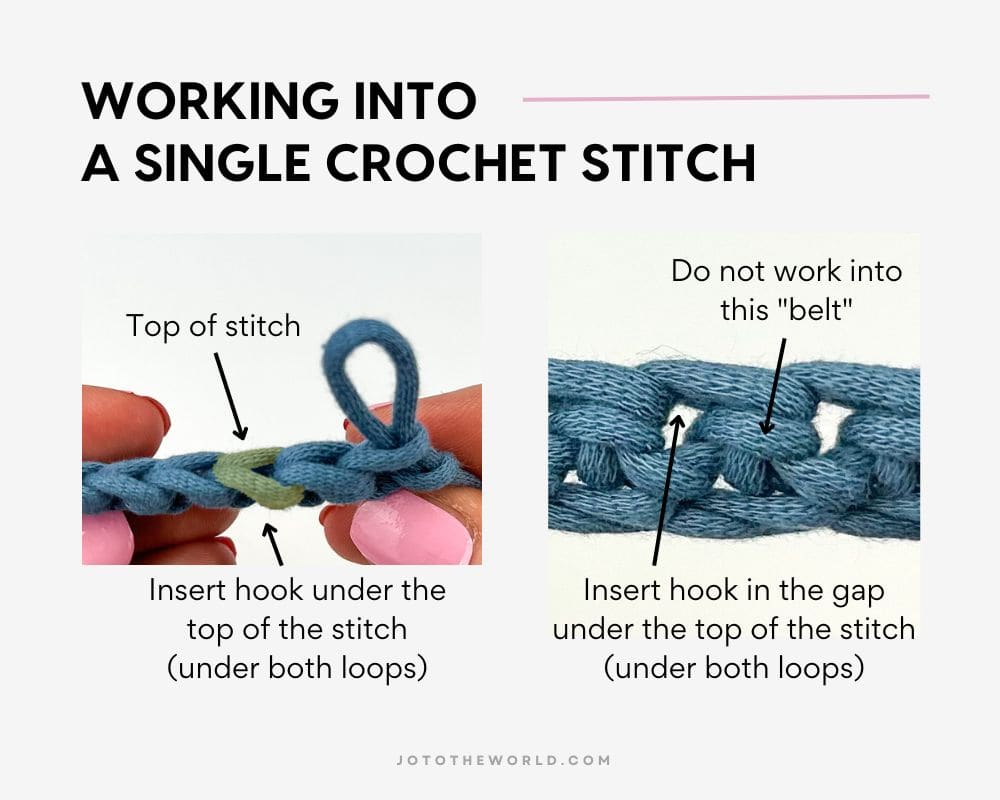
Note: the image above shows the 3rd stitch in the row highlighted but you will work into the 1st stitch in the row (the stitch attached to the chain) unless otherwise indicated in the pattern.
The exception to working under both loops is when the pattern says to work in the Front Loops Only (FLO) or the Back Loops Only. The pattern will clearly indicate if you should work into one loop only. If the pattern doesn’t specify, work into both loops.
Reminder: when working into single crochet stitches, you will make the stitch exactly the same as you did when working into the chain. The only difference is where you first insert your hook.
How to Count Rows in Single Crochet
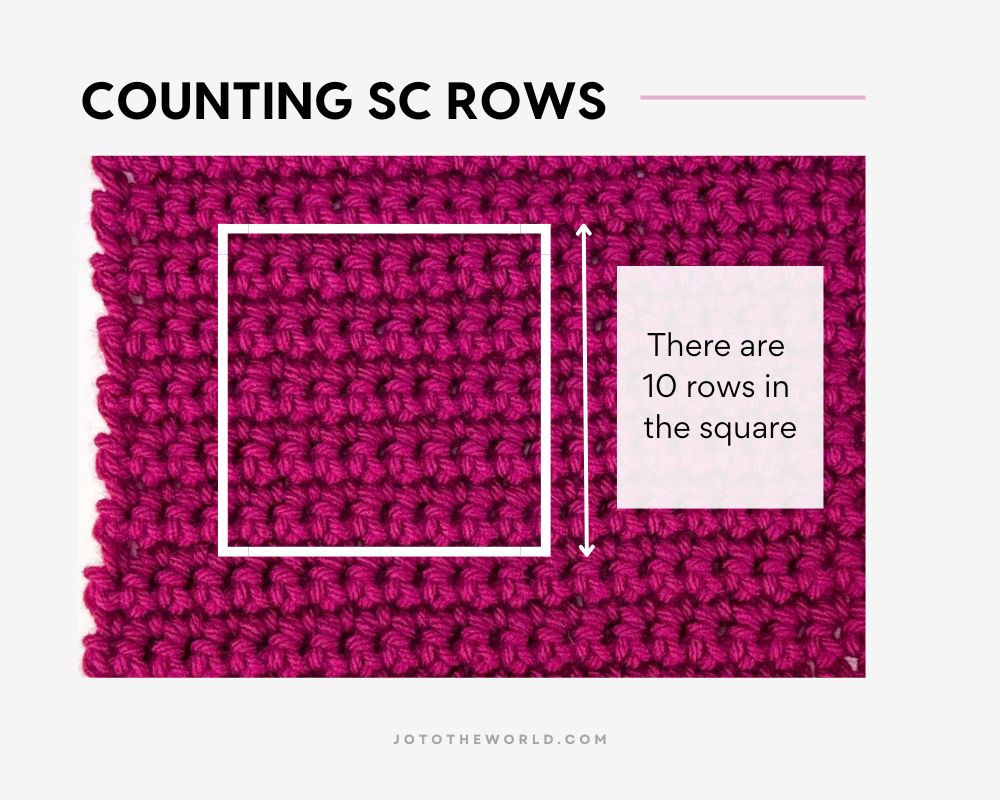
Here are some tips for counting single crochet rows in a project:
- Learn the anatomy of the stitch so you can tell rows apart.
- Make a small swatch with a set number of rows and compare it with your project.
- Use a stitch marker for every 5 or 10 rows.
- Use a row counter like the one referenced in my recommended crochet supplies.
Single Crochet in Back Loop Only
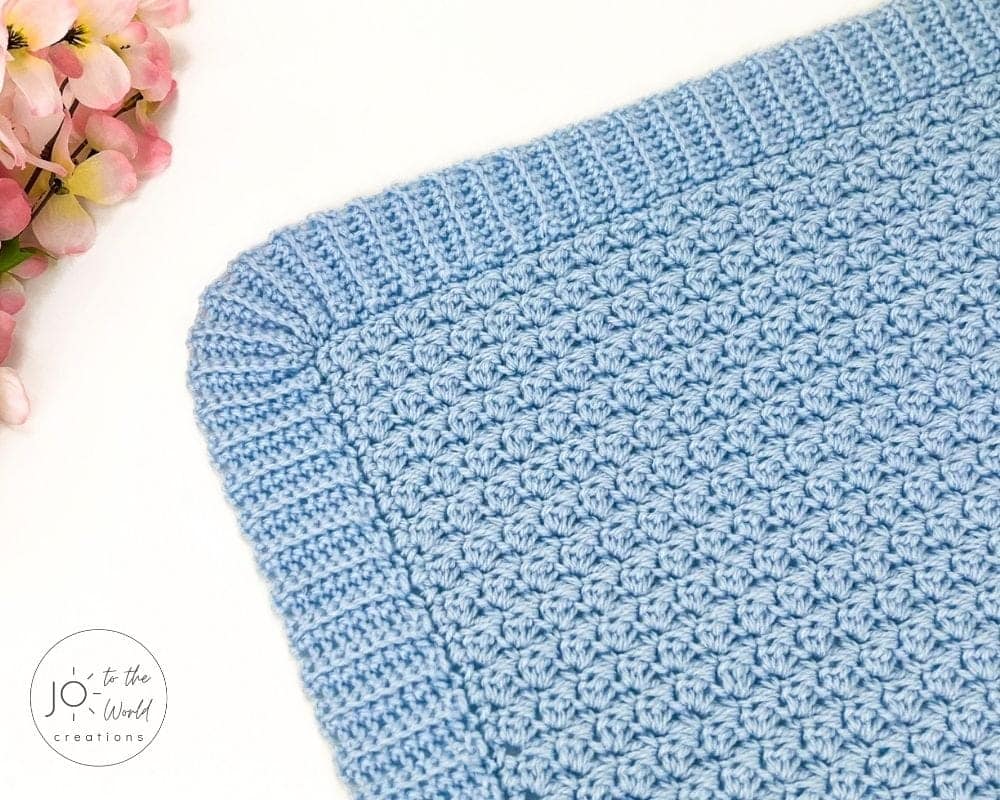
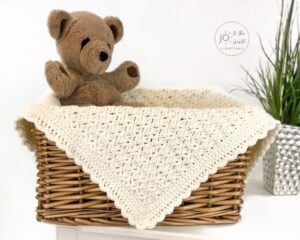
Single crocheting in the back loop only creates a lovely variation of the single crochet stitch. It is often used in ribbing, such as in my Adorable Baby Blanket border.
Single crochet in the back loop only is abbreviated “sc BLO” or you may see the instructions say to “sc in the BLO.” You may also see “BL” which means the same thing (back loop).
To make a single crochet stitch in the back loop only, insert your hook under the loop that is furthest away from you.
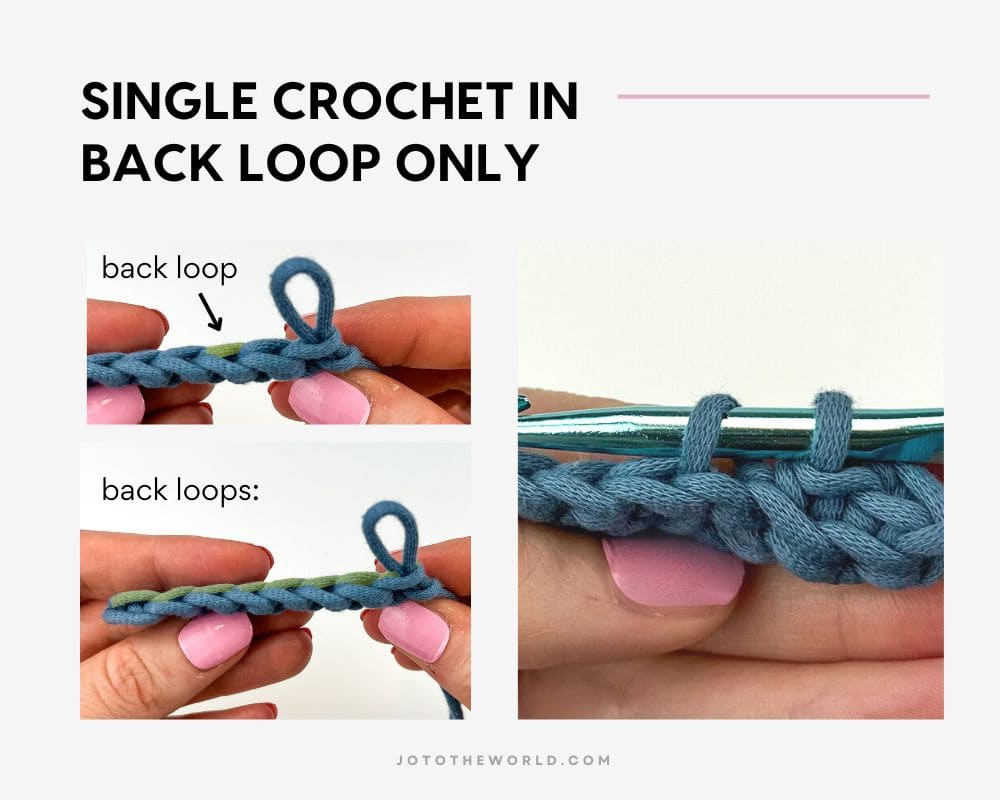
After inserting your hook under the back loop, you will make a regular single crochet stitch.
The only change is where you first insert your hook. In regular single crochet stitches, you insert your hook underneath both loops of the top of the stitch. When working in the back loop only, you will insert your hook under just one of those top loops and that’s the loop that is furthest away from you.
Remember, the back and front loops change depending on which side of your work is facing you. The back loops are the loops furthest away from you.
Single Crochet in Front Loop Only
Making a single crochet in the front loop only is another variation that is often called for in patterns.
Single crochet in the front loop only is abbreviated “sc FLO” or you may see the instructions say to “sc in the FLO.” You may also see “FL” which means the same thing (front loop).
To make a single crochet stitch in the front loop only, insert your hook under the loop that is closest to you.
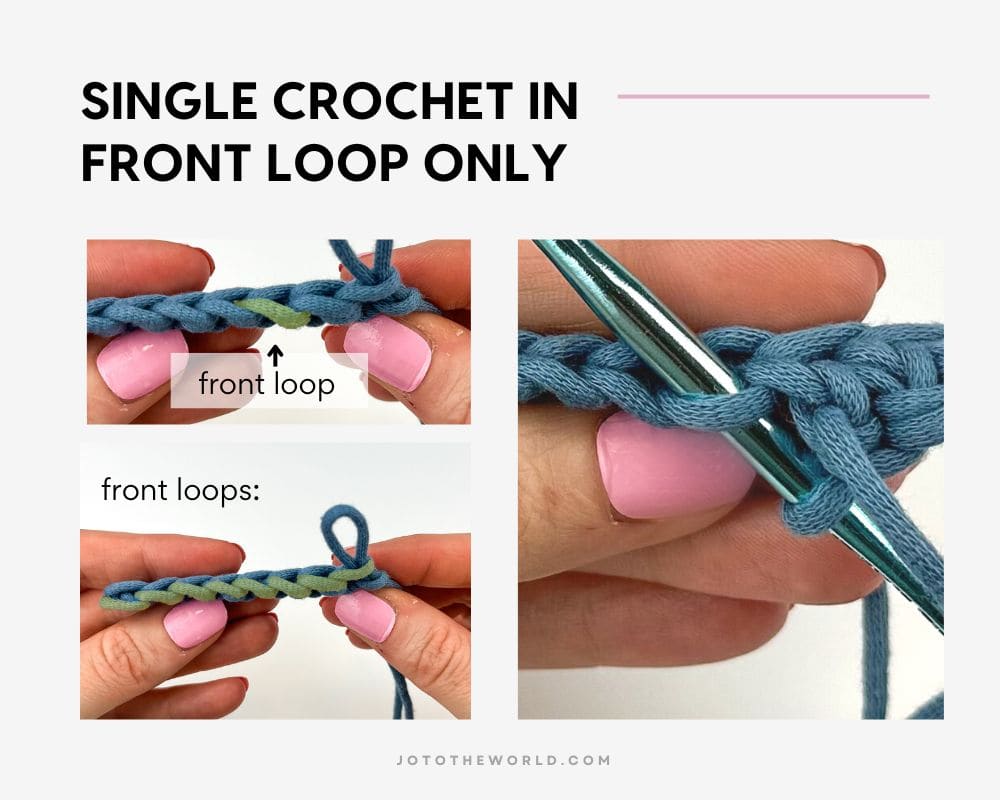
After inserting your hook under the front loop, you will make a regular single crochet stitch.
The only change is where you first insert your hook. In regular single crochet stitches, you insert your hook underneath both loops of the top of the stitch. When working in the front loop only, you will insert your hook under just one of those top loops and that’s the loop that is closest to you.
Remember, the back and front loops change depending on which side of your work is facing you. The front loops are the loops closest to you.
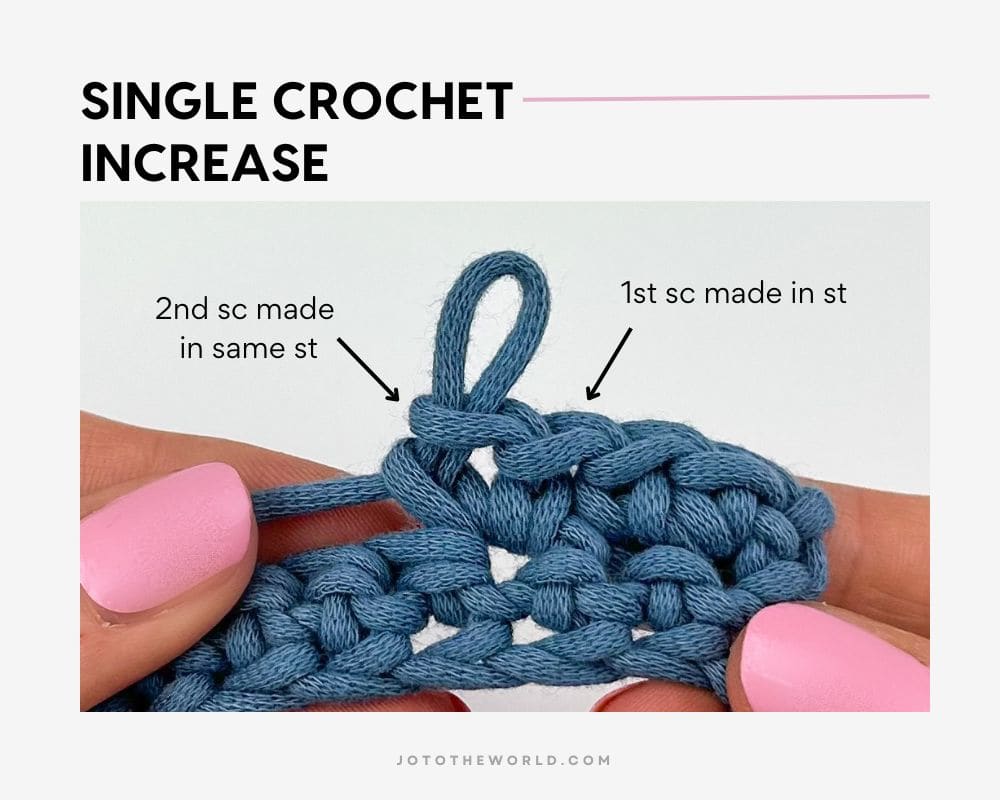
Single Crochet Increase
Single crochet increase, which is abbreviated as “sc inc,” involves making two or more single crochet stitches in the same place. That place can be a chain, stitch or space. Increases and decreases are used to shape your work.
Some patterns don’t call it an increase. Some patterns say to make 2 sc in the next st, for example. This means to make two single crochet stitches in the next stitch.
When the pattern calls for an increase or to make two or more single crochet stitches in the same place, start by making one single crochet in the designated place (exactly the same as you normally would). Then make another single crochet stitch in the same chain, stitch or space as the stitch you just made (and make more if the pattern calls for it).
When making a single crochet increase, the actual single crochet stitch is exactly the same, the only difference is where you are making the stitch.
Single Crochet Decrease
A single crochet decrease (abbreviated as sc dec) involves making two or more single crochet stitches together. Decreases are used to shape your work.
Single Crochet Two Together
When making two single crochet stitches together, it is called single crochet two together and it is abbreviated “sc2tog.”
Some patterns use a single crochet two together as a decrease and others say to do this in the same stitch.
To single crochet two together as a decrease, insert your hook into the next next stitch. Yarn over and pull through a loop. You will now have two loops on your hook. Instead of finishing the single crochet stitch here, insert your hook into the next stitch (the following stitch). Yarn over and pull through a loop. You will now have three loops on your hook. Yarn over and pull the yarn through all three loops on your hook.
Here’s a video tutorial of how to do a sc2tog decrease from my friends at The Crochet Crowd.
When the pattern calls for a sc2tog in the same stitch, you do the exact same thing as a decrease but instead of working in two stitches, you simply insert your hook into the same stitch.
Single crochet decreases can also be done with 3 stitches or more.
Front and Back Post Single Crochet
Lastly, there are times when a pattern instructs you to work around the front or back post of the stitch below and single crochet. This means to work around the single crochet body instead of into the top of the stitch.
Here’s The Crochet Crowd again with video tutorials on how to do a Single Crochet Front Post and Single Crochet Back Post.
Frequently Asked Single Crochet Questions
What does SC stand for?
Sc is the abbreviation for single crochet. Single crochet is an US (American) term for one of the most basic and fundamental stitches in crochet. In UK terminology, the exact same stitch is called double crochet (dc).
What is the difference between single crochet and double crochet?
A single crochet (sc) stitch is shorter than a double crochet (dc) stitch, which is a much taller stitch. The two stitches are also completed differently. You begin a single crochet stitch by inserting your hook into the designated stitch or space. When making a double crochet stitch, you first yarn over and then insert your hook into the designated stitch or space. Because of this yarn over, there is an additional step required when making a double crochet stitch.
See the differences between single crochet and double crochet:
To single crochet, insert hook your hook into the designated space or stitch. Yarn over and pull through a loop (2 loops on hook). Yarn over and pull through both loops.
To double crochet, yarn over and insert your hook into the designated space or stitch. Yarn over and pull through a loop (3 loops on hook). Yarn over and pull through first two loops (2 loops on hook). Yarn over and pull yarn through both loops.
Is single crochet the same as a chain stitch?
A single crochet (sc) stitch is different from a chain (ch) stitch. To make a chain stitch, yarn over and pull the yarn through the loop that is on your hook. To make a single crochet stitch, insert hook your hook into the designated space or stitch. Yarn over and pull through a loop (2 loops on hook). Yarn over and pull through both loops.
What is single crochet (sc) in UK?
Single crochet (sc) in US crochet terminology is the same as double crochet (dc) in UK crochet terminology. There is no single crochet stitch in UK terminology. In US terminology, double crochet means an entirely different stitch. Learn more with US to UK Conversion Chart.
Patterns using Single Crochet Stitches
Now that you’ve learned how to single crochet, here are some crochet patterns that use the single crochet stitch:
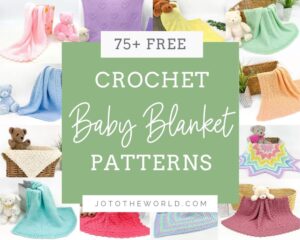
You can also find lots of beginner-friendly patterns with this collection of 70+ Crochet Patterns for Beginners.

I’m Jo, the designer behind Jo to the World Creations, and I’m dedicated to helping you make the perfect crochet gift! I love designing and sharing free crochet patterns that you can make for every gift occasion.
About →Let’s Connect
Download. Print. Keep.
Get Instant Access to ALL Printable Patterns
Make your crocheting more enjoyable, relaxing and productive with printable PDF patterns.
- 100+ premium crochet patterns.
- Download, save and print from any device.
- No ads or popups!
Not sure yet? Take a look at the Pattern Library and see all the patterns you can download once you’re a member.

Save with Pattern Bundles
For a limited time, I’ve grouped some of my most popular crochet patterns and I’m offering them as pattern bundles where you can get the printable versions for one low, discounted price. Check out these incredible Crochet Pattern Bundles.
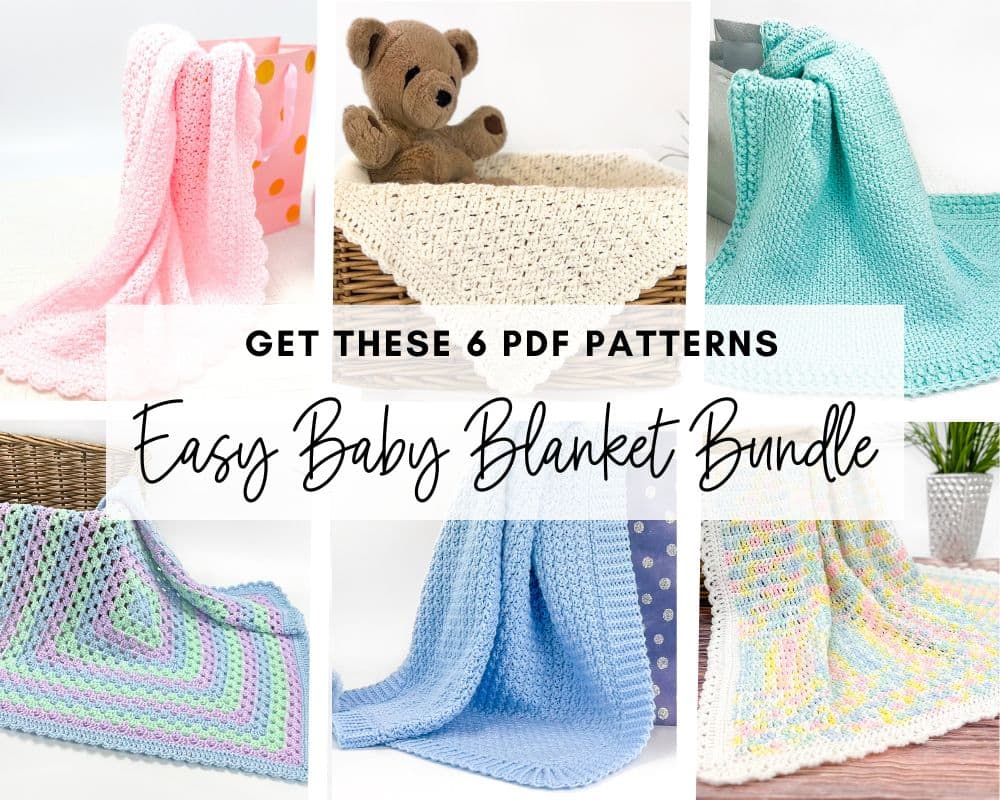
Easy Baby Blanket Bundle
With this Easy Baby Blanket Bundle, you’ll get SIX easy crochet baby blankets as printable downloads. Each pattern includes step-by-step instructions and a full video tutorial.
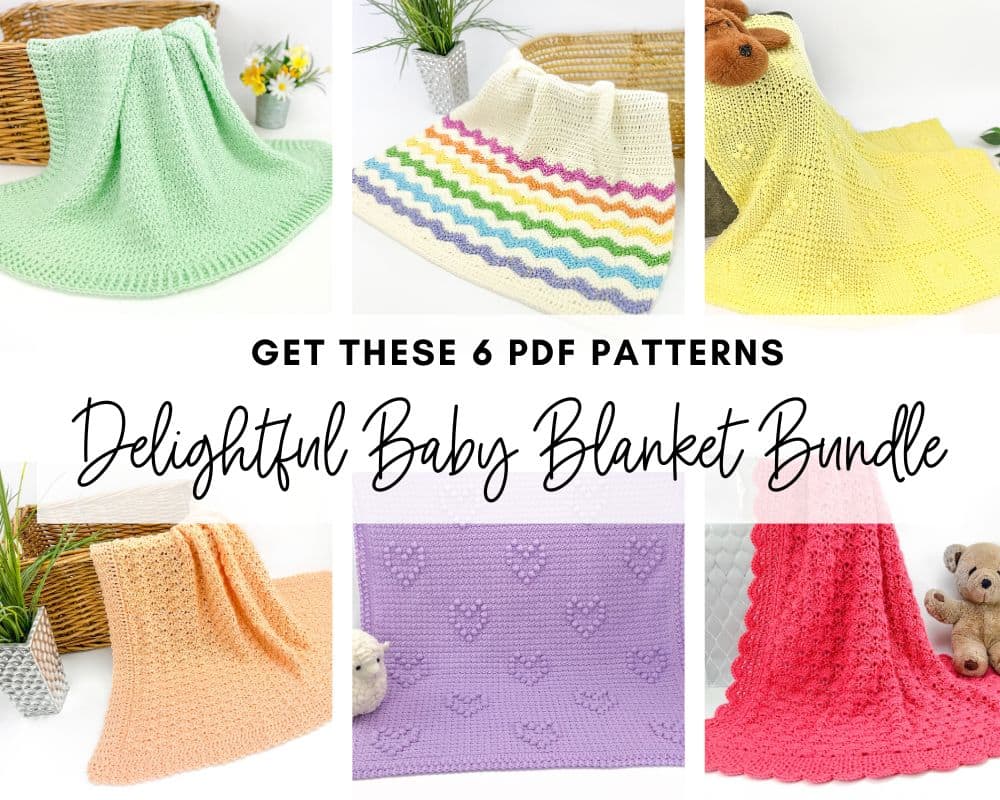
Delightful Baby Blanket Bundle
This incredible deal includes six SIX blanket patterns that are a delight to make and create truly stunning blankets – all as printable PDFs for one low, discounted price.
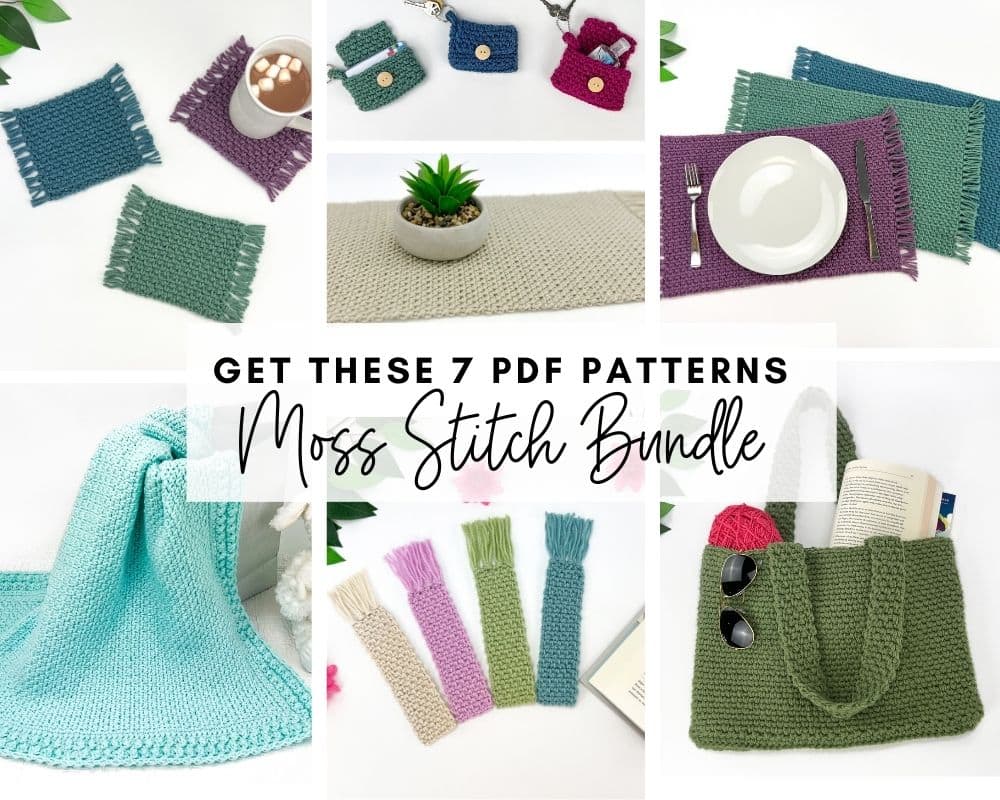
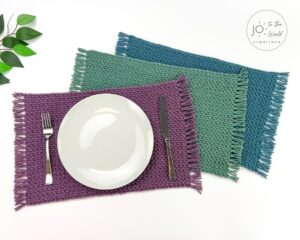
Moss Stitch Pattern Bundle
All your favorite Moss Stitch patterns in one bundle! Get SEVEN easy Moss Stitch crochet patterns as ad-free, print-ready PDFs to print, save and keep forever.
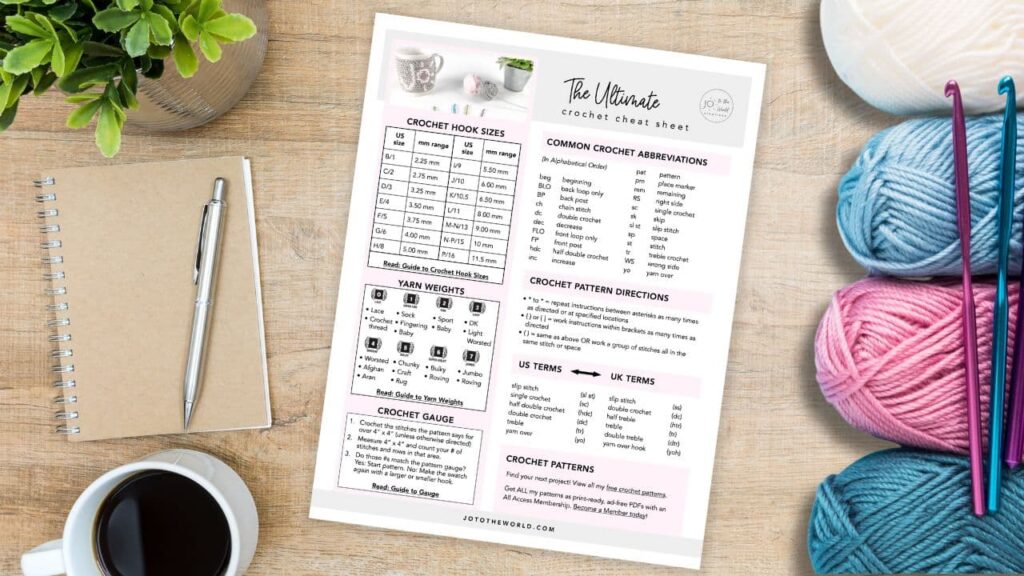
Free Crochet Cheat Sheet
Get instant access to this Ultimate Crochet Cheat Sheet! Plus you’ll receive free patterns for crochet gifts delivered right to your inbox!
Featured Crochet Patterns
Pattern Collections


Free Patterns for Crochet Gifts
Never miss a pattern! Get all my secrets to making incredible crochet gifts as well as new free crochet patterns and exclusive deals when you sign up for my newsletter (it’s free!).