

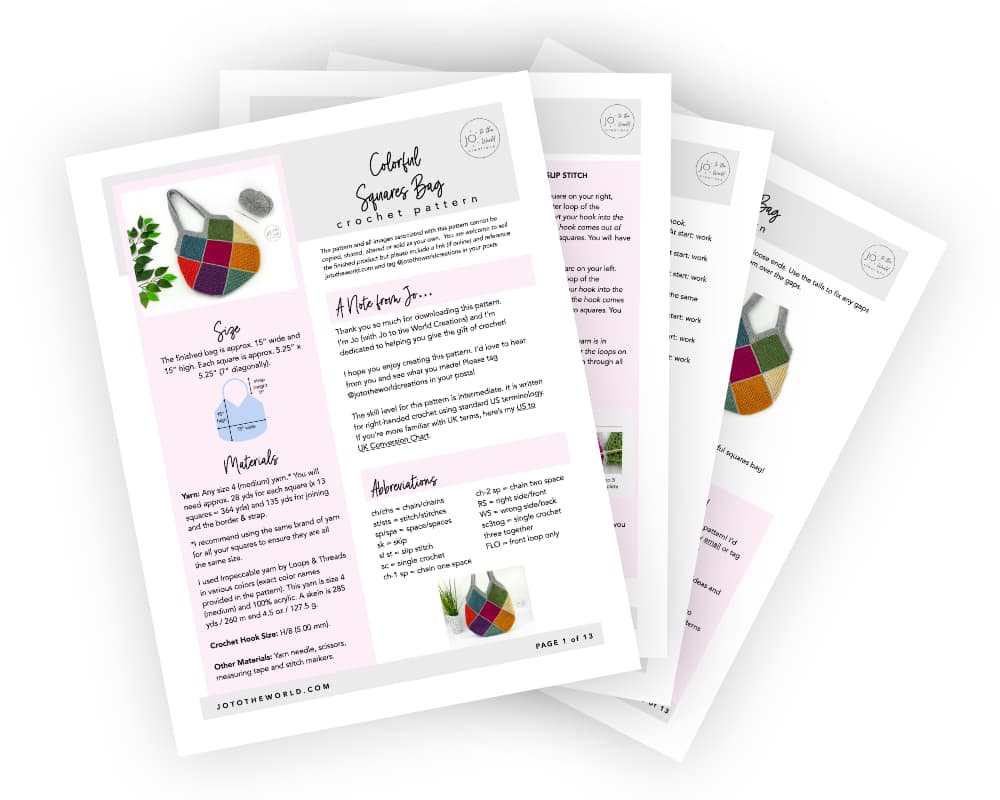
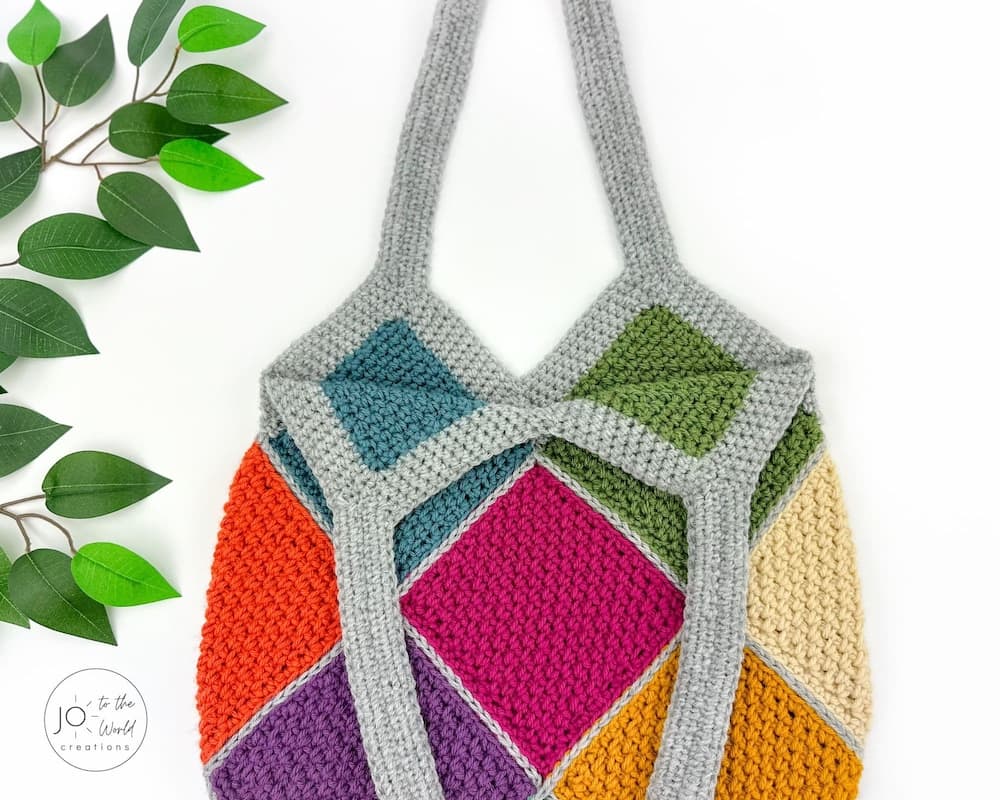
Colorful Squares Bag – Free Crochet Pattern
Embrace the joy of colors with this delightful Colorful Squares Bag Crochet Pattern! This easy-to-follow pattern will show you how to make this vibrant and stylish crochet bag from start to finish.
Before we begin, I would like to thank you for visiting Jo to the World Creations, a site dedicated to helping you give the gift of crochet.
More free patterns (that make awesome crochet gifts) are on the way! Sign up for my emails, follow me and never wonder “What should I make for…” again!
FREE PATTERNS FOR CROCHET GIFTS
Delivered to your inbox
AND GET A FREE PDF OF THE LOVE PILLOW
& A FREE CROCHET CHEAT SHEET
Unsubscribe at any time.
Delivered Socially
Follow Me on
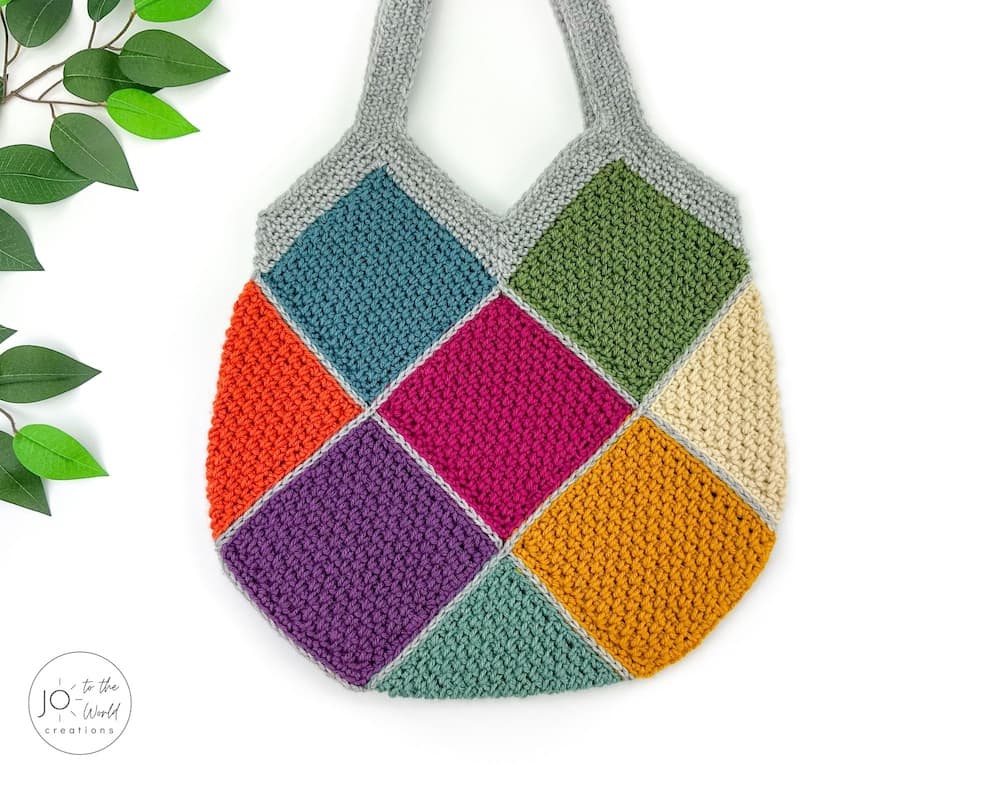
Colorful Crochet Bag
Grab your crochet hook and a rainbow of yarns and get ready to create your own masterpiece with this vibrant square tote pattern. Let your creativity shine as you crochet each square and watch as the colors come together to form a truly eye-catching accessory that will brighten up any outfit.

With its cheerful color palette and versatile design, this colorful crochet bag is perfect for a day at the beach, a trip to the farmers’ market, or an afternoon stroll in the city. It’s also a fantastic gift idea for friends and loved ones who appreciate handmade treasures.
Use the Table of Contents below to jump to any section of the pattern or keep scrolling down to view all of the details and instructions.
Affiliate Disclosure: This post may contain affiliate links meaning I may receive a commission for purchases made through links in this post at no extra cost to you. As an Amazon Associate, I earn from qualifying purchases.
Get the PDF!
Purchase the printer-friendly, ad-free PDF of this pattern that you can instantly download! It includes everything from this free pattern but you can easily save, print and access it anytime!
You can also purchase it on Etsy or Ravelry.

All-Access Membership
For only $0.14 a day, you can get this pattern as a PDF and my entire library of 100+ print-ready, ad-free PDF crochet patterns!

Pattern Details
Skill Level
Intermediate
Size
The finished bag is approx. 15” wide and 15” high. Each square is approx. 5.25” x 5.25” (7” diagonally).

Materials
Yarn: Any size 4 (medium) yarn.* You will need approx. 28 yds for each square (x 13 squares = 364 yds) and 135 yds for joining and the border & strap.
*I recommend using the same brand of yarn for all your squares to ensure they are all the same size.
I used Impeccable yarn by Loops & Threads in various colors (exact color names provided in the pattern). This yarn is size 4 (medium) and 100% acrylic. A skein is 285 yds / 260 m and 4.5 oz / 127.5 g.
Crochet Hook Size: H/8 (5.00 mm).
Other Materials: Yarn needle, scissors, measuring tape and stitch markers.
Terminology
This pattern is written for right-handed crochet using standard US terminology. If you’re more familiar with UK terms, here’s my US to UK Conversion Chart.
Abbreviations
- ch/chs = chain/chains
- st/sts = stitch/stitches
- sp/sps = space/spaces
- sk = skip
- sl st = slip stitch
- sc = single crochet
- ch-1 sp = chain one space
- ch-2 sp = chain two space
- RS = right side/front
- WS = wrong side/back
- sc3tog = single crochet three together
- FLO = front loop only
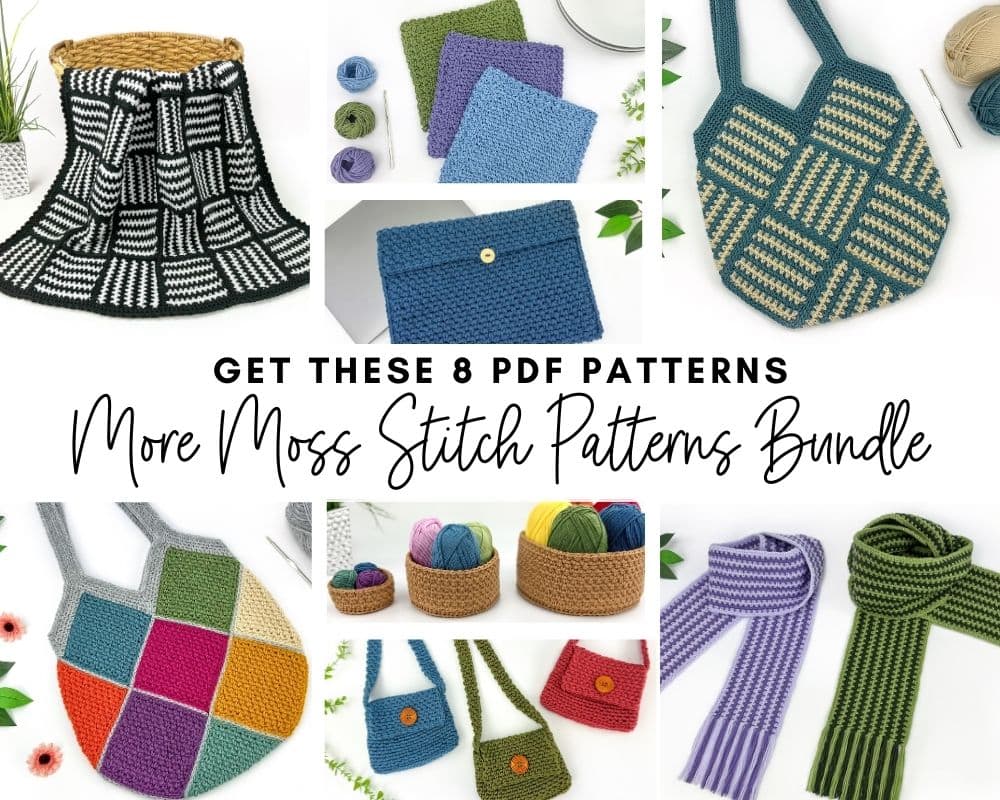
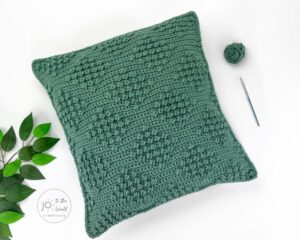
This Colorful Squares Bag Pattern is included in the More Moss Stitch Patterns Bundle! For a limited time, get EIGHT fabulous moss stitch crochet patterns as print-ready, ad-free PDFs for one low price.
Please note: This pattern and all images associated with this pattern cannot be copied, shared, altered or sold on your own. You are welcome to sell the finished product but please include a link (if online) and reference jototheworld.com.
Just a Reminder!
This pattern is also available as a PDF, which includes everything listed here but as a printer-friendly, ad-free PDF that you can instantly download, save, print, make notes on and keep forever.
You can also purchase it on Etsy or Ravelry.
Get this PDF with an All-Access Membership!
Only $0.14 a day!
- Instant Access to 100+ Premium PDF Crochet Patterns
- Make Gifts for Every Occasion!
- Save, Print & Keep Forever
- No Ads or Popups
- Happiness Guaranteed!
Pattern Instructions
1) Make the squares
2) Assemble the squares
3) Join the squares
4) Add the border & strap
Make the Squares
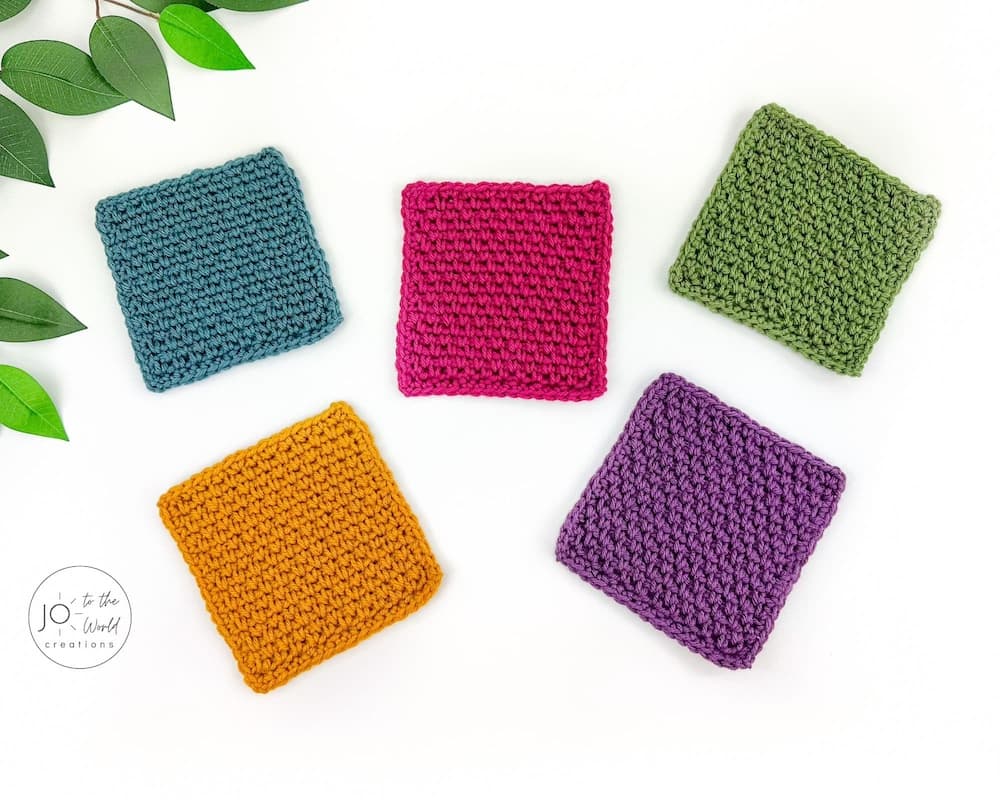
Make 13 squares. All squares are made the same way. You can use any colors. The colors I used are below with the yarn’s color names in quotations.
For the front and back, I made:
- 2 in blue (“Misty Blue”)
- 2 in green (“Forest”)
- 2 in fuchsia (“Rich Orchid”)
- 2 in purple (“Violet”)
- 2 in gold (“Gold”)
For the sides, I made:
- 1 in orange (“Pumpkin”)
- 1 in beige (“Heather”)
For the bottom, I made:
- 1 in teal (“Green Lagoon”)
Square Instructions
Start: Ch 22.
For Row 1 (only) work into the back ridge loops.
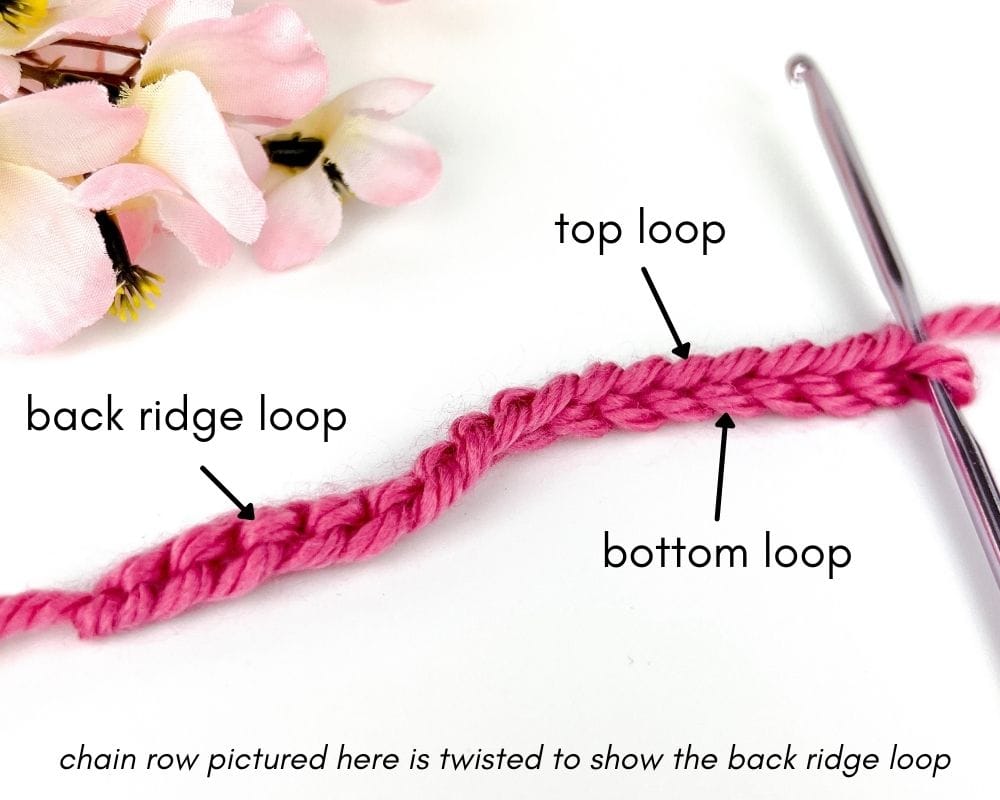
Row 1 (RS): In the second ch from hook, sl st VERY loosely. Sl st VERY loosely in each ch across. (21 sts).
(Work normally into both top loops from now on).
Row 2 (WS): Ch 2 and turn.
In the first st (the st attached to the ch), sc.
(Note: the sp between the starting chs and the sc creates a ch-2 sp that you will work into on the next row).
*Ch 1. Sk the next st. In the next st, sc.*
(Note: every time you ch 1 and sk a st, this creates a ch-1 sp that you will work into on the next row).
Repeat from * to * across.
Your final st is a sc in the last sl st of the row.
(11 sc sts, 1 ch-2 sp and 10 ch-1 sps created).
Row 3 (RS): Ch 2 and turn.
In the first ch-1 sp from the previous row, sc (this creates a new ch-2 sp).
*Ch 1. In the next ch-1 sp from the previous row, sc (new ch-1 sp created).*
Repeat from * to * until the ch-2 sp at the end.
Ch 1. In the ch-2 sp (the sp between the 2 starting chs and the last sc from the previous row), sc.
(11 sc sts, 1 ch-2 sp and 10 ch-1 sps created).
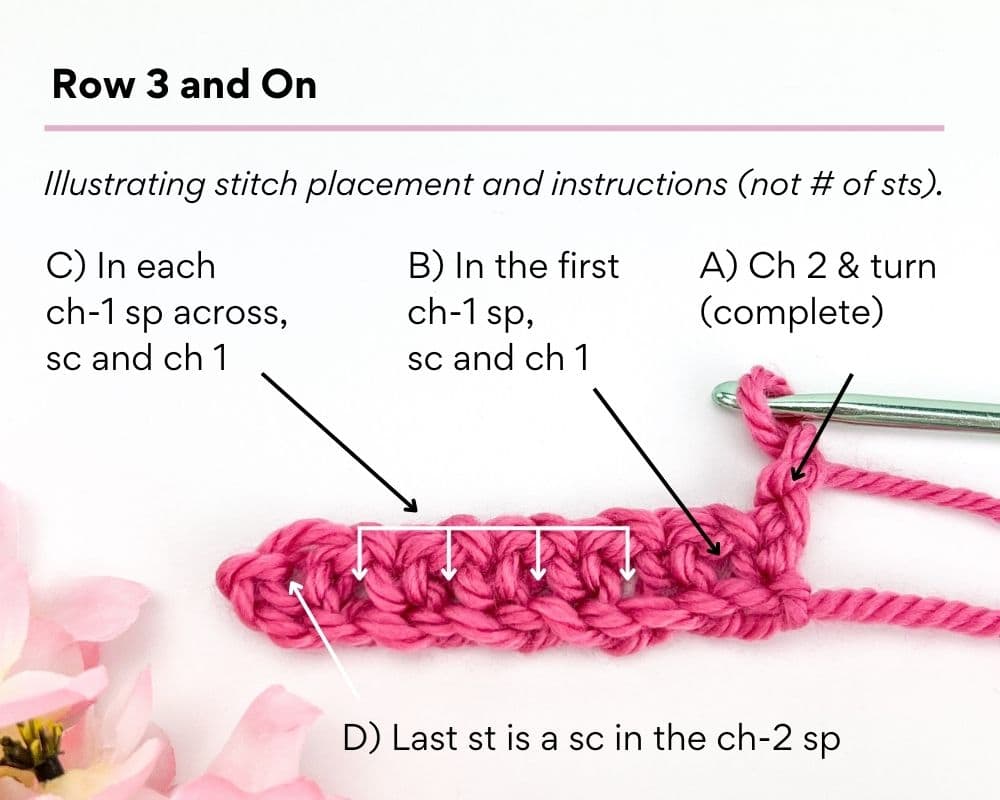
Row 4 – 18: Repeat Row 3. After completing Row 18, do not fasten off.
Measurements:
After Row 6 = 5” w x 1.75” h
After Row 10 = 5” w x 2.75” h
After Row 14 = 5” w x 3.75” h
After Row 18 = 5” w x 4.75” h
After the Border = 5.25” w x 5.25” h (7” diagonally) – due to st placement, the height increases more than the width.
Note about measurements: you need your finished square’s width to be the same as its height. It’s okay if your work is not the same size as the measurements above but it does need to be a square. All of your squares need to be the same size.
How to Adjust the Size of the Square:
To adjust the width, make more or less starting chains in multiples of 2 (an even number). To adjust the height, make more or less rows. Ensure you end after completing a WS row.
If you are adjusting the size of the square, you will also need to adjust the border. When making the border, ensure you have the same number of single crochet stitches on the top, left side and bottom. On the right side of the border, ensure you have one less single crochet stitch than the other three sides. The invisible join that completes the square counts as a stitch, so having one less stitch on the last/right side will ensure you have an equal number of stitches on each side.
Square Border Instructions
Turn. Do not make any chains. The RS will now be facing you.
Top: In the first ch-1 sp, make (sc, ch 2, sc) (first corner made). *In the next ch-1 sp, sc. In the next ch-1 sp, make 2 sc.* Repeat from * to * across until there are 2 sps left (there will be 1 ch-1 sp and 1 ch-2 sp left). In the next sp (the last ch-1 sp), sc. In the last sp (the ch-2 sp), make (sc, ch 2, sc) (second corner made). (13 sc sts made in between the two corners).
Side – Down: Sk the first row. Sc in the end of the next 4 rows. Note: at the end of each row, you can work into one loop or two loops or into the sp around the st. *Sk the end of the next row. Sc in the end of the next 3 rows.* Repeat from * to * until the last row. Sk the last row. (13 sc sts made).
Bottom: In the first ch along the bottom, make (sc, ch 2, sc) (third corner made). In the next ch, sc. *Sk the next ch. Sc in the next 2 chs.* Repeat from * to * across the bottom until there is 1 ch left. In the last ch, make (sc, ch 2, sc) (fourth corner made). (13 sc sts made in between the two corners).
Side – Up: Sk the end of the first row. Sc in the end of the next 4 rows. *Sk the end of the next row. Sc in the end of the next 3 rows.* Repeat from * to * until there are 5 rows left. Sk the end of the next row. Sc in the end of the next 2 rows. Sk the last 2 rows. (12 sc sts made).

Use the Invisible Join Technique to join. This technique resembles a stitch so you will have the same number of stitches on each side of the square.
Invisible Join Technique:
- After finishing the last stitch in the round, cut the yarn that’s attached to the skein, leaving an 8” long tail.
- Pull the tail through your last stitch (don’t worry, your work won’t come undone).
- Put the tail in the eye of your yarn needle.
- Insert your yarn needle into both loops of the top of the first stitch made in the round and pull your tail through.
- Next, you’ll be working into the last stitch made in the round. Insert your yarn needle from top to bottom through the back loop of the last stitch. Insert your needle into the horizontal line on the back of that stitch (the small line that is parallel to the back loop). Pull the tail through both the back loop and the horizontal line on the back of the stitch. Be careful not to pull too tightly.
- The tail has now created two lines that connect the first and last stitches and it resembles a stitch.
- Still with your yarn needle, weave the tail into stitches on the back of your work, being careful not to pull too tightly. Once the tail is secure and hidden, cut any remaining yarn.
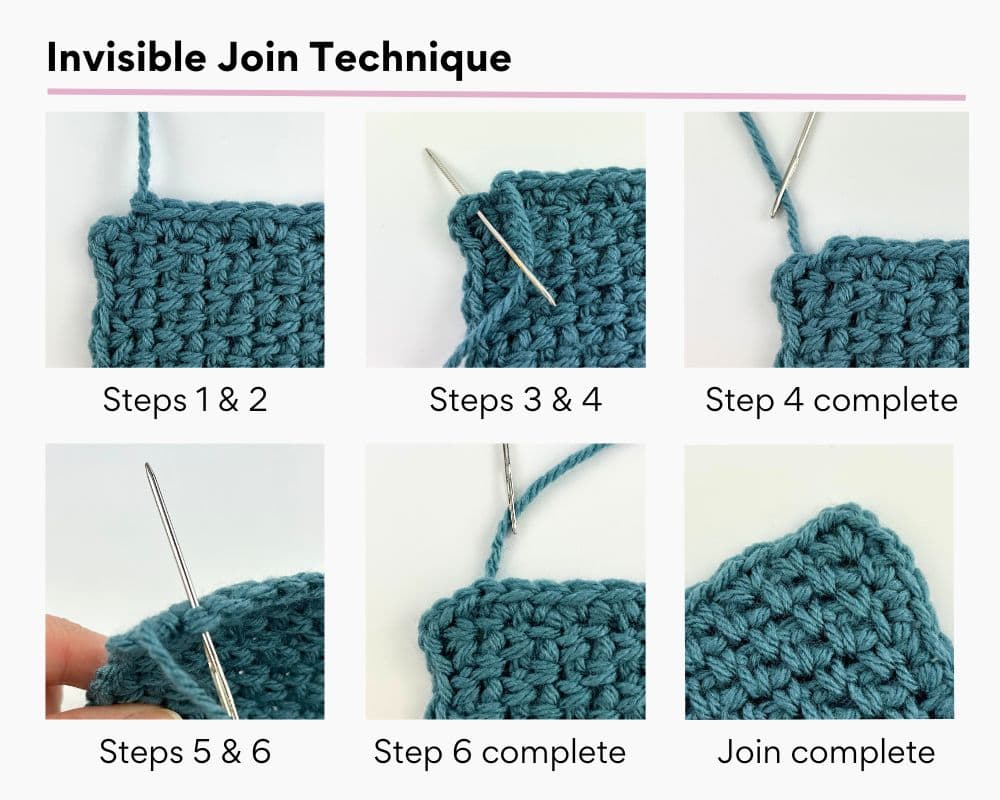
Weave in all other loose ends.
Should you block your squares before joining?
Blocking is a personal preference. You are welcome to block your squares before joining or after finishing the bag (or not at all). I personally did not block my squares before joining. I found the flat slip stitch joining technique helped straighten out the squares.
Assemble the Squares
Assembly – Front of Bag
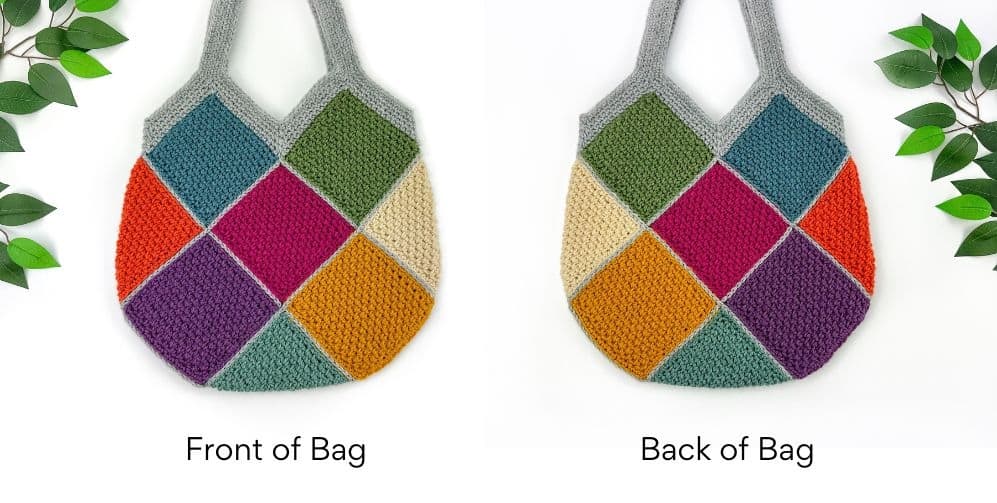
Five Front Squares: Place the five squares you want for the front of the bag as shown in the image below. The wrong side (the back) of each square should be facing up. Ensure the squares are all placed in the same direction, with the bottom (the chain row) of each square pointing towards the bottom right and the top (the final row) of each square pointing towards the top left.

Sides: Place the two squares you want for the sides with the wrong sides (the backs) facing up. (Remember we are assembling the front and once the bag is flipped over, the square you place on the right side will be on the left side and vice versa). The bottom (the chain row) of each square should be facing towards the bottom right and the top (the final row) should be facing towards the top left.
Bottom: Place the square for the bottom with the wrong side (the back) facing up. The bottom (the chain row) of the square should be facing towards the bottom right and the top (the final row) should be facing towards the top left. Note: the bottom square will look slightly different on the back and front (it’s going in the same direction on the front but will be reversed on the back).

Tie/Hold Together: Using stitch markers or any yarn/string, secure the squares together (this is just temporary until you join them). For each corner of the middle square, secure all the squares attached (place markers or weave your yarn with a yarn needle through each square’s ch-2 sp).

Fold: Fold the side squares and the bottom square in half.

Assembly – Back of Bag
Five Back Squares: Place the five squares you want for the back of the bag on top of the squares for the front as shown in the image below. The right side (the front) of each square should be facing up. Ensure the squares are all placed in the same direction, with the bottom (the chain row) of each square pointing towards the bottom left and the top (the final row) of each square pointing towards the top right.

Tie/Hold Together: Using stitch markers or any yarn/string, secure the squares on the back together (same as you did for the front).

Optional: secure any other squares/corners.
Assembly – Mark the Front
Mark the Front: Flip the bag over so the front of the bag is facing you. Place a stitch marker in the top left square to identify which side is the front.

Helpful Video Tutorial
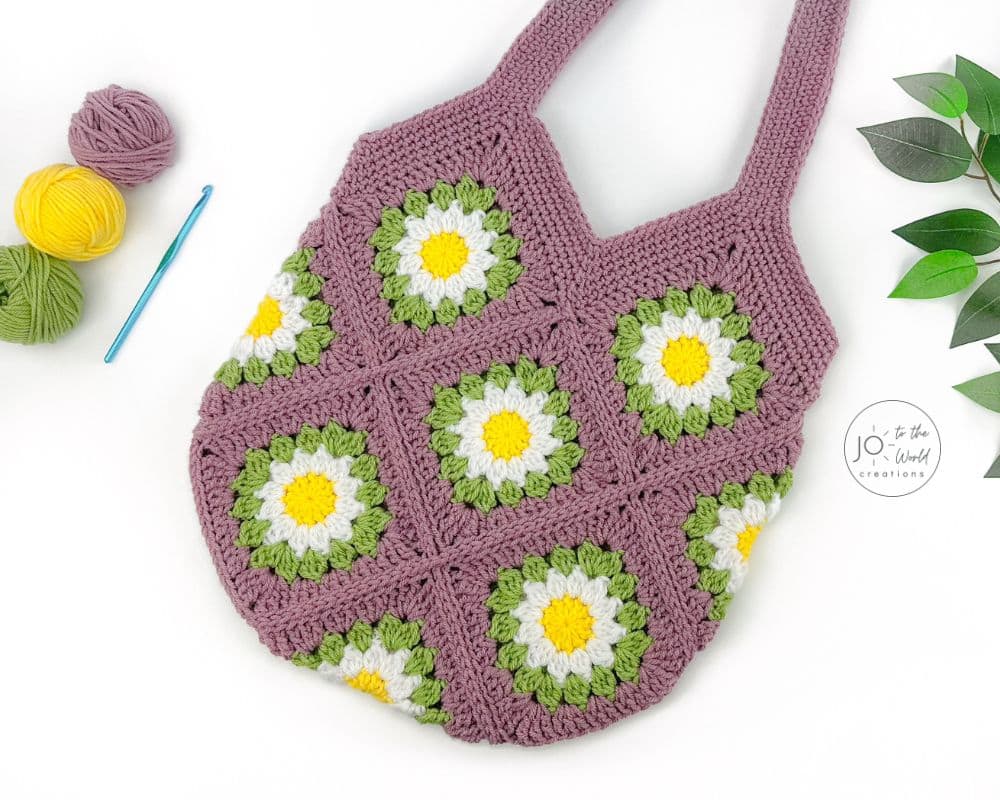
While there isn’t a video tutorial for this bag, from this point in the pattern, you can refer to my video tutorial for my Flower Granny Square Bag starting at 29:49. That video tutorial has similar instructions for joining and adding the border & strap that you may find helpful.
Join the Squares
Joining Notes
- The squares are joined using the flat slip stitch joining technique, which is a quick way to create a flat, polished-looking seam that securely holds the squares in place.
- Use an H/8 (5.00 mm) hook.
- Use the same color for joining as you will for the strap and bag border. I used the color “Pale Gray.” You will need approx. 23 yds of yarn for joining.
- As you approach the corners where your squares are secured, remove the stitch markers or yarn/string and replace them after working on them (until joining holds the squares in place without them).
- You will always be working on joining the sides of two squares at once.
- Both squares should be in front of you, lying flat, with the right side (the front) of each square facing up.
- Your working yarn should always be in between the two squares and under the loops on your hook.
- When the instructions say to join Squares “Z” and “Y,” the first square listed (in this example, Square Z) should be on your right and the second square listed (in this example, Square Y) should be on your left.

- Don’t make your stitches too tight (this is very important!). If necessary, go up a hook size.
- Always work into the corresponding stitch on each square (for example, join the third stitch of the square on your right to the third stitch of the square on your left).
- You will always be working into the outer loops only. The outer loop is the loop furthest away from the inside of the square.

- Treat the invisible join as a stitch and work into the outer loop as you would any other stitch.
How to Make a Flat Slip Stitch
Step 1: Starting with the square on your right, insert your hook into the outer loop of the designated stitch. Note: insert your hook into the stitch from right to left so the hook comes out of the stitch in between the two squares. You will have two loops on your hook.
Step 2: Next, work into the square on your left. Insert your hook into the outer loop of the designated stitch. Note: insert your hook into the stitch from the left to the right so the hook comes out of the stitch in between the two squares. You will have three loops on your hook.
Step 3: Note: ensure your working yarn is in between your two squares and under the loops on your hook. Yarn over and pull the yarn through all three loops on your hook.
Your flat slip stitch has now been made.

Joining the next two squares:
After joining the sides of the first two squares, you will join the next two squares. Nothing special happens. You will follow the steps above for the next two squares.
Joining – Columns & Bottom
Instructions for each column and bottom:
- Always start joining the sides of squares by working in the second of two chain stitches (leave the first of two chain stitches unworked).
- Work into each corresponding stitch until the next two chain stitches.
- Always finish joining the sides of the squares by working into the first of two chain stitches (leave the second of two chain stitches unworked).
Column 1:
Make a slip knot and place it on your hook.
- Join Squares F and H (on the back).
- Join Squares L and I (on the back).
- Don’t fasten off. Continue working on the same column but now along the front.
- Join Squares L and E (on the front).
- Join Squares B and C (on the front).
Fasten off.

Column 2:
Make a slip knot and place it on your hook.
- Join Squares G and K (on the back).
- Join Squares H and J (on the back).
- Join Squares I and M (on the back).
- Don’t fasten off. Continue working on the same column but now along the front.
- Join Squares E and M (on the front).
- Join Squares C and D (on the front).
- Join Squares A and K (on the front).
Fasten off.

Bottom 1:
Make a slip knot and place it on your hook.
- Join Squares D and J (on the bottom).
Fasten off.
Bottom 2:
Make a slip knot and place it on your hook.
- Join Squares E and I (on the bottom).
Fasten off.

Joining – Rows
Instructions for each row:
- The instructions indicate if, at the start, you should work in both of the first two chain stitches or just the second. When working in both, the first has already been worked in but work into it again.
- “Work over columns” means to ignore the column’s join lines. Your row’s stitches will be overtop of the columns.
- After the start, always work into each corresponding stitch until the next two chain stitches.
- Always finish joining the sides of squares by working into the first of two chain stitches (leave the second of two chain stitches unworked).
Row 1:
Make a slip knot and place it on your hook.
- Join Squares H and G (on the back) – At start: work in the second of 2 ch sts.
- Join Squares J and K (on the back) – At start: work over column and in both ch sts.
- Don’t fasten off. Continue working on the same row but now along the front.
- Join Squares D and K (on the front) – At start: work in the second of 2 ch sts.
- Join Squares C and A (on the front) – At start: work over column and in both ch sts.
Fasten off.

Row 2:
Make a slip knot and place it on your hook.
- Join Squares L and F (on the back) – At start: work only in the second of 2 ch sts.
- Join Squares I and H (on the back) – At start: work over column and in both ch sts.
- Join Squares M and J (on the back) – At start: work over column and in both ch sts.
- Do not fasten off. Continue working on the same row but now along the front.
- Join Squares M and D (on the front) – At start: work in the second of 2 ch sts.
- Join Squares E and C (on the front) – At start: work over column and in both ch sts.
- Join Squares L and B (on the front) – At start: work over column and in both ch sts.
Fasten off.

Do not weave in ends (the ends/tails can be used to fix any gaps between the join lines and bag border).
Add the Border & Strap
Bag Border & Strap Notes
- This section of the pattern is made in a continuous round. At the start of a round, never turn and never make any chains. You will use a stitch marker to identify the first stitch of the round.
- Use the same color yarn and hook size that you did for joining. You will need approx. 112 yds of yarn for the border and strap.
- You can move the stitch marker that identifies the front but keep it somewhere on the front of the bag for the remainder of the pattern.
- You can use the ends/tails to fix any gaps.
- A “peak” is the top of a square. A “valley” is the “V” between two squares.

Strap Sizing
In Round 2, you will make a number of chains that will create the strap. The pattern says to chain 80, which creates a strap that is approx. 24” long and is approx. 11” away from the peak of the bag (13” away from the valley).
You can adjust the size of the strap by making any number of chains (there’s no specific multiple required).
Special Stitches
Special sc3tog = Insert hook in the first ch-2 sp. Don’t yarn over. Insert hook in the middle ch-2 sp. Don’t yarn over. Insert hook in the last ch-2 sp. Yarn over and pull the yarn through all three ch-2 sps (two loops on your hook). Yarn over and pull the yarn through the two loops on your hook.
Invisible sc3tog = Insert hook in the FLO (the front loop only, which is the loop closest to you) of the next st. Don’t yarn over. Insert hook into the FLO of the next st. Don’t yarn over. Insert hook in the FLO of the next st. Yarn over and pull the yarn through all three sts (two loops on your hook). Yarn over and pull the yarn through the two loops on your hook.
Waistcoat sc st = Insert hook in the middle of the “V” of each sc st (in between the two legs of each post). Then complete the sc st as you normally would: yarn over and pull the yarn through the st (two loops on your hook). Yarn over and pull the yarn through the two loops on your hook).
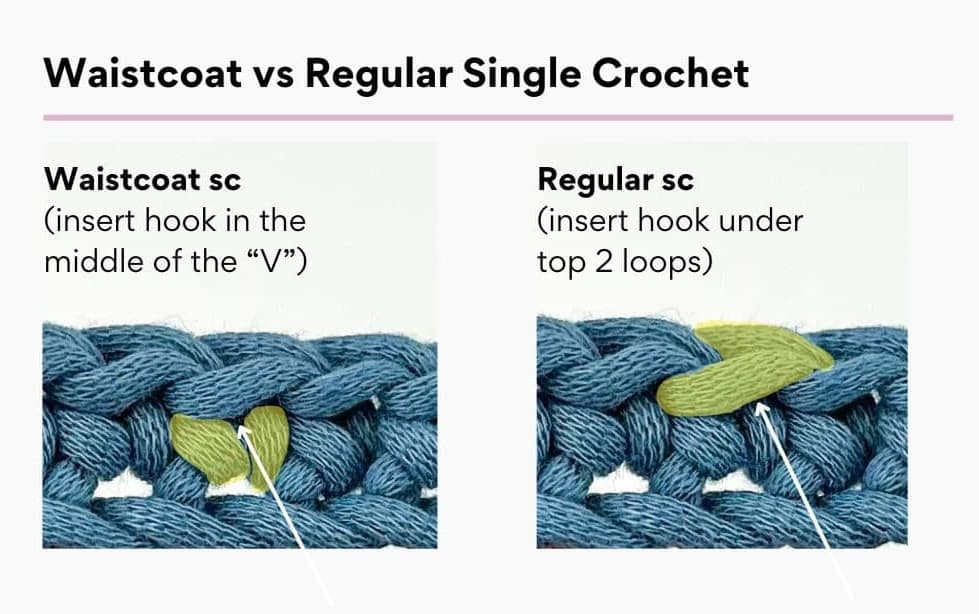
Making waistcoat sc sts for the strap will help stop the strap from stretching and curling.
Bag Border & Strap Instructions
You will attach your yarn on the front of the bag, in the top right square (near where it’s joined with the side square) in the first top st to the left of the 2 ch sts (see image below).

For this round, do not work into any ch sts (only into ch-2 sps and into the tops of sc sts).
Round 1:
Attach yarn with a sl st. Sc in the same st. Place a stitch marker in the top of that first sc st.
Sc in each st until the first peak.
At the first peak, in the ch-2 sp, make 3 sc in the same sp.
Sc in each st until the first valley.
At the valley, make a special sc3tog (see Special Stitches in the Add Border & Strap section above) over the 3 ch-2 sps.
*Sc in each st until the next peak.
At the peak, in the ch-2 sp, make 3 sc in the same sp.
Sc in each st until the next valley.
At the valley, make a special sc3tog over the 3 ch-2 sps.*
Repeat from * to * around until back at the first st made in the round.
Sc in the top of the first st made (the st with the stitch marker. Remove marker).

Round 2:
(Reminder: Don’t turn or make any chains).
Sc in the next st. Place a stitch marker in that first st.
*Sc in each st until the peak (the 3 sc made in the ch-2 sp from the previous round).
At the peak, sc in the next 2 sts (the first and second of 3 sc sts made in the ch-2 sp from the previous round).
Ch 80 (or your desired number of chains for the strap).
Ensure the ch sts are not twisted and attach the strap (the ch sts) to the top of the next square (see image below) by making a sc in the third of 3 sc sts made in the ch-2 sp from the previous round.
Sc in each st until the valley (the 3 sts closest to the valley).
At the valley, make an invisible sc3tog (see Special Stitches in the Add Border & Strap section above) over the 3 valley sts.*
Repeat from * to * around until back at the first st made in the round.
Sc in the top of the first st made (the st with the stitch marker. Remove marker).

Round 3:
Sc in next st. Place a stitch marker in that first st.
*Sc in each st until the strap (the 80 ch sts).
Working into the back ridge loops of each ch, sc VERY loosely in each ch across the strap.
When back at the bag border, sc in each st until the valley (the 3 sts closest to the valley).
At the valley, make an invisible sc3tog over the 3 valley sts.*
Repeat from * to * around until back at the first st made in the round.
Sc in the top of the first st made (the st with the stitch marker. Remove marker).
Round 4:
Sc in the next st. Place a stitch marker in that first st.
*Sc in each st until the strap.
At the strap, make a waistcoat sc st (see Special Stitches in the Add Border & Strap section above) in each st across the strap.
When back at the bag border, return to making regular sc sts.
Sc in each st until the valley (the 3 sts closest to the valley).
At the valley, make an invisible sc3tog over the 3 valley sts.*
Repeat from * to * around until back at the first st made in the round.
Sc in the top of the first st made (the st with the stitch marker. Remove marker).
Round 5: Repeat Round 4.
At the end of Round 5, use the invisible join technique (the same technique used to finish the squares) to finish the round. When using this technique for this section of the pattern, you may want to join the second stitch to the last stitch (instead of the first stitch to the last stitch) to make the join more invisible.
Bag Border & Strap – Front Inside
With the front of the bag facing you, attach yarn under the strap on the right side on the third of 3 sc sts (see image below).

Round 1: Attach yarn with a sl st. Sc in the same st. Place a stitch marker in that first sc st.
Sc in each st until the valley (the 3 sts closest to the valley).
At the valley, make an invisible sc3tog over the 3 valley sts.
Sc in each st until the strap.
Working into both loops of each ch st, sc VERY loosely in each ch across the strap.
When back at the bag border, sc in the next st (the st with the stitch marker. Place the stitch marker in that new st).
Round 2: Sc in each st until the valley.
At the valley, make an invisible sc3tog over the 3 valley sts.
Sc in each st until the strap.
At the strap, make a waistcoat sc st in each st across the strap.
When back at the bag body, make a regular sc in the next st (the st with the stitch marker. Place the stitch marker in that new st).
Round 3: Sc in each st until the valley (the 3 sts closest to the valley).
At the valley, make an invisible sc3tog over the 3 valley sts.
Sc in each st until the strap.
At the strap, make a waistcoat sc st in each st across the strap.
When back at the bag body, make a regular sc in the next st (the st with the stitch marker. Remove marker).
Round 4: Sc in each st until the valley (the 3 sts closest to the valley).
At the valley, make an invisible sc3tog over the 3 valley sts.
Sc in each st until the strap.
Leave the rest of the sts in the round unworked.
Use the invisible join technique to finish the round (which includes fastening off).
Bag Border & Strap – Back Inside
With the back of the bag facing you, attach yarn under the strap on the right side on the third of 3 sc sts (see image below).

Repeat Rounds 1 – 4 for the “Bag Border & Strap – Front Inside” for the back of the bag.
Weave in all loose ends. Use the tails to fix any gaps by sewing them over the gaps.
And now you have a new colorful squares bag!
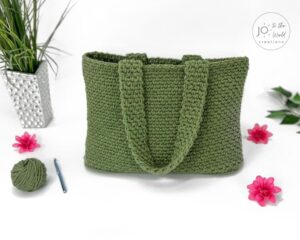
More Crochet Bag Patterns
Find more wonderful bags to crochet in this collection of Crochet Bag Patterns.


I’m Jo, the designer behind Jo to the World Creations, and I’m dedicated to helping you make the perfect crochet gift! I love designing and sharing free crochet patterns that you can make for every gift occasion.
About →Let’s Connect
Download. Print. Keep.
Get Instant Access to ALL Printable Patterns
Make your crocheting more enjoyable, relaxing and productive with printable PDF patterns.
- 100+ premium crochet patterns.
- Download, save and print from any device.
- No ads or popups!
Not sure yet? Take a look at the Pattern Library and see all the patterns you can download once you’re a member.

Save with Pattern Bundles
For a limited time, I’ve grouped some of my most popular crochet patterns and I’m offering them as pattern bundles where you can get the printable versions for one low, discounted price. Check out these incredible Crochet Pattern Bundles.
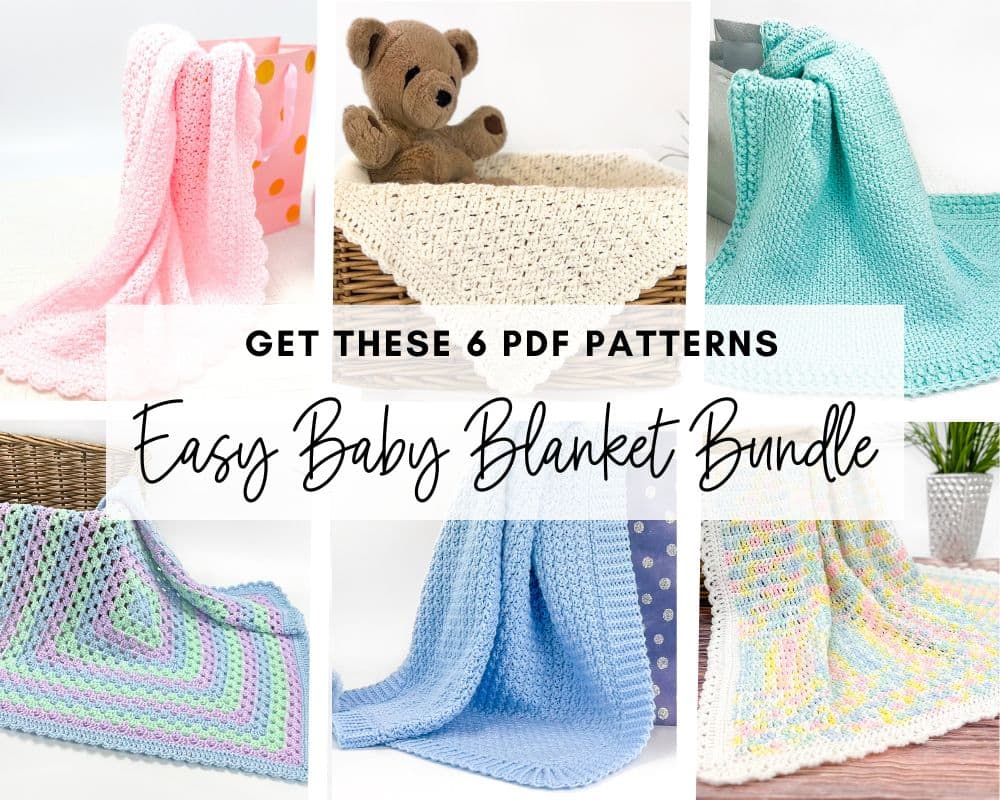
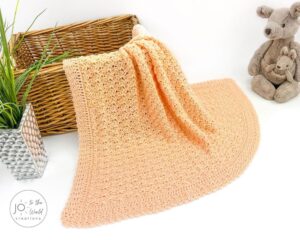
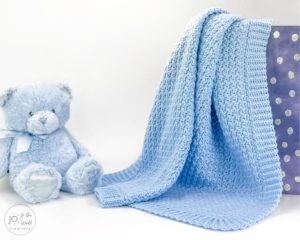
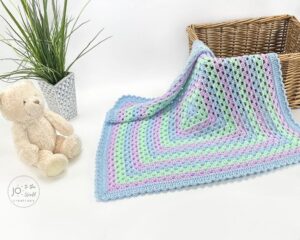
Easy Baby Blanket Bundle
With this Easy Baby Blanket Bundle, you’ll get SIX easy crochet baby blankets as printable downloads. Each pattern includes step-by-step instructions and a full video tutorial.
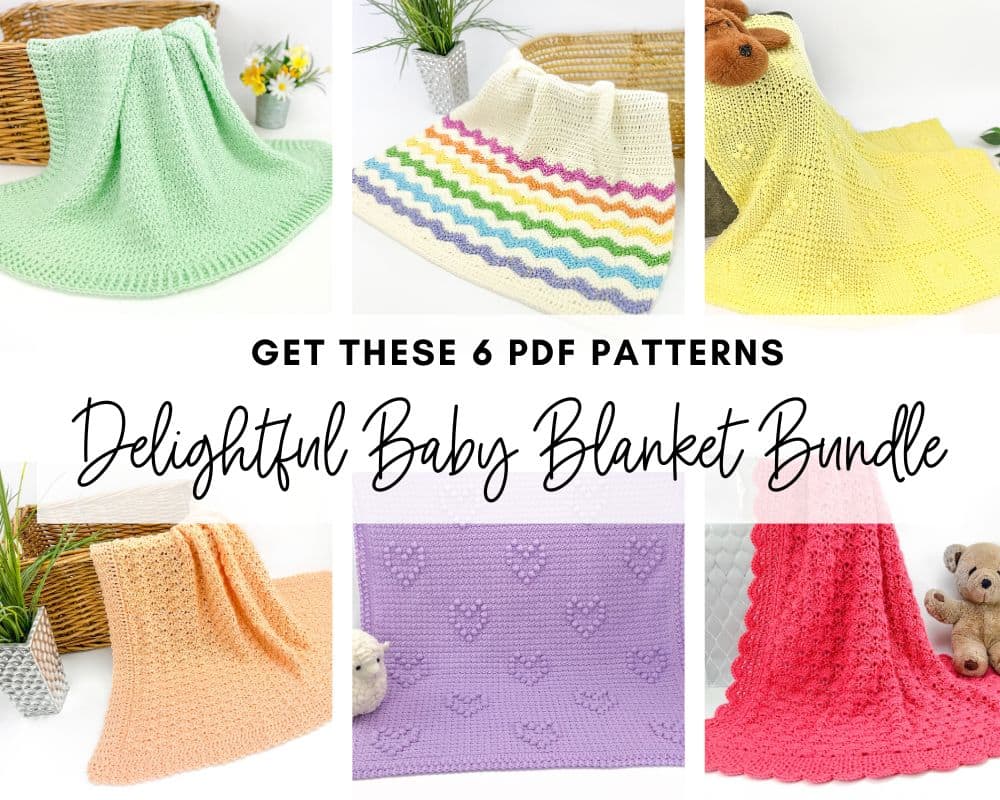
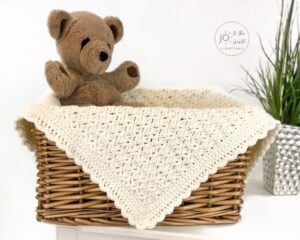
Delightful Baby Blanket Bundle
This incredible deal includes six SIX blanket patterns that are a delight to make and create truly stunning blankets – all as printable PDFs for one low, discounted price.
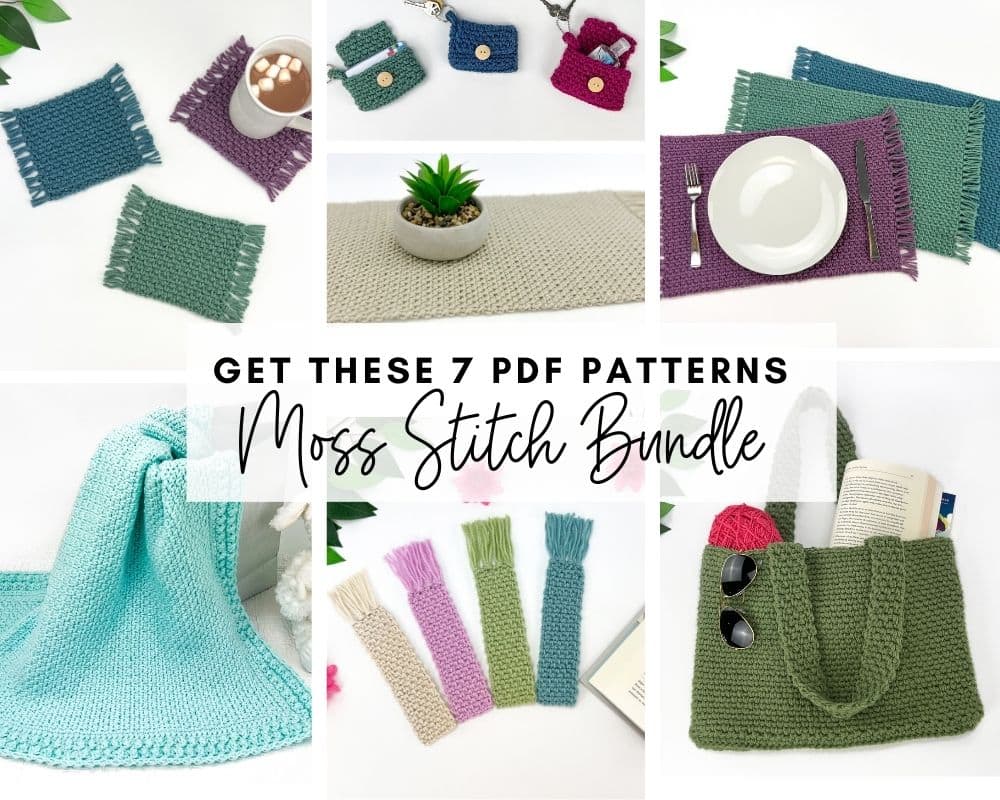
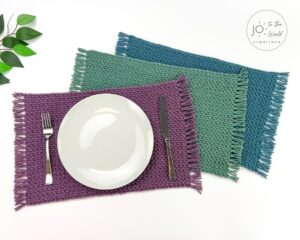
Moss Stitch Pattern Bundle
All your favorite Moss Stitch patterns in one bundle! Get SEVEN easy Moss Stitch crochet patterns as ad-free, print-ready PDFs to print, save and keep forever.
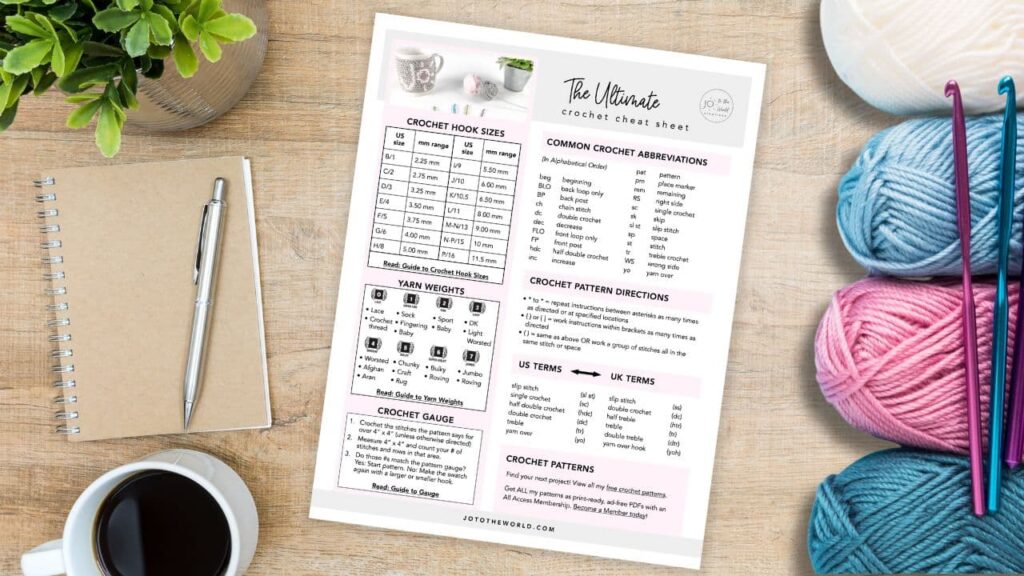
Free Crochet Cheat Sheet
Get instant access to this Ultimate Crochet Cheat Sheet! Plus you’ll receive free patterns for crochet gifts delivered right to your inbox!
Featured Crochet Patterns
Pattern Collections


Free Patterns for Crochet Gifts
Never miss a pattern! Get all my secrets to making incredible crochet gifts as well as new free crochet patterns and exclusive deals when you sign up for my newsletter (it’s free!).