

How to Start a Crochet Chain
Learn how to start a crochet chain to begin crocheting and make a chain stitch with this complete guide and photo tutorial and video tutorial on how to chain (crochet) for beginners.
Before we begin, I would like to thank you for visiting Jo to the World Creations, a site dedicated to helping you give the gift of crochet.
More free patterns (that make awesome crochet gifts) are on the way! Sign up for my emails, follow me and never wonder “What should I make for…” again!
FREE PATTERNS FOR CROCHET GIFTS
Delivered to your inbox
AND GET A FREE PDF OF THE LOVE PILLOW
& A FREE CROCHET CHEAT SHEET
Unsubscribe at any time.
Delivered Socially
Follow Me on

What is a Crochet Chain?
Almost every crochet pattern and project begins with a foundation row made up of chains. These chain stitches (also called starting chains) are then worked into on the following row (Row 1).
There are more advanced ways to begin a crochet pattern but as a beginner, it is a essential to know how to make starting chains and especially how to begin the row of crochet chains.
As well as forming the foundation row, chain stitches also help us “move up” to the next row or round in crochet. Chains are frequently used in a variety of crochet stitches. It’s important for beginners to learn how to make a chain so you can make a foundation row, start or end a row and make a chain stitch whenever the pattern calls for it.
How to Start a Crochet Chain
In a crochet pattern, the instructions usually begin with “chain X” with X being a number. You may also see the instructions as “ch X” because “ch” is the abbreviation for chain. What this means is that you need to make X number of starting chains.
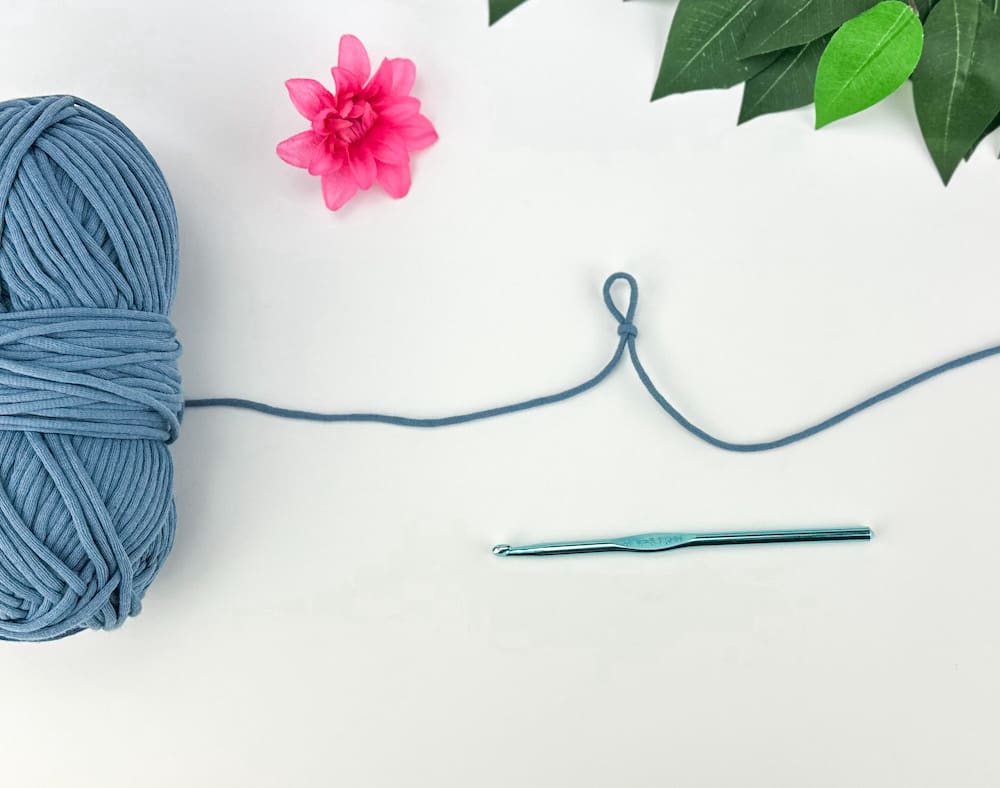
Before you can get to making those starting chains, you need to make a slip knot. Making a slip knot is how to start a crochet chain. It can be confusing and frustrating for beginners learning how to crochet because making a slip knot is often left out of the instructions.
Making a slip knot to start a crochet chain is left out of instructions as it is one of those “must know” elements of crochet. As you become more experienced with crochet, you’ll understand that unless the pattern indicates otherwise, you always start your row of starting chains with a slip knot.
It’s important to note that once a slip knot is made, it does not count as a stitch. If you have experience knitting, you’ll recall that in knitting, the slip knot does count as the first stitch. In crochet, the slip knot does not count as a stitch. When you make your first chain, you will count that first chain as your first stitch.
Starting a Crochet Chain with a Slip Knot
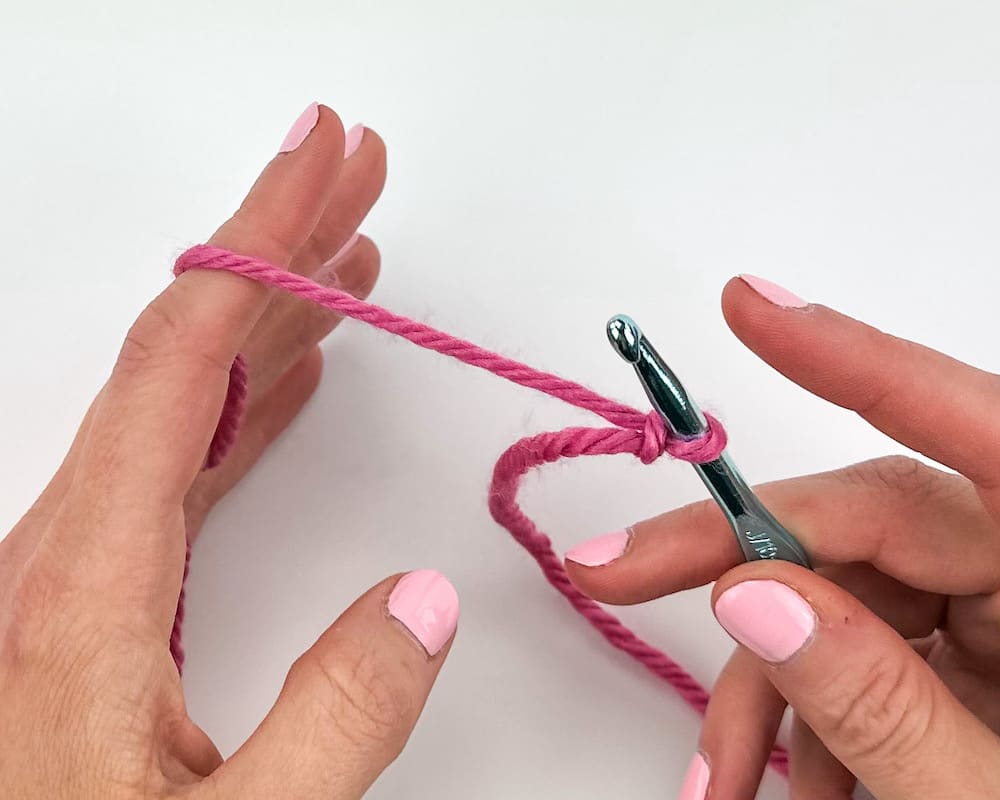
There are a number of ways to make a slip knot and you can choose which method works best for you. Once your slip knot is made, you will place it on your hook and tighten it up. Then you can begin making starting chains.
Let’s go through one basic way to make a slip knot to start a crochet chain.
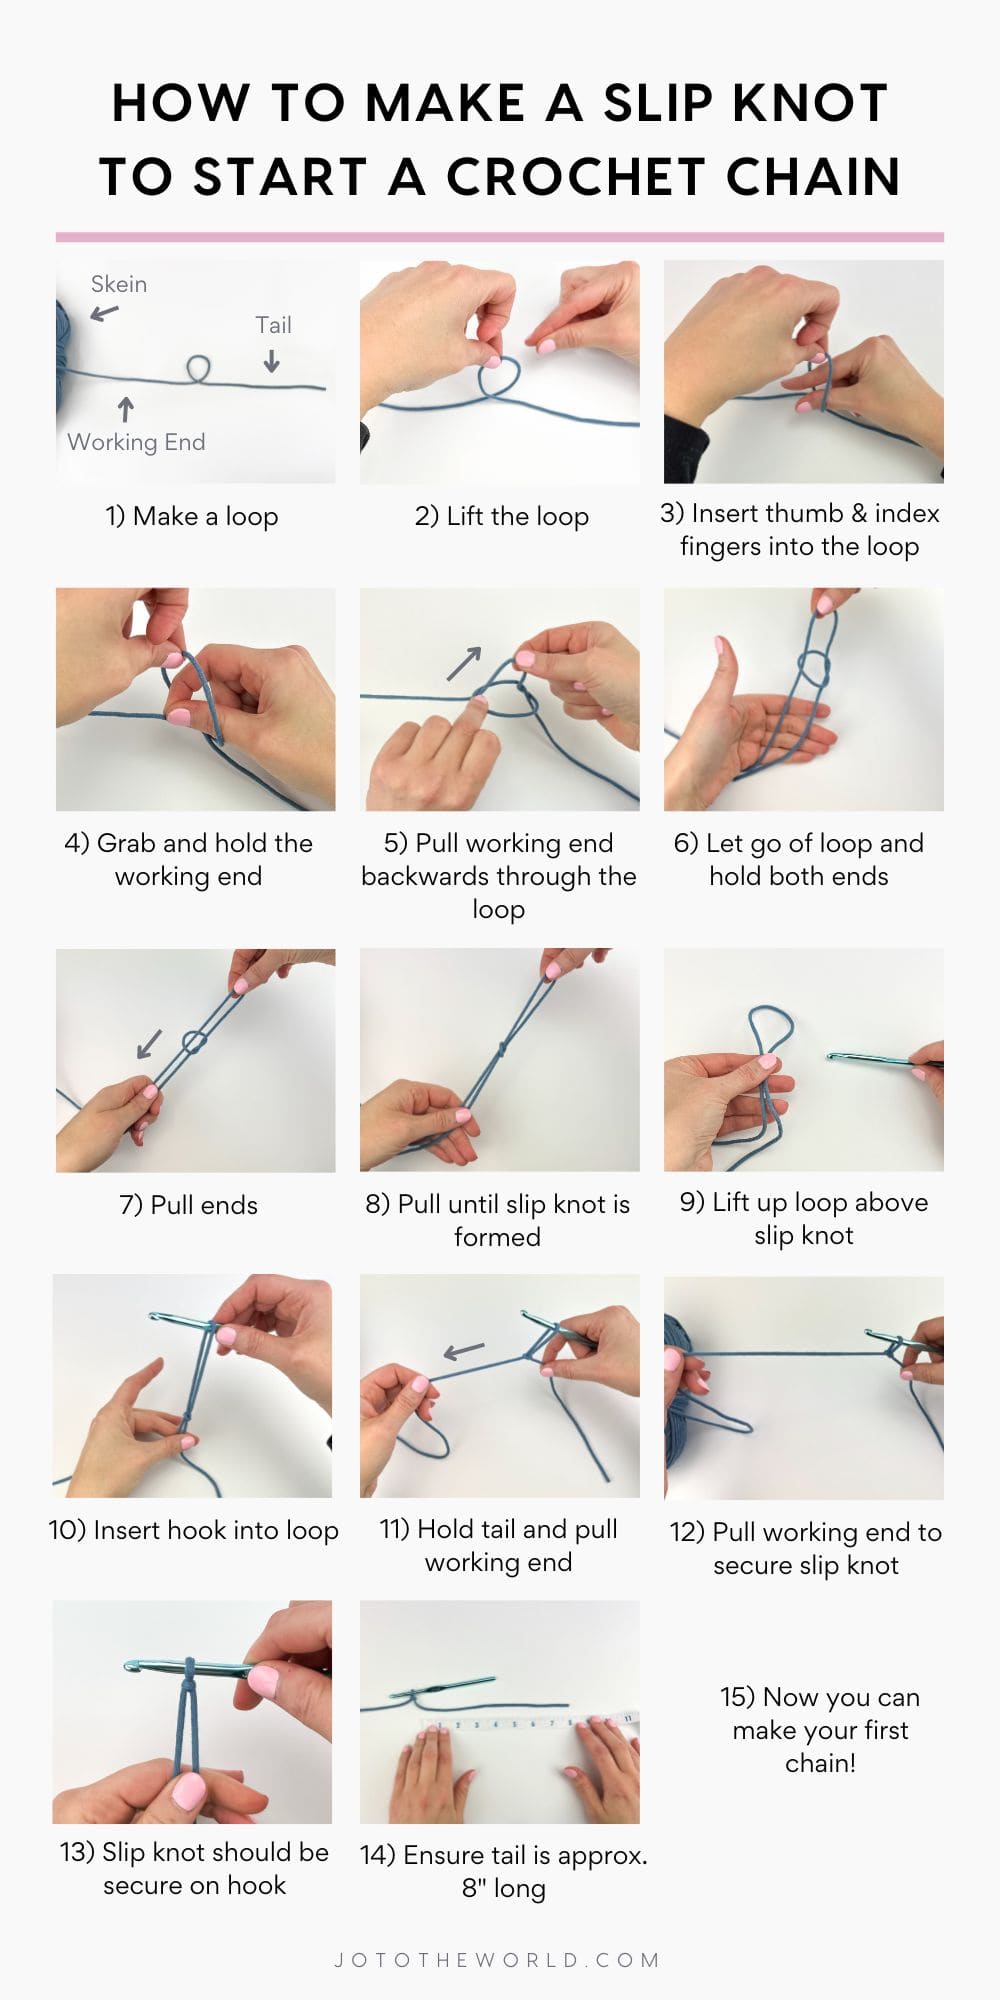
- Place your skein (ball of yarn) on the left side. Take a strand of yarn and make a loop. Note that the part of the strand closest to the end is called the tail and the part of the strand that is closest to the skein is the working end. When you make a loop, the tail end is overtop of the working end of yarn.
- With your left hand, lift the loop.
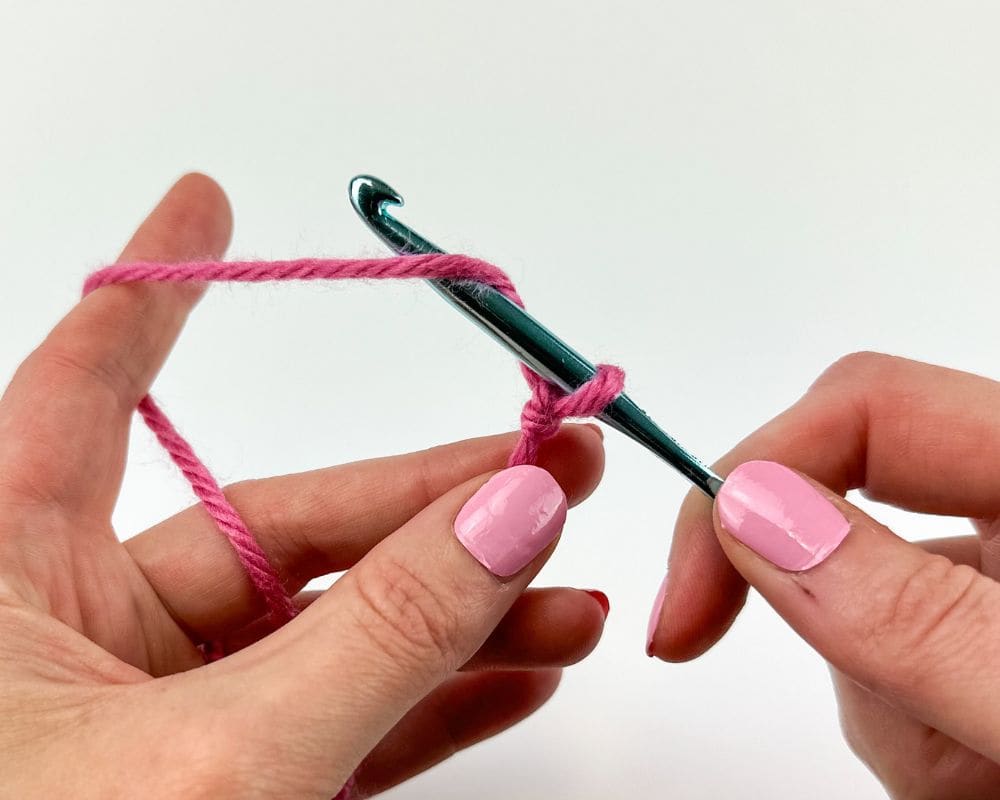
- Insert your right hand’s thumb and index finger from back to front into the loop.
- While still holding the loop with your left hand, use your thumb and index finger to grab and hold the working end of yarn (do not let go until instructed to).
- Pull the working end backwards through the loop.
- Your left hand can now let go of the loop. Use your left hand to gather and hold the working end and the tail.
- With your left hand, pull the working end and the tail to form the slip knot.
- Pull until the slip knot is formed.
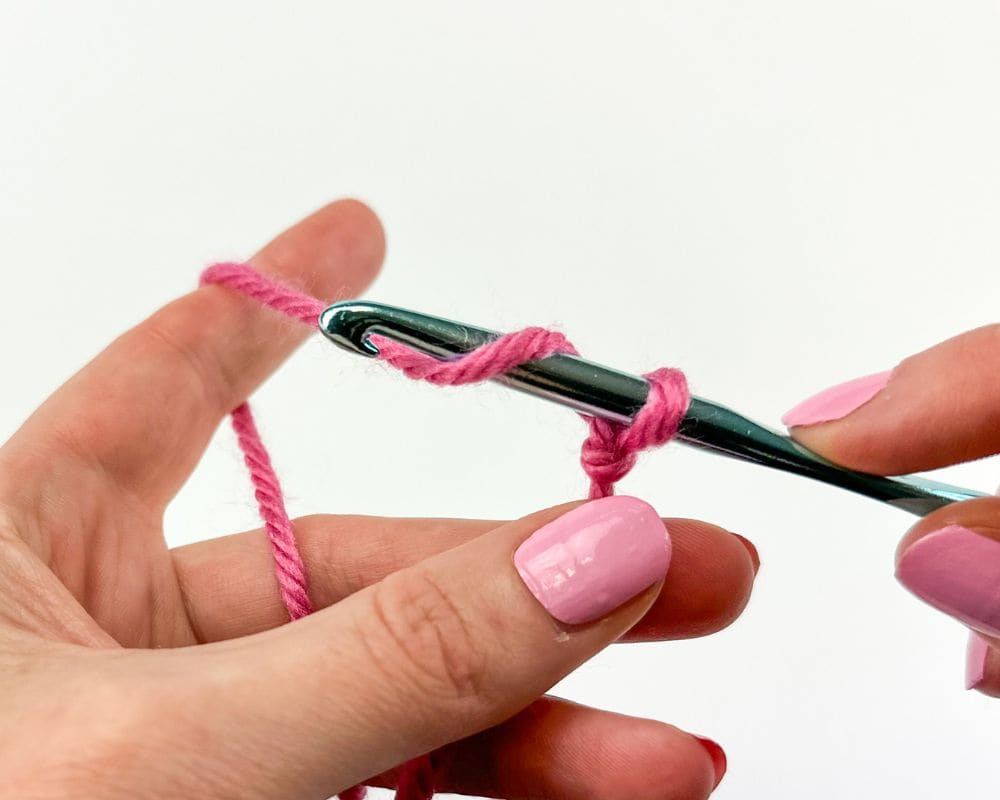
- Both hands can now let go. With your left hand pick up the loop above slip knot. With your right hand, pick up your crochet hook.
- Insert your crochet hook from back to front into the loop above the slip knot.
- With your right hand, hold the tail. With your left hand, pull the working end.
- Pull the working end to secure the slip knot onto the hook.
- The slip knot should be secure on the hook but not too tight (it should be able to move around the hook).
- Ensure that the tail is approx. 8″ long. – Leaving a tail/end is important because at the end of the project, you will weave in this tail to your work using a yarn needle so that it is hidden within your stitches. If you don’t leave a large enough tail, it will be very difficult to put onto a yarn needle and sew into our project. If you ask 100 crocheters, each will tell you a different length of yarn to leave on your tail. As a beginner, an 8″ tail will you give you lots of yarn to work with. Also, it gives you some leeway that if your tail is shorter by a couple of inches, that’s okay.
- With your slip knot on your hook, you can now make your first chain!
Want to learn more ways to make a slip knot? Learn 3 different methods to make a slip knot with this photo & video tutorial on How to Make a Slip Knot in Crochet – 4 Easy Ways.
Making a Starting Chain in Crochet
With your slip knot now securely on your hook, you can now make your first chain.
Before we make a chain, let’s familiarize ourselves with the different parts of the hook:
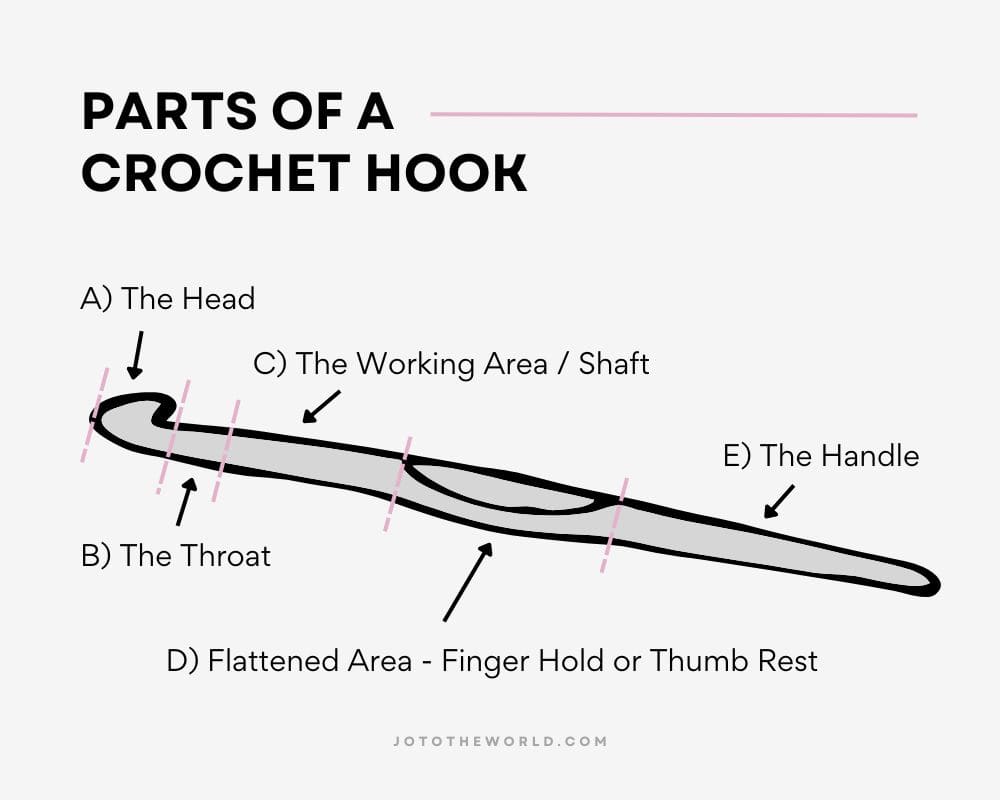
A crochet hook is made up of 5 parts:
- The Head – the tip of the hook that you will insert into stitches.
- The Throat – what catches the yarn and guides it onto the working area/shaft.
- The Working Area / Shaft – holds the loops you are working on. The shaft is also where the crochet hook is measured and determines the size of your stitches.
- Flattened Area – the place you can put your finger or thumb depending on how you grip your hook.
- The Handle – is the bottom part of the hook and controls the overall movement of the hook.
These parts of the hook are referenced in the step by step guide to making a chain below.
Make a Foundation Chain Step-by-Step
Let’s go through how to make a foundation chain (row of starting chains) in more detail:
Get into starting position. You should be holding your hook in your dominant hand and the yarn in your non-dominant hand. You can read more about How to Hold a Crochet Hook and How to Hold Yarn When Crocheting.
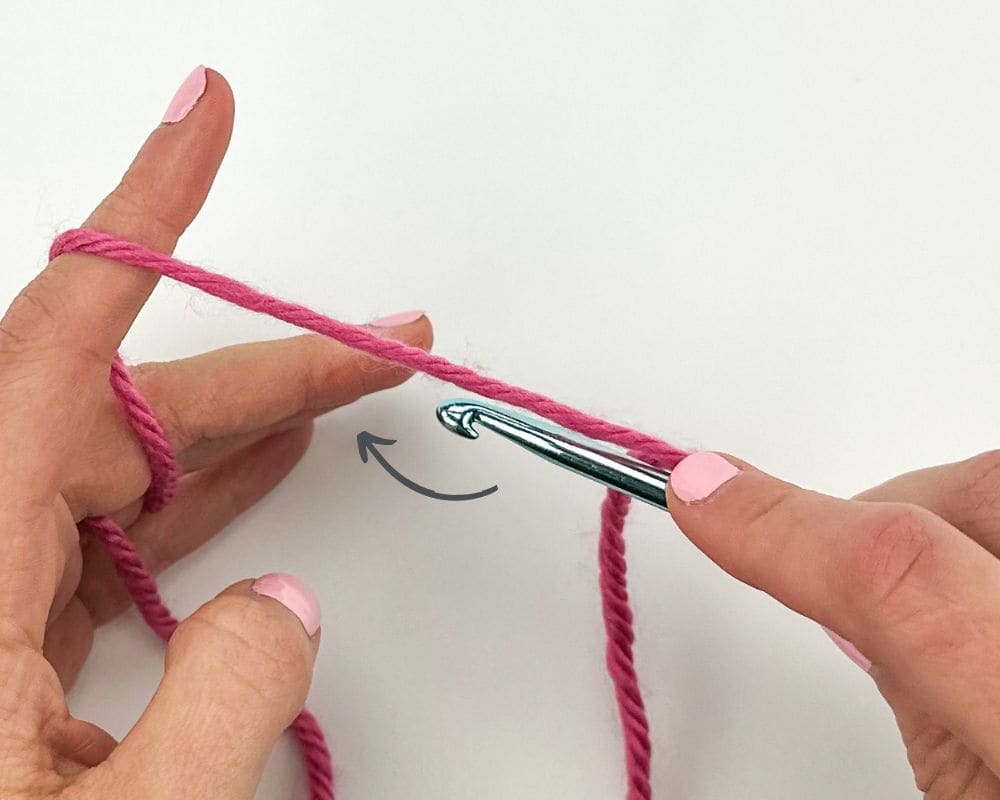
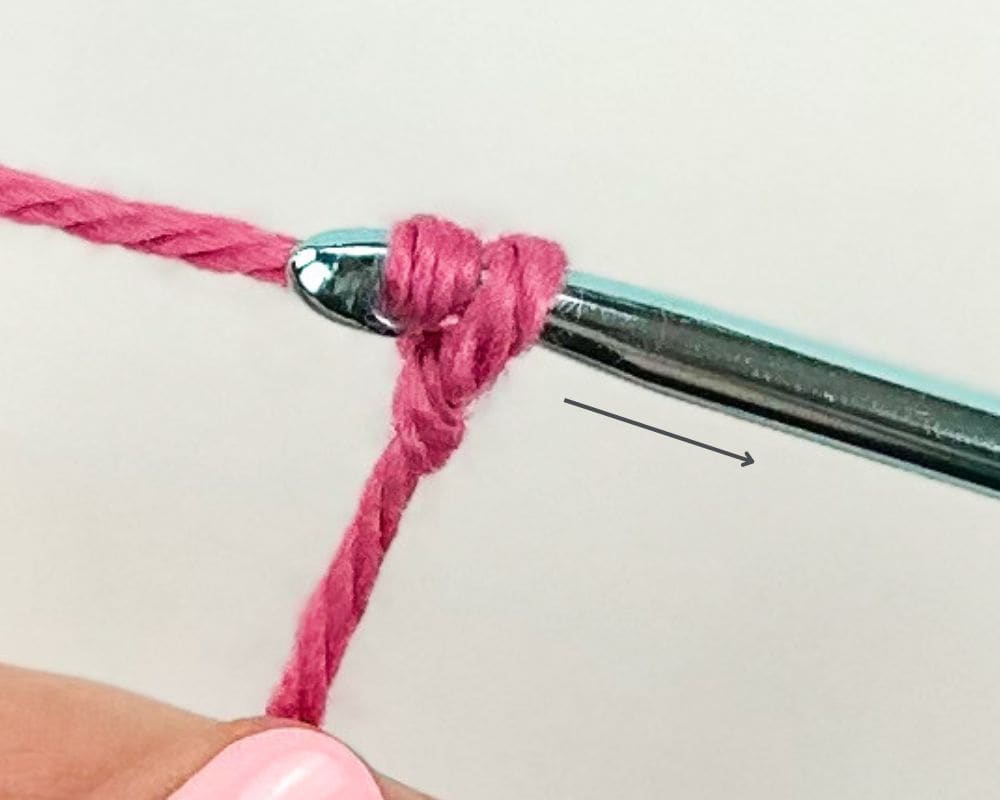
- Move the hook underneath your yarn. This is called yarn over (abbreviated as “yo”) as the yarn is over your hook.
As you yarn over, the yarn should go on top of your hook at an angle from bottom right to top left. To be more precise, the yarn should first go on top of your hook (furthest right) at the 4 o’clock position. The yarn should be leaving the top of your hook (furthest left) at the 10 o’clock position. This now completes the yarn over.
- The head of the hook is currently facing you. Rotate the hook slightly so the head is pointing up (towards the ceiling).
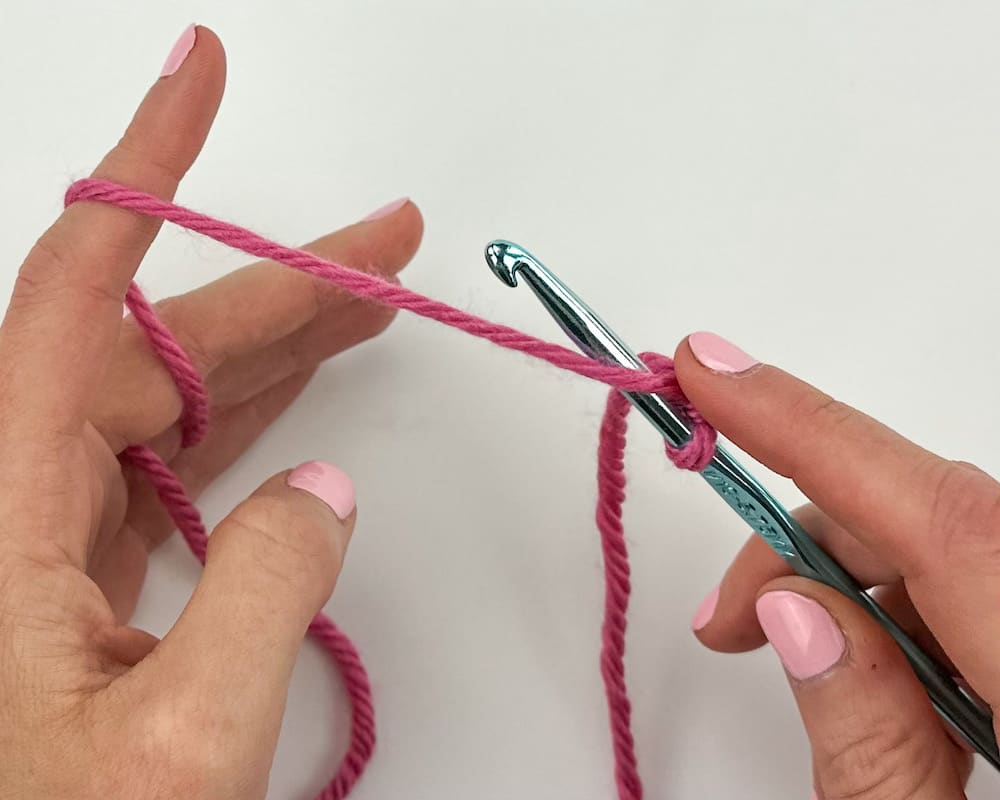
- Rotate the head of the hook towards the ground so it is pointing down. “Hook” the yarn and catch it in the throat of the hook. Pull the yarn towards the loop that is currently on the hook.
- Pull the yarn through the loop on the hook.
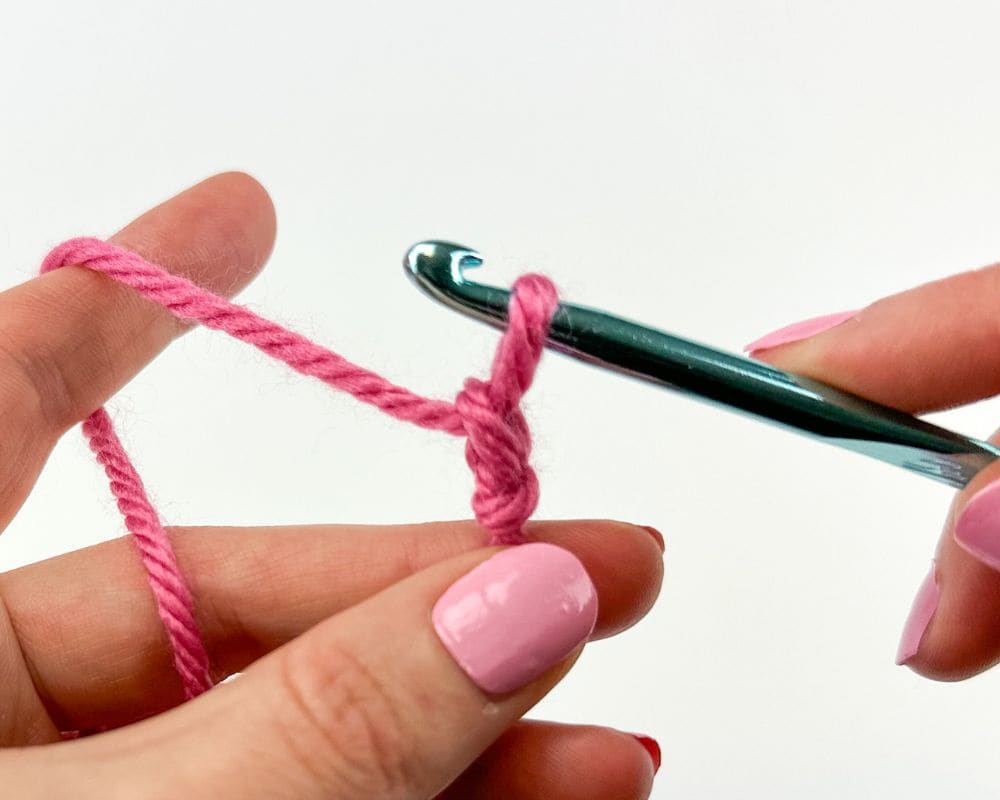
- Rotate hook head so it is pointing up. You will now have a new loop on your hook. You have just made your first chain (first chain stitch / first starting chain – they all mean the same thing).
Before starting your next stitch, ensure the loop lives on the working area / shaft of the hook and not in it’s throat.
To make additional chains, repeat these steps for each chain you wish you make. If the instructions for the pattern say to Chain 5 for example (or “ch” 5), this means to make 5 starting chains. Once you have made all the chains required, your chain row is now complete and you can move on to Row 1.
Starting a Crochet Chain Video Tutorial

Where to Work in the Chain
After your chain row is complete, the next row involves working into these chains.
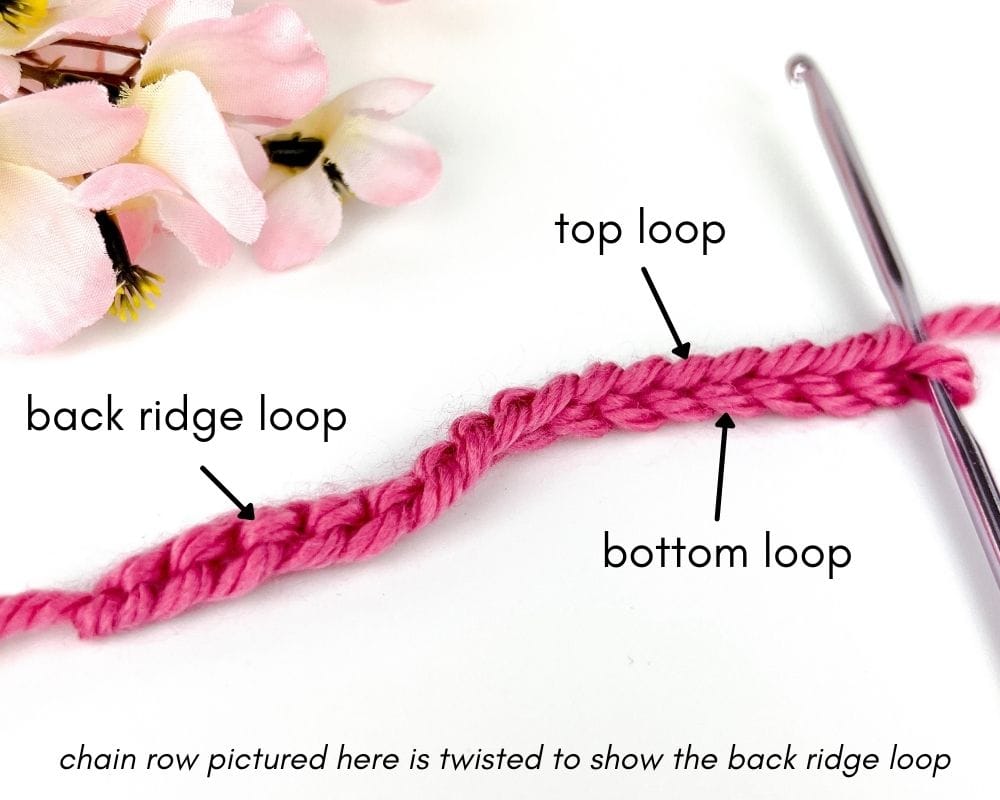
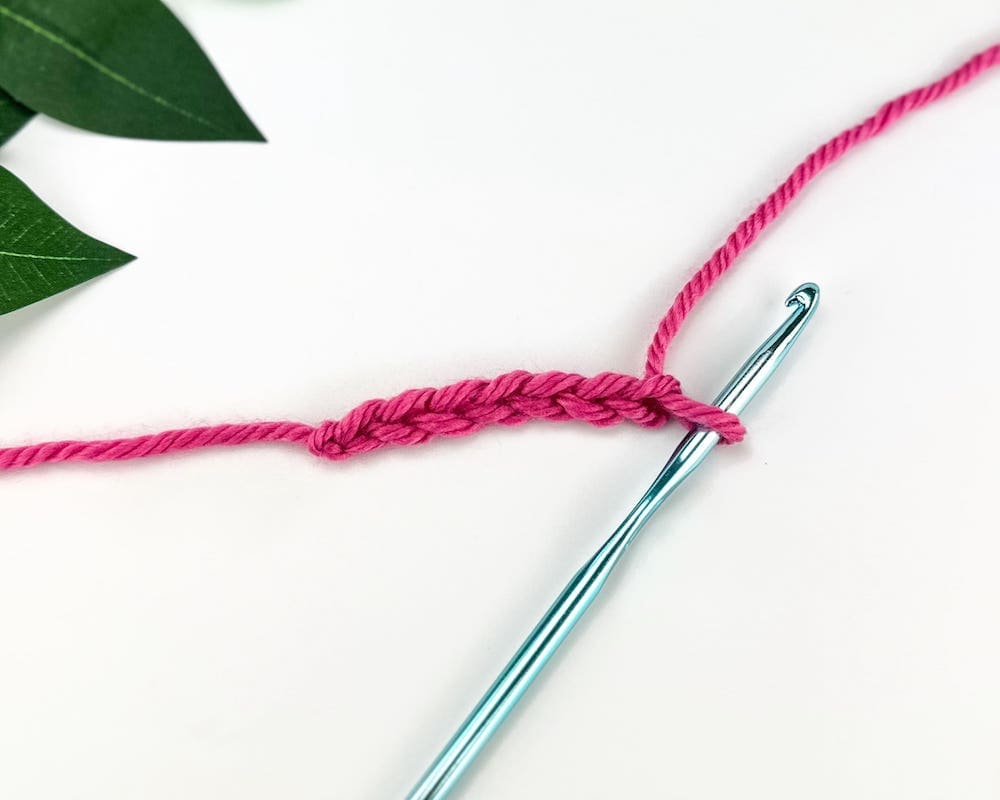
As you can see in the picture above, the chain row creates three places where you can crochet into. With your work facing towards you, there is the top loop and bottom loop. If you look at the back of the chain (or twist the stitches as pictured above), you can see little bumps along the back. Those are called the back ridge loops. They are also referred to as the back bumps or the back of the chain.
If the pattern says: For Row 1 (only) work into the back ridge loops, what this means is for the entire first row (and only the first row), you should make your stitches into the back ridge loops of the chain.
If the pattern does not indicate where in the chain you should work into, then that means you can decide where you want to work into. Everyone seems to have a different preference. Sometimes you will have to experiment to see what looks best for the pattern. My default, if the pattern does not indicate where to work into, is to work into the top loops.
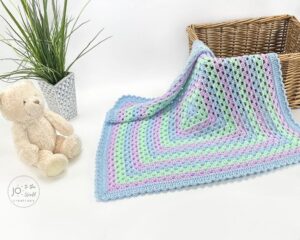
The reason some patterns indicate where in the chain to work into is because how you work into the chain can impact the overall look of the finished piece. For example, for some baby blanket patterns with borders, working into the top loops of the chain in Row 1 can create large unwanted gaps between the blanket body and the blanket border. Working into the back ridge loops however, eliminates these gaps for a much nicer transition between the blanket body and border.
Read More: How to Crochet in the Chain.
Crochet Second Chain From Hook (or 3rd, 4th, etc)
Now that you’re ready to start Row 1, you may see the instructions for the first row say: “In the X chain from hook,” with X being 2nd, 3rd, 4th, 5th or more. What this means is to count the chains the you made, with the 1st chain being closest to the hook. Remember that “ch” is the abbreviation for chain.
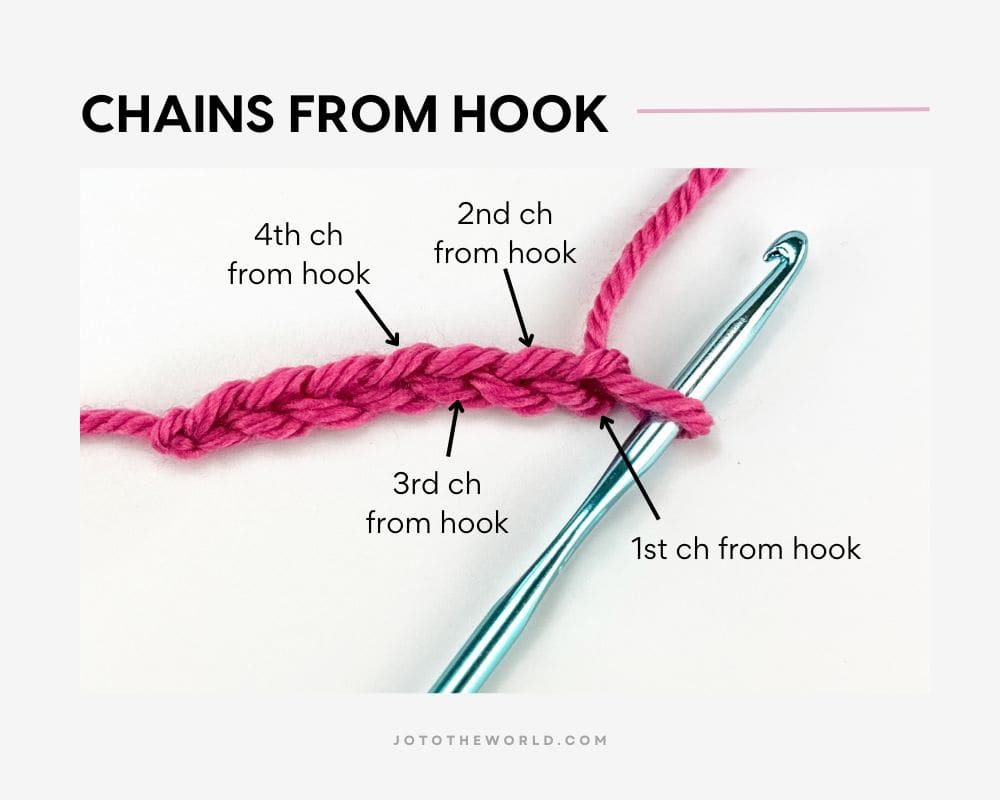
Depending on the instructions, you will work into the 2nd, 3rd, 4th (etc) chain. If you are working into the 2nd chain from the hook, that means you are skipping the first chain. If the pattern calls for making one stitch in each chain across, you will have one less stitch at the end of Row 1 than your number of starting chains.
If you are working into the 3rd chain from the hook, that means you are skipping the first two chains. If the pattern calls for making one stitch in each chain across, you will have two less stitches at the end of Row 1 than your number of starting chains.
Chains at the End or Beginning of Rows
In order to “move up” to the next row in crochet, the pattern usually says to chain X and turn. Or it may say to turn and then chain X (with X being the number of chains to make before or after turning). This can be done at the end of rows or at the beginning of rows.
To make a chain or chains at the end or beginning of rows, simply follow the same steps to make a chain. Repeat for each chain required. Turning involves flipping your work over and working on the other side.
Chain Stitch Crochet
Chains are not just made to start a pattern or to “move up” to the next row. Chains can be part of stitches and are very common in patterns. Whenever the stitch calls for a chain, you simply follow the same steps that you did to make the starting chain.
How to Make a Chain (ch) Stitch
Here’s a step-by-step guide with infographic on how to make a chain (ch) stitch:
- Yarn over
- Rotate the hook head up
- Rotate the hook head down. “Hook” the yarn and bring it towards the loop on the hook.
- Pull the yarn through the loop.
- Rotate the hook head up. You’ve just made 1 chain (ch) stitch.

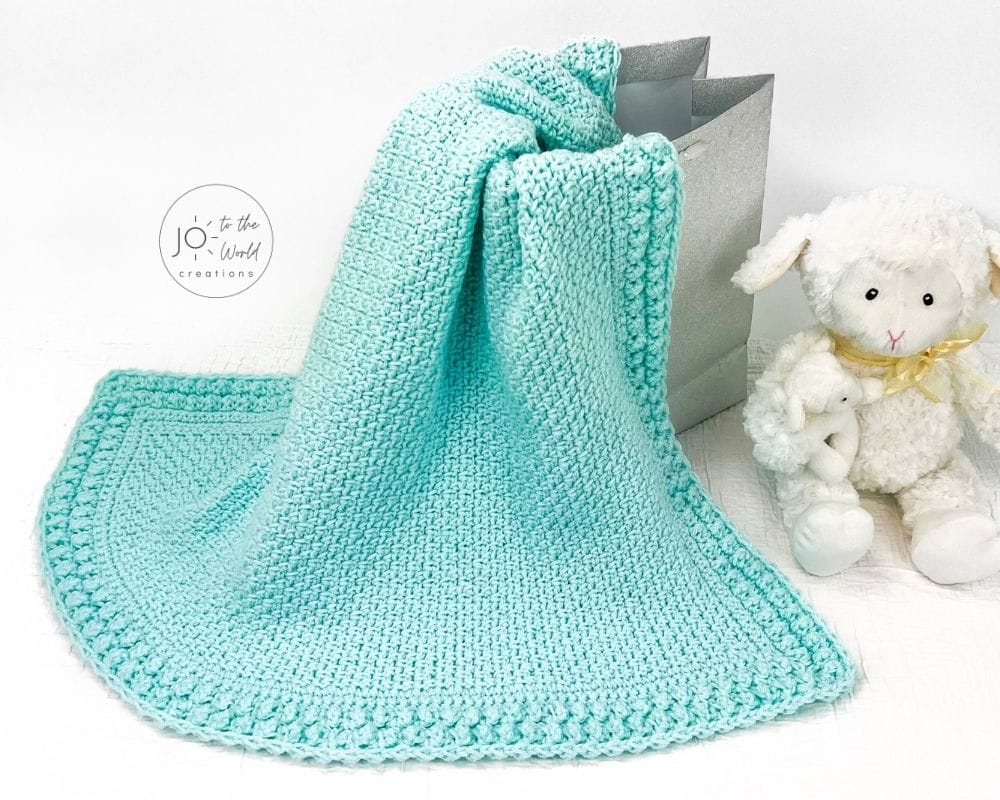
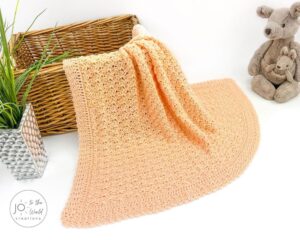
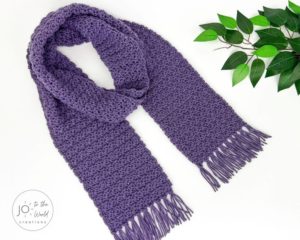
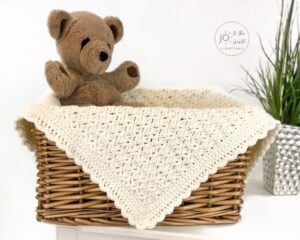
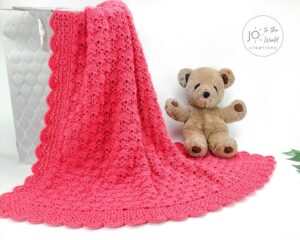
Chain stitches are part of many stitches such as my Moss Stitch Baby Blanket (pictured below), which instructs you to make 1 chain stitch after every single crochet stitch.
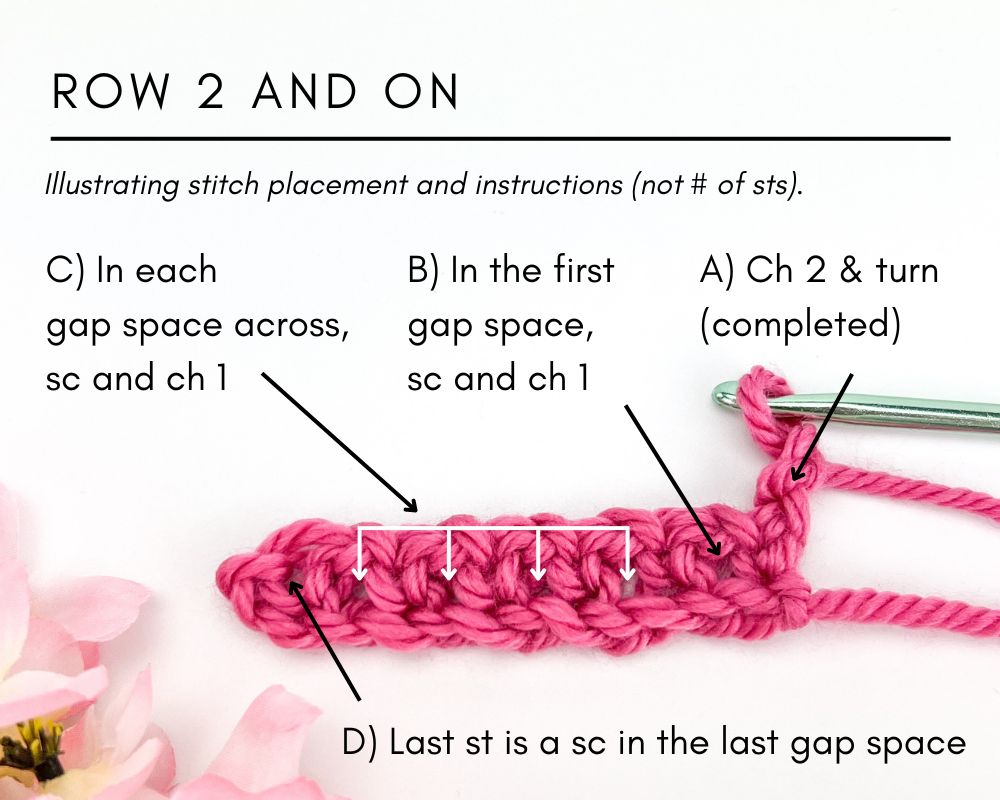
Chain Space
Lastly, sometimes in patterns, you’ll see instructions to work into ch-1 or ch-2 (or ch-3 +) spaces. Sometimes these are called gap spaces. This means to work into the space underneath where you chained 1 or chained 2 (or chained 3+) in the previous row.
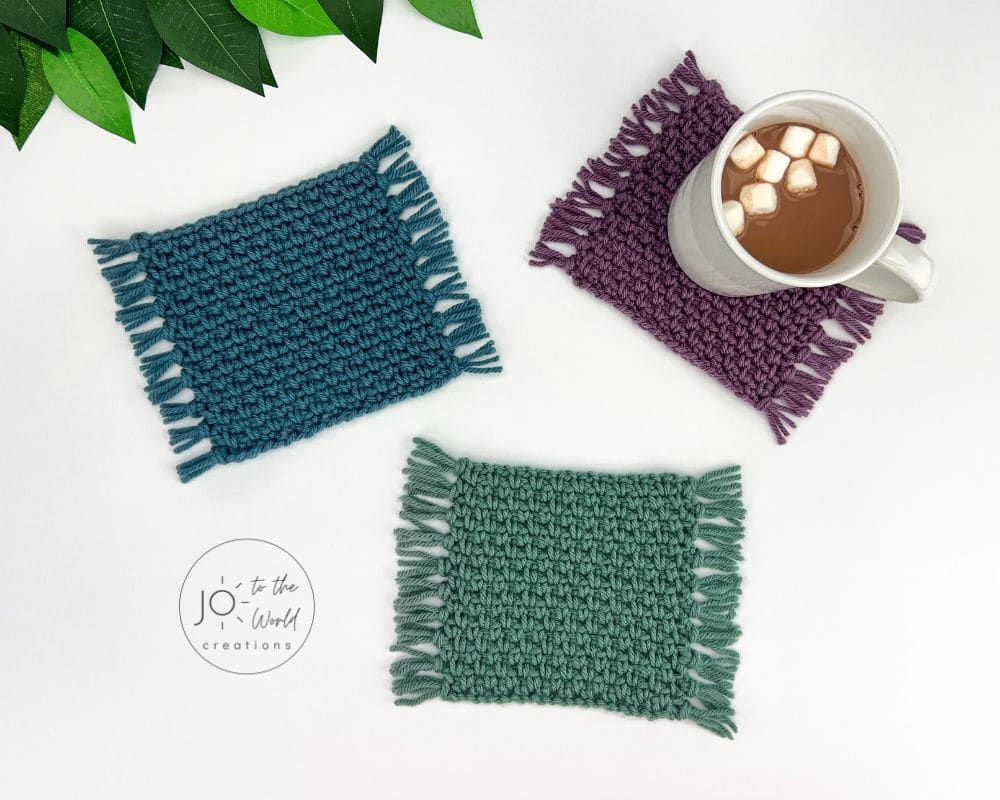
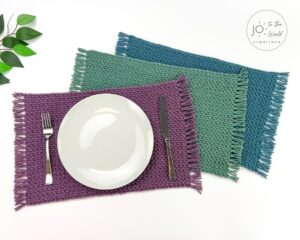
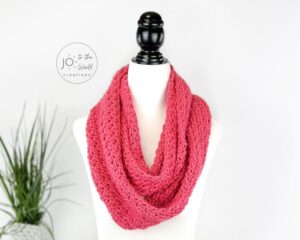
For example, in my Easy Mug Rug Crochet Pattern (pictured above), Row 1 consists of: chain 1, skip the next stitch, single crochet in the next stitch – all the way across. Starting in Row 2, you work into the spaces created by chain 1 from the previous row (I’ve called them gap spaces in this pattern). Working into spaces created by chain stitches means that unlike working into the tops of stitches, you insert your hook underneath the chain (not into the actual chain stitches).
I hope this has helped you learn how to start a crochet chain!
You May Also Like:
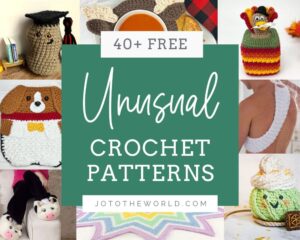
- More Crochet Resources
- Free Crochet Patterns & Gift Ideas
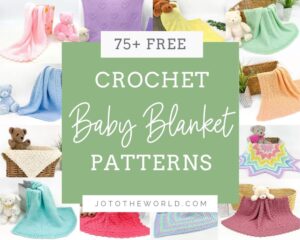
- 30+ Free Baby Blanket Crochet Patterns
- 70+ Free & Easy Crochet Patterns for Beginners

I’m Jo, the designer behind Jo to the World Creations, and I’m dedicated to helping you make the perfect crochet gift! I love designing and sharing free crochet patterns that you can make for every gift occasion.
About →Let’s Connect
Download. Print. Keep.
Get Instant Access to ALL Printable Patterns
Make your crocheting more enjoyable, relaxing and productive with printable PDF patterns.
- 100+ premium crochet patterns.
- Download, save and print from any device.
- No ads or popups!
Not sure yet? Take a look at the Pattern Library and see all the patterns you can download once you’re a member.
Save with Pattern Bundles
For a limited time, I’ve grouped some of my most popular crochet patterns and I’m offering them as pattern bundles where you can get the printable versions for one low, discounted price. Check out these incredible Crochet Pattern Bundles.
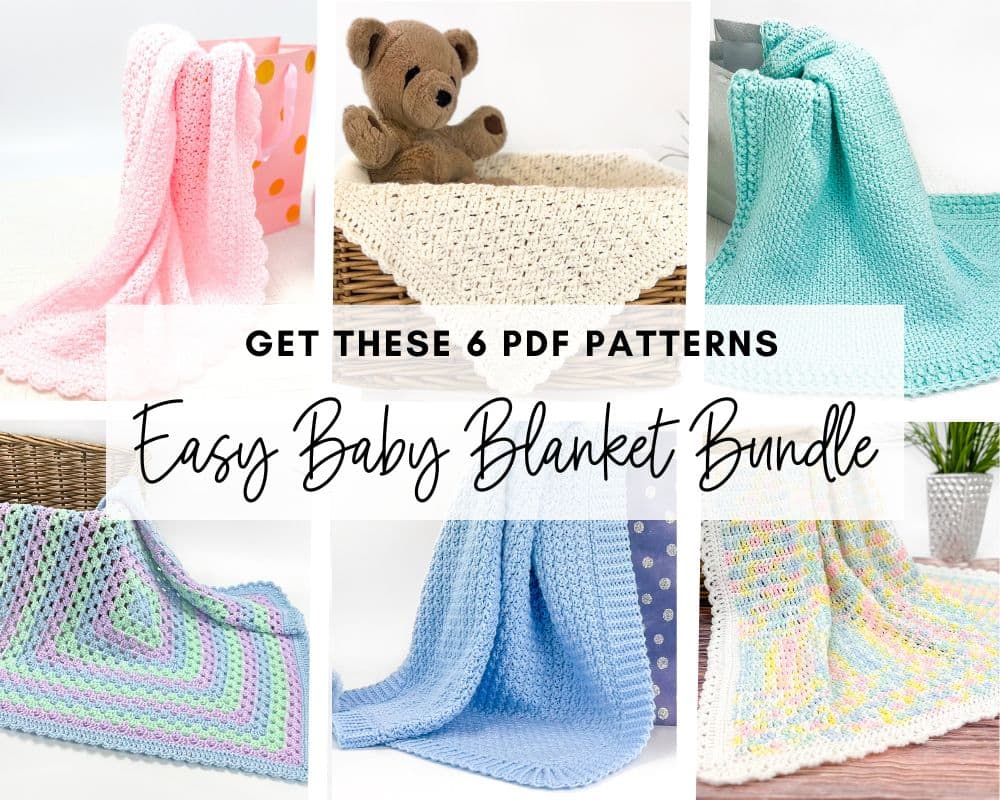
Easy Baby Blanket Bundle
With this Easy Baby Blanket Bundle, you’ll get SIX easy crochet baby blankets as printable downloads. Each pattern includes step-by-step instructions and a full video tutorial.
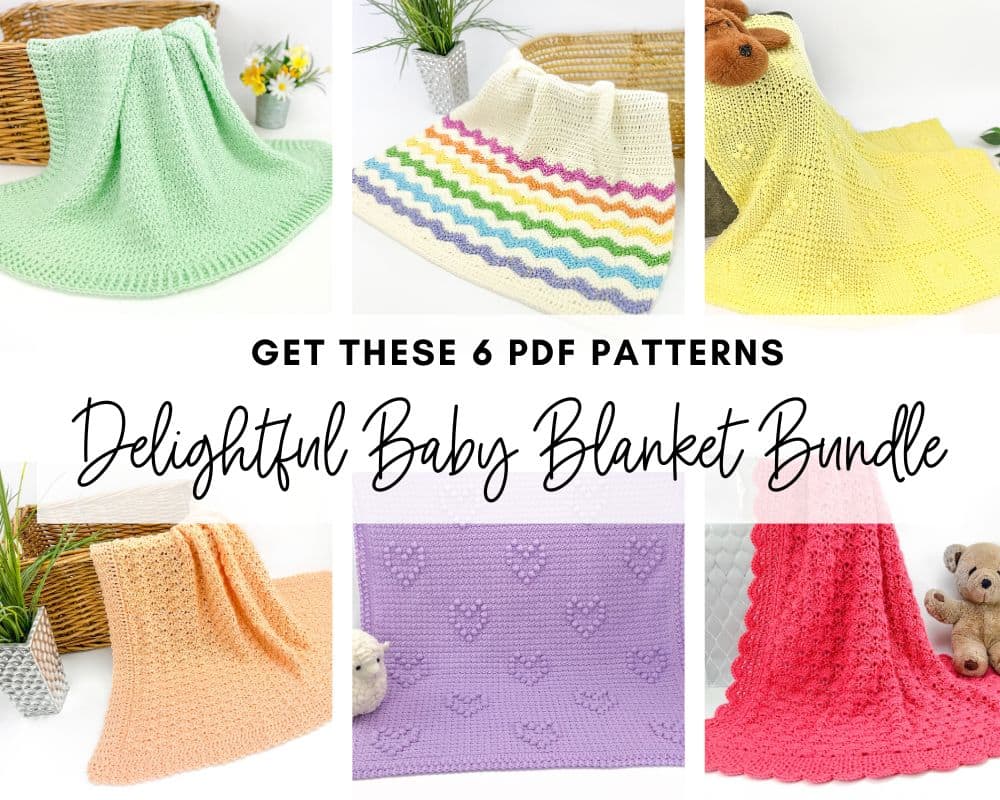
Delightful Baby Blanket Bundle
This incredible deal includes six SIX blanket patterns that are a delight to make and create truly stunning blankets – all as printable PDFs for one low, discounted price.
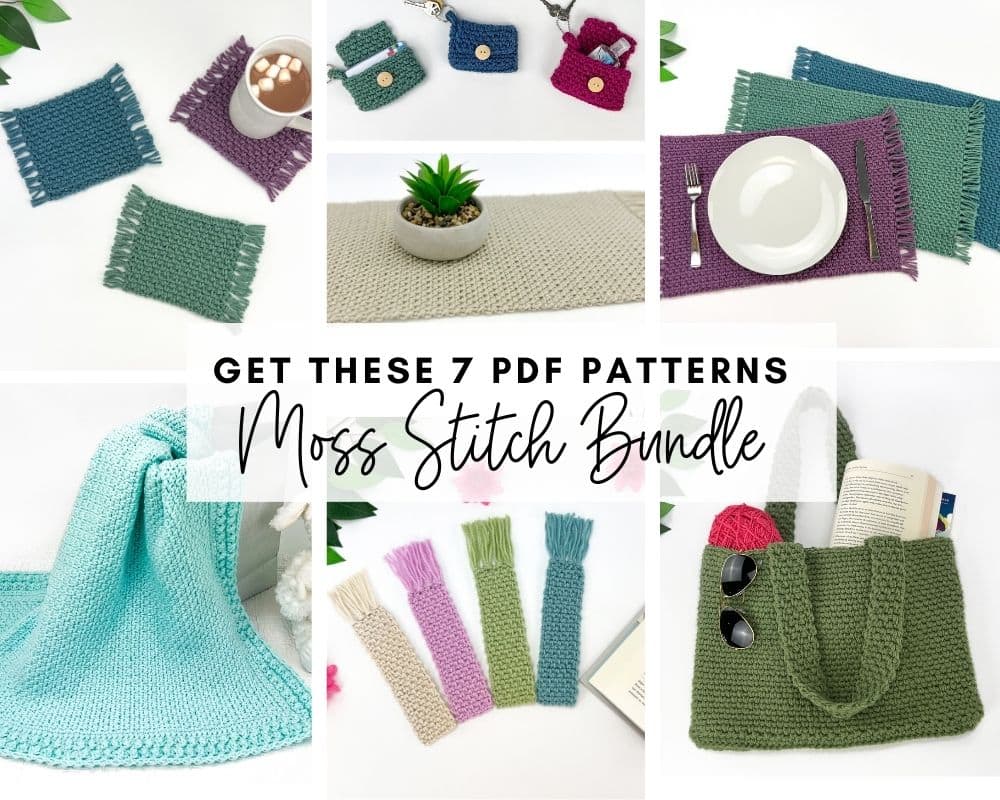
Moss Stitch Pattern Bundle
All your favorite Moss Stitch patterns in one bundle! Get SEVEN easy Moss Stitch crochet patterns as ad-free, print-ready PDFs to print, save and keep forever.
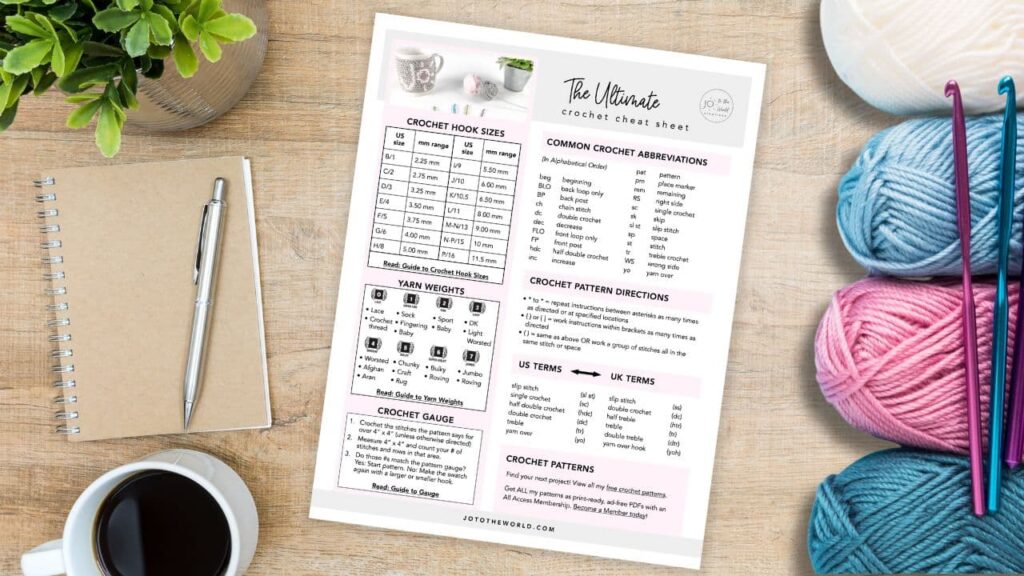
Free Crochet Cheat Sheet
Get instant access to this Ultimate Crochet Cheat Sheet! Plus you’ll receive free patterns for crochet gifts delivered right to your inbox!
Featured Crochet Patterns
Pattern Collections

Free Patterns for Crochet Gifts
Never miss a pattern! Get all my secrets to making incredible crochet gifts as well as new free crochet patterns and exclusive deals when you sign up for my newsletter (it’s free!).