
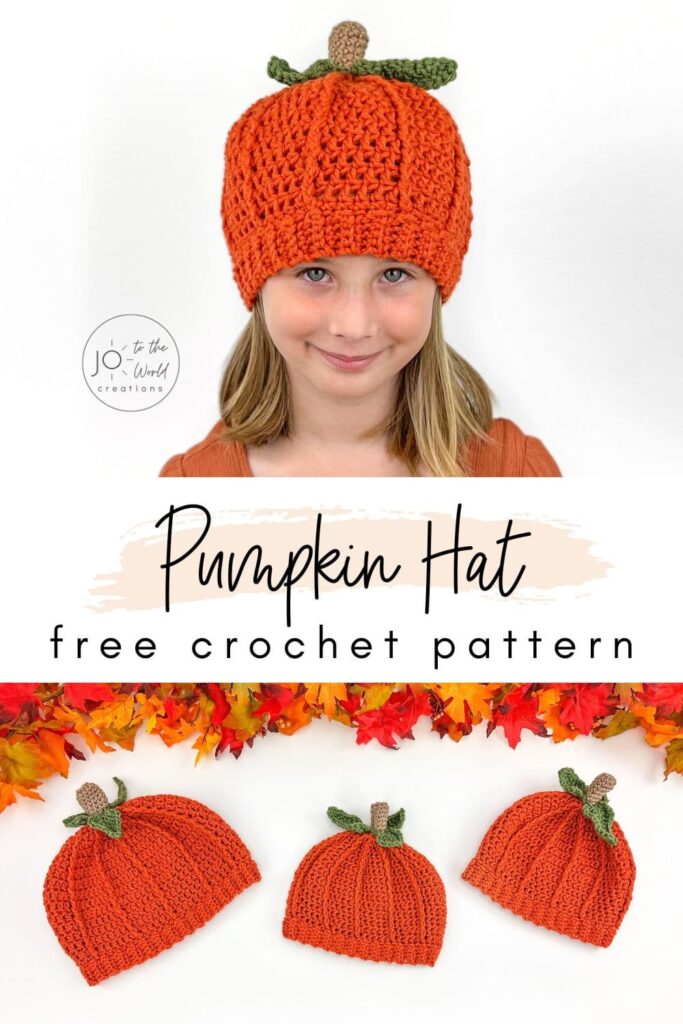
Crochet Pumpkin Hat Pattern – Free
Here’s a free crochet pumpkin hat pattern that’s easy to follow with lots of pictures to help you make this super cute crochet pumpkin hat/beanie!
Before we begin, I would like to thank you for visiting Jo to the World Creations, a site dedicated to helping you give the gift of crochet.
More free patterns (that make awesome crochet gifts) are on the way! Sign up for my emails, follow me and never wonder “What should I make for…” again!
FREE PATTERNS FOR CROCHET GIFTS
Delivered to your inbox
AND GET A FREE PDF OF THE LOVE PILLOW
& A FREE CROCHET CHEAT SHEET
Unsubscribe at any time.
Delivered Socially
Follow Me on


Crochet Pumpkin Hat Pattern
This free crochet pumpkin hat pattern is an easy to follow pattern with step-by-step instructions and lots of diagrams to help you make this adorable crochet pumpkin hat.
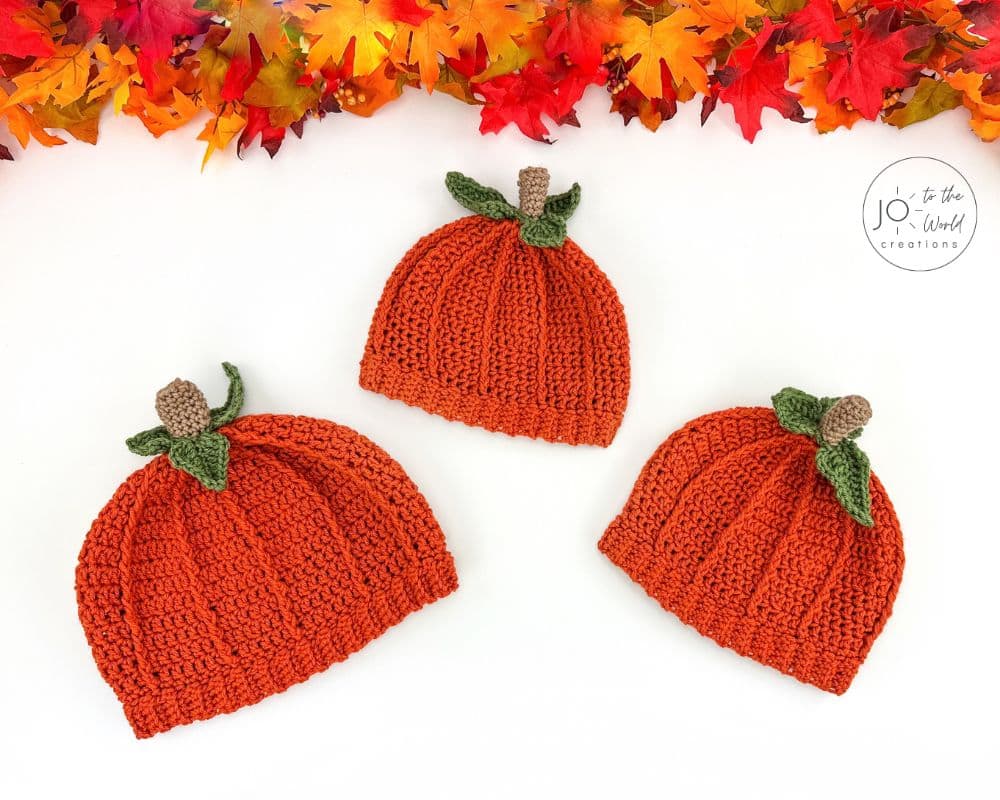
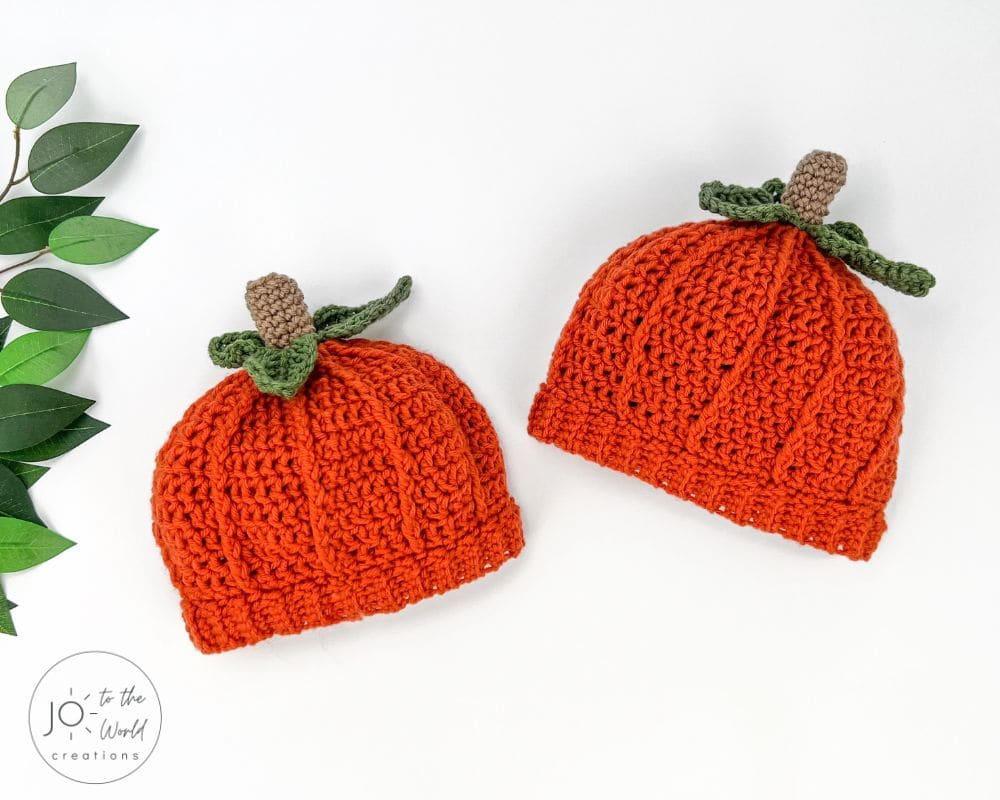
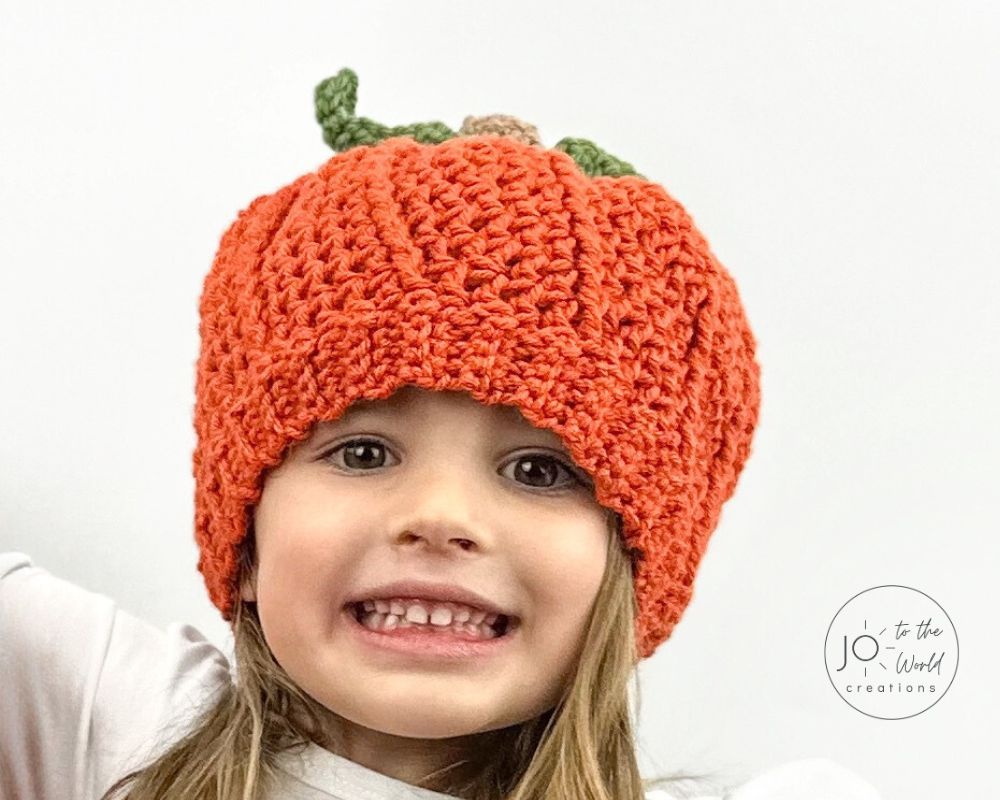
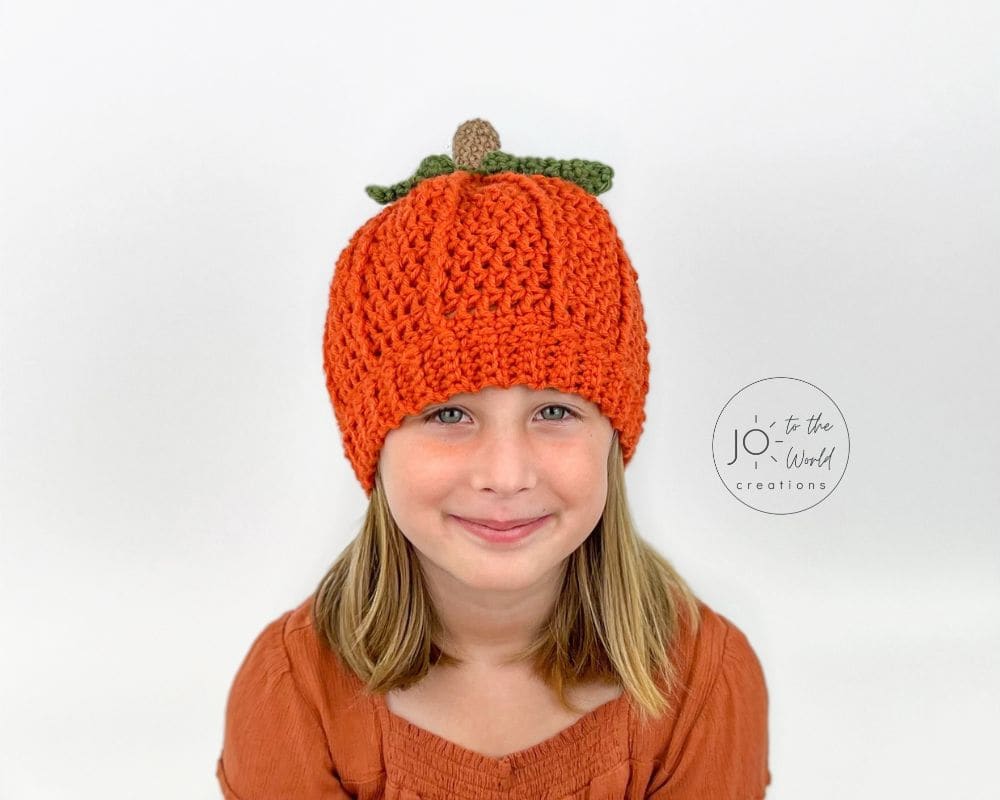
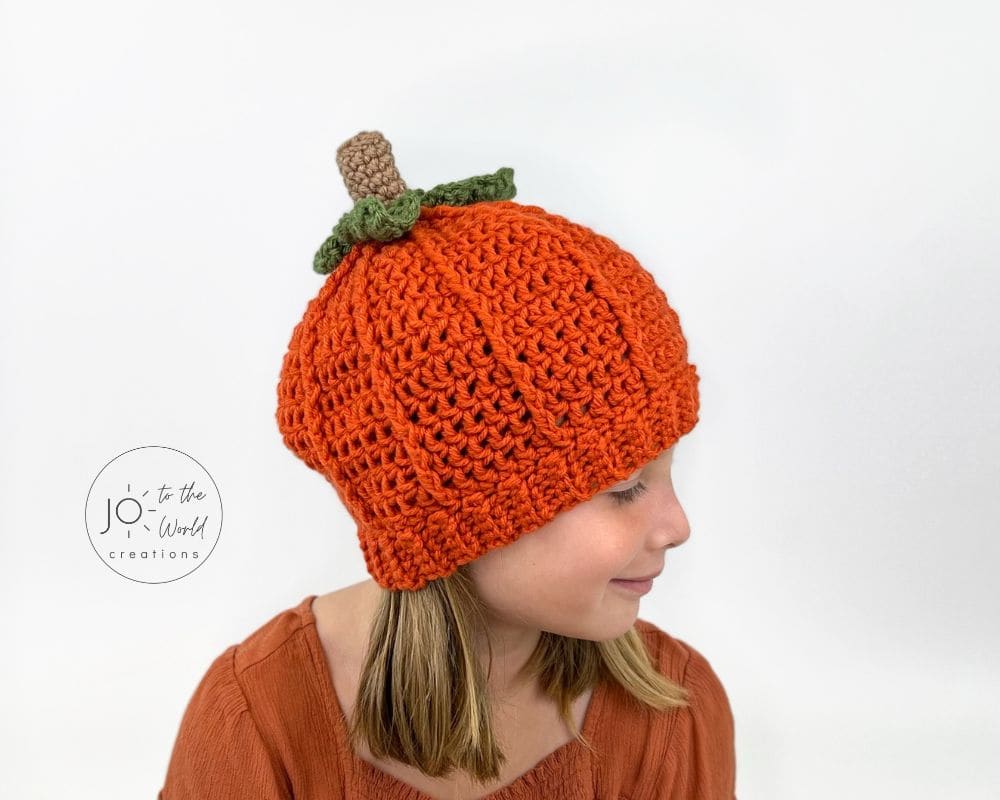
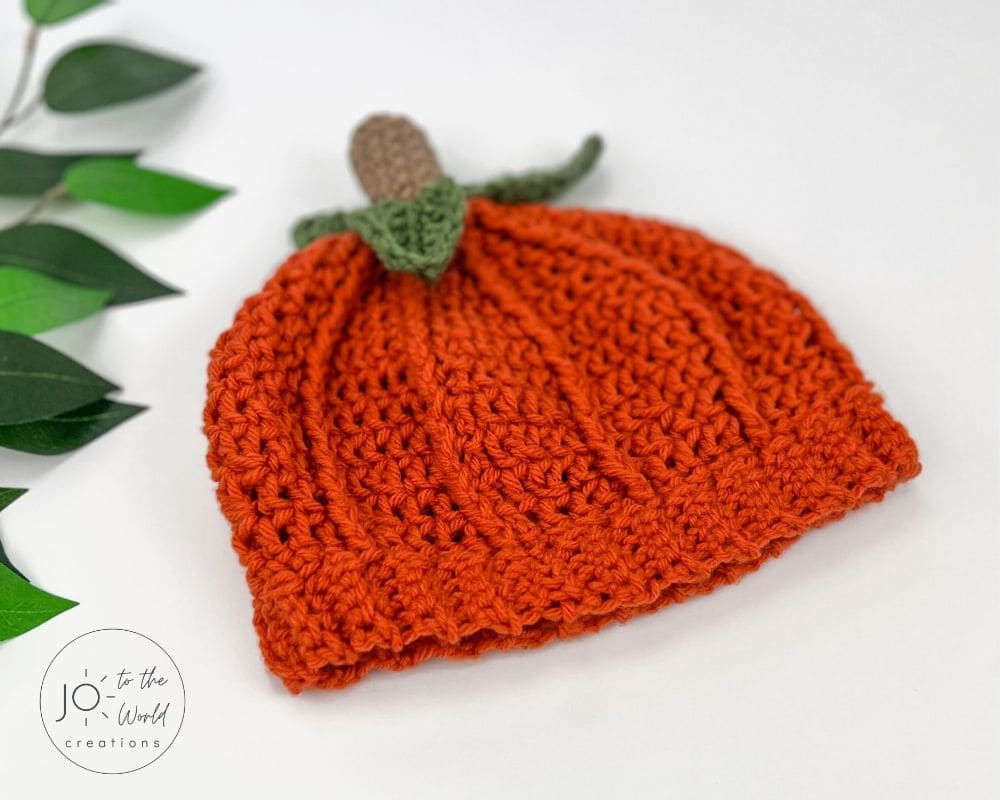
The crochet pumpkin hat pattern (free) creates a hat that is fitted at the bottom but bulges out a bit at the top to create a realistic pumpkin look. The hat stays securely on a head with a lovely textured ribbing, which has lots of stretch to it.

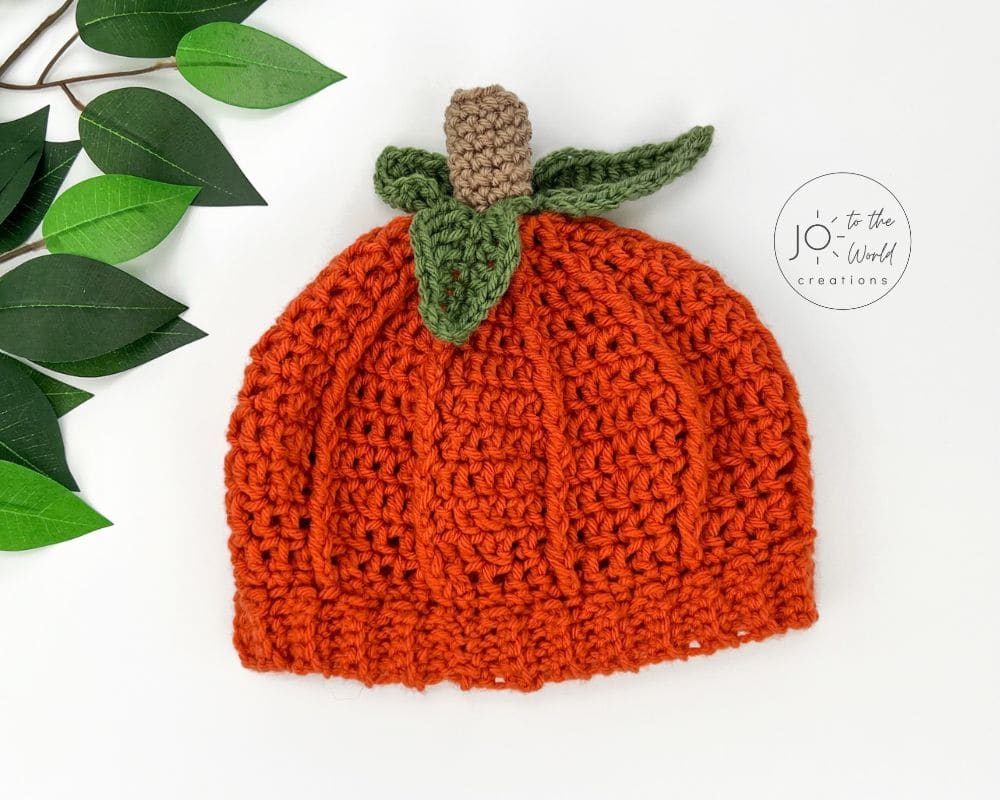
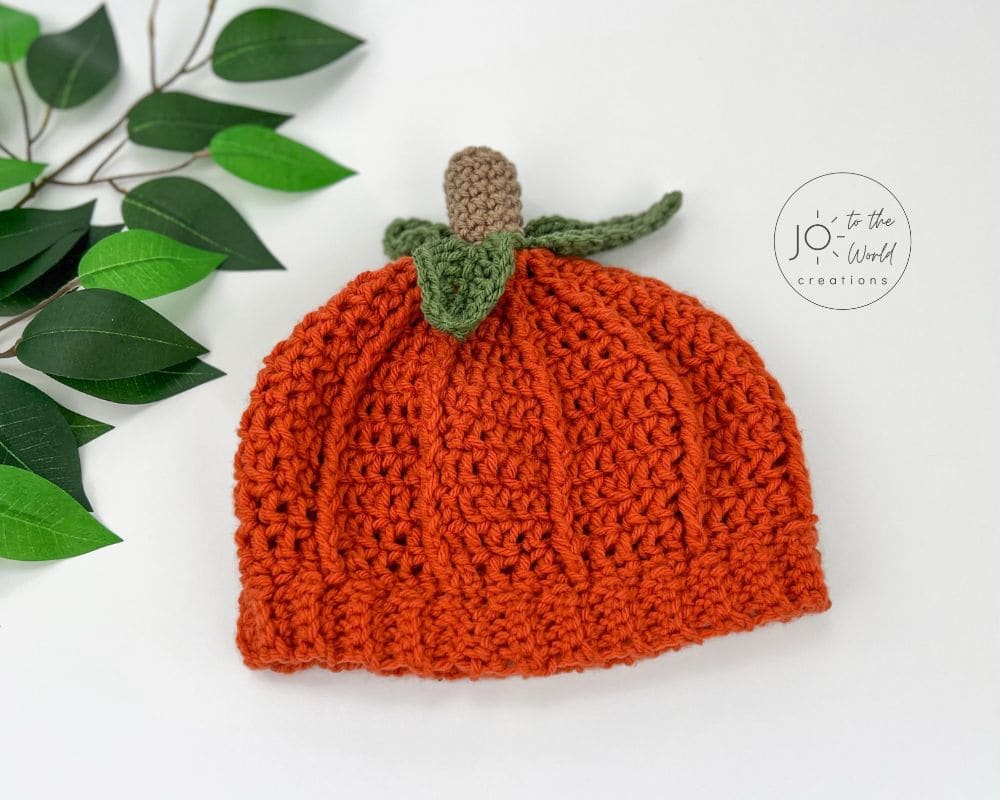
The pattern includes instructions for the crochet pumpkin stem with leaves, which gets attached to the top of the hat.
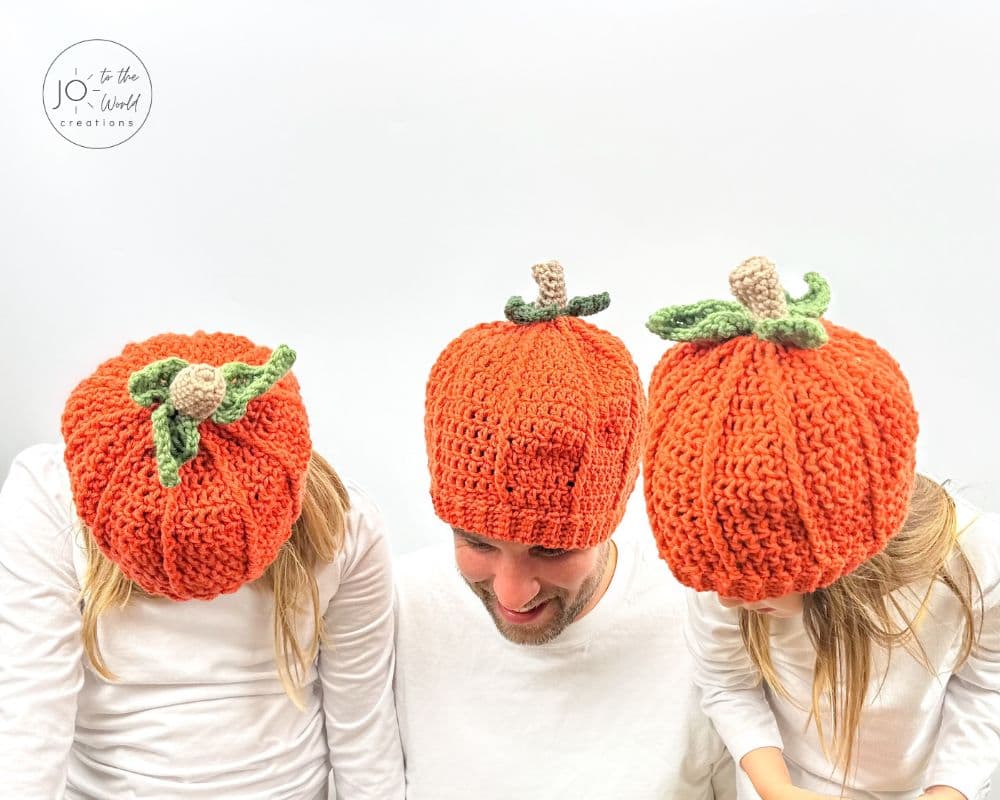
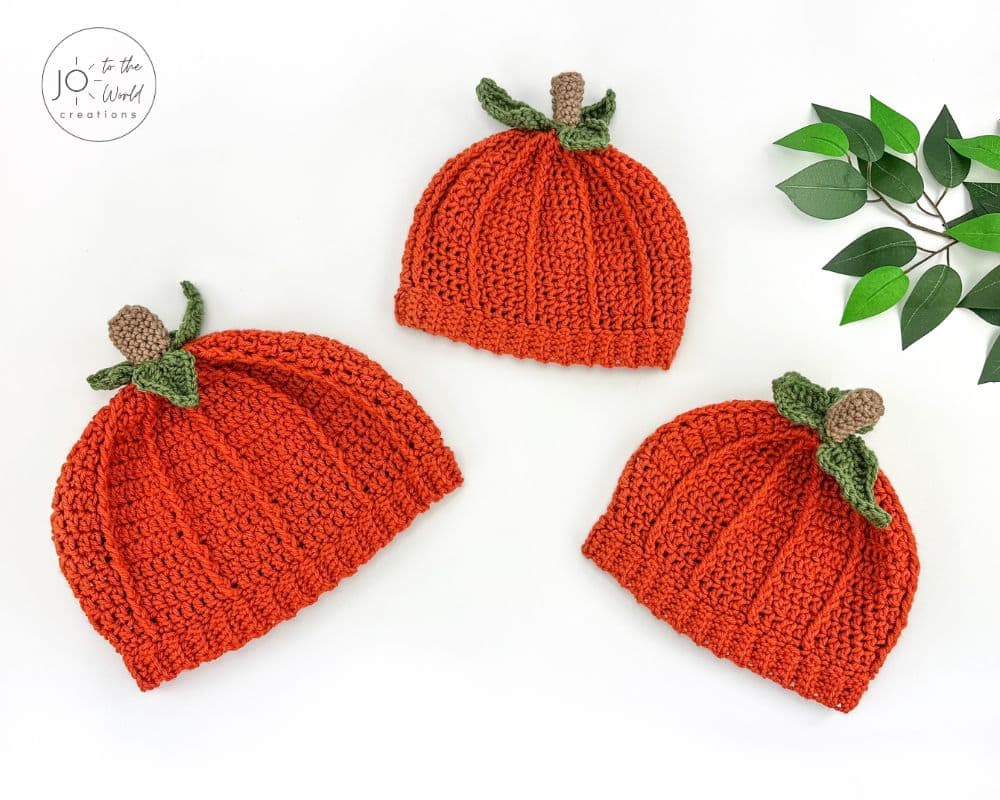
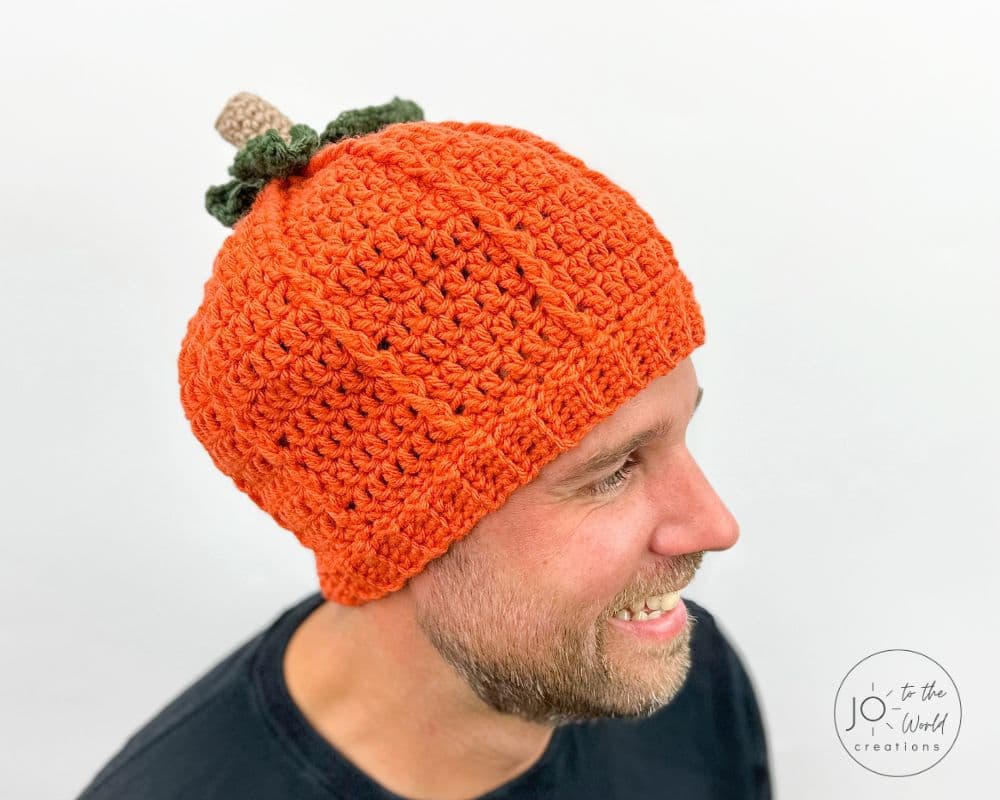
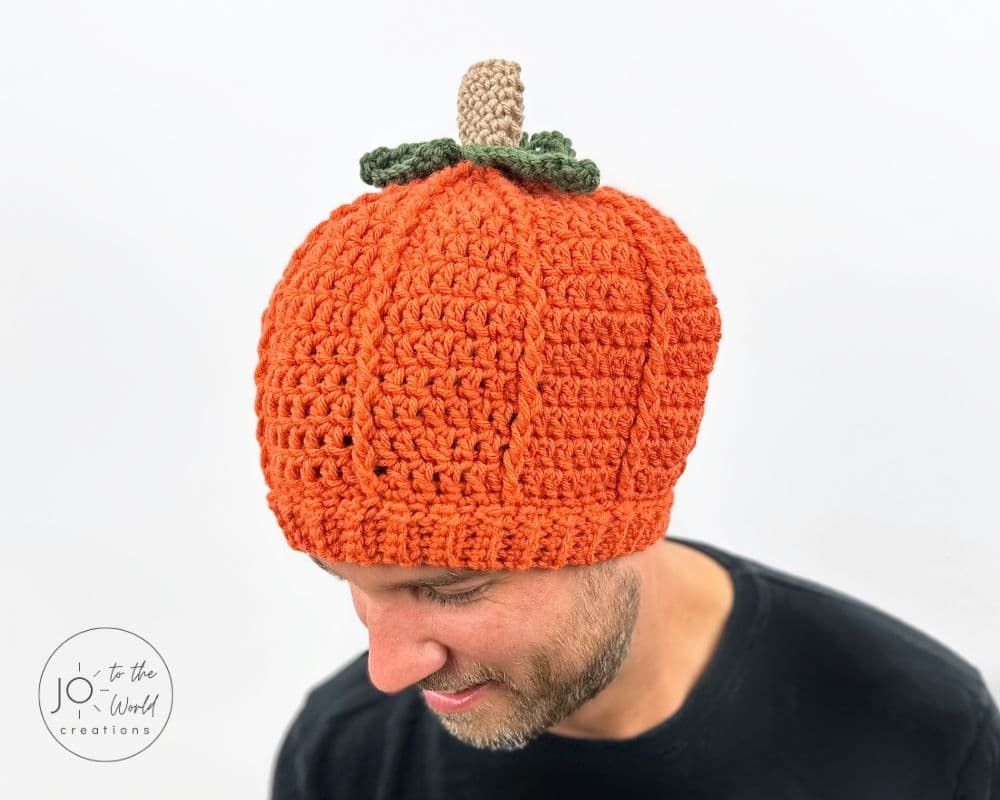
This crochet pumpkin hat can be made for toddlers, children and adults. It’s a great Halloween or fall hat for the whole family!
How to Crochet a Pumpkin Beanie
Wondering how to crochet a pumpkin beanie? You have come to the right place! This crochet pumpkin beanie pattern will show you step by step how to make a crochet pumpkin beanie. Start by following the crochet pumpkin hat instructions to complete the hat / beanie and then make and attach the stem and leaves to create a wonderful crochet pumpkin beanie!
Affiliate Disclosure: This post may contain affiliate links meaning I may receive a commission for purchases made through links in this post at no extra cost to you. As an Amazon Associate, I earn from qualifying purchases.
Get the PDF!
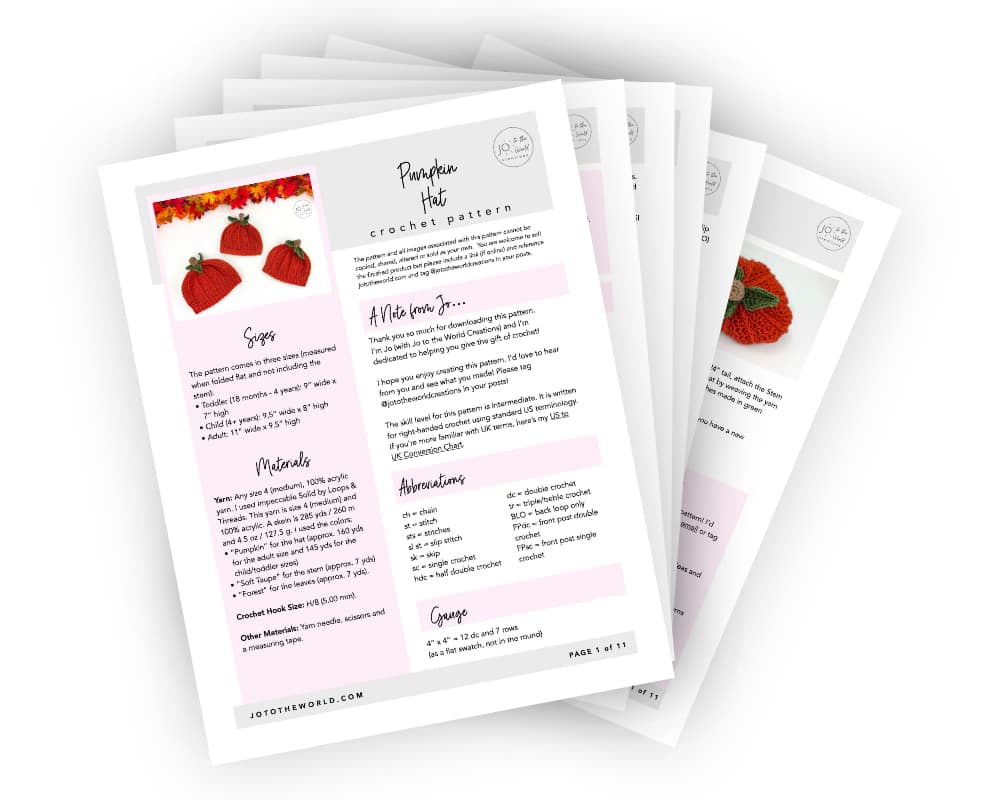
Purchase the printer-friendly, ad-free PDF of this pattern that you can instantly download! It includes everything from this free pattern but you can easily save, print and access it anytime!
You can also purchase it on Etsy or Ravelry.

All-Access Membership
For only $0.14 a day, you can get this pattern as a PDF and my entire library of 100+ print-ready, ad-free PDF crochet patterns!
Pumpkin Hat Crochet Pattern Details
Skill Level
Intermediate – the lines on the pumpkin are made using front post stitches, which may be a new technique for beginners but the pattern includes instructions and pictures to help you follow along.
Size
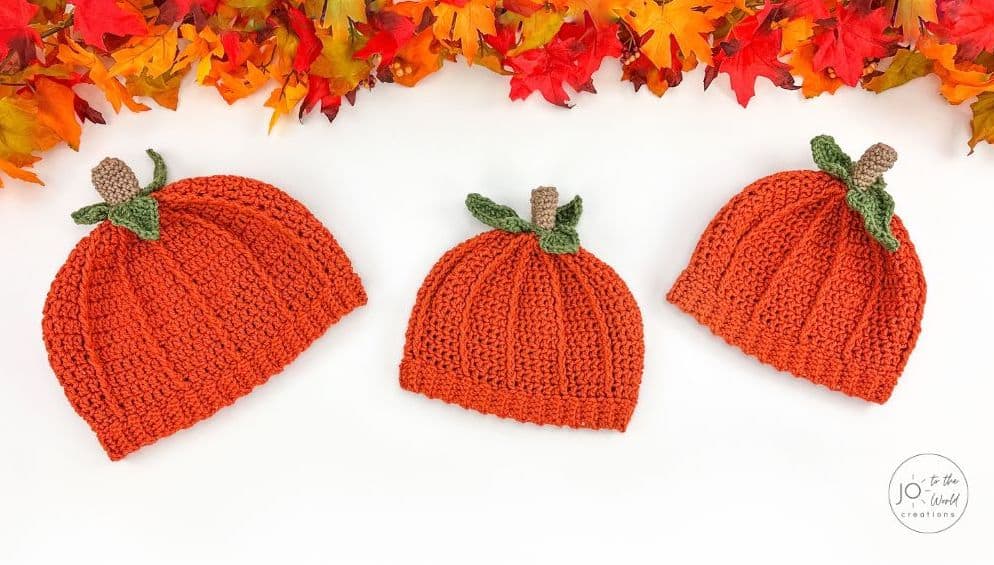
The pattern comes in three sizes (measured when folded flat and not including the stem):
- Toddler (18 months – 4 years): 9” wide x 7” high
- Child (4+ years): 9.5” wide x 8” high
- Adult: 11” wide x 9.5” high
Gauge
4” x 4” = 12 dc and 7 rows (as a flat swatch, not in the round)
Materials
Any size 4 (medium), 100% acrylic yarn. I used Impeccable Solid by Loops & Threads. This yarn is size 4 (medium) and 100% acrylic. A skein is 285 yds / 260 m and 4.5 oz / 127.5 g. I used the colors:
- “Pumpkin” for the hat (approx. 160 yds for the adult size and 145 yds for the child/toddler sizes)
- “Soft Taupe” for the stem (approx. 7 yds)
- “Forest” for the leaves (approx. 7 yds).
Crochet Hook Size: H/8 (5.00mm).
Other Materials: Yarn needle, scissors and measuring tape.
Terminology
This crochet pumpkin hat pattern is written for right-handed crochet using standard US terminology. If you’re more familiar with UK terms, here’s my US to UK Conversion Chart.
Abbreviations
- ch = chain
- st = stitch
- sts = stitches
- sl st = slip stitch
- sk = skip
- sc = single crochet
- hdc = half double crochet
- dc = double crochet
- tr = triple/treble crochet
- BLO = back loop only
- FPdc = front post double crochet
- FPsc = front post single crochet
Stitch Explanations
Front Post Double Crochet (FPdc) = Yarn over, insert your hook from the front to the back at the right of the designated stitch and bring your hook out at the left of the same stitch. Then finish your double crochet stitch as you normally would: yarn over and pull through a loop (3 loops on hook). Yarn over and pull the yarn through the first two loops on your hook (2 loops on hook). Yarn over and pull the yarn through the last two loops on your hook.
Front Post Single Crochet (FPsc) = Insert your hook from the front to the back at the right of the designated stitch and bring your hook out at the left of the same stitch. Then finish your single crochet stitch as you normally would: yarn over and pull through a loop (2 loops on hook). Yarn over and pull the yarn through the two loops on your hook.
Double Crochet Two Stitches Together (dc2tog) = Yarn over and insert your hook into the next st. Yarn over and pull through a loop (3 loops on hook). Yarn over and pull yarn through the two loops on your hook (2 loops on hook). Yarn over and insert your hook into the next st. Yarn over and pull up a loop (4 loops on hook). Yarn over and pull yarn through two loops on your hook (3 loops on hook). Yarn over and pull yarn through all three loops on your hook.
Triple/Treble Crochet Stitch (tr) = Yarn over twice and insert your hook into the next st. Yarn over and pull up a loop (4 loops on hook). Yarn over and pull yarn through two loops on your hook (3 loops on hook). Yarn over and pull yarn through two loops on your hook (2 loops on hook). Yarn over and pull yarn through last two loops on your hook.
Pattern Notes
- The hat is worked from the top down in the round. Never turn at the start/end of a round.
- The first stitch is the stitch attached to the chain.
- Chains never count as stitches.
Please note: This pattern and all images associated with this pattern cannot be copied, shared, altered or sold on your own. You are welcome to sell the finished product but please include a link (if online) and reference jototheworld.com.
Just a Reminder!
This pattern is also available as a PDF, which includes everything listed here but as a printer-friendly, ad-free PDF that you can instantly download, save, print, make notes on and keep forever.
You can also purchase it on Etsy or Ravelry.
Get this PDF with an All-Access Membership!
Only $0.14 a day!
- Instant Access to 100+ Premium PDF Crochet Patterns
- Make Gifts for Every Occasion!
- Save, Print & Keep Forever
- No Ads or Popups
- Happiness Guaranteed!
Crochet Pumpkin Hat Pattern Instructions
All Sizes
Start: With orange yarn, make a Magic Ring/Circle.
Round 1: Ch 1. Make 10 dc into the Magic Ring. Pull end of Magic Ring tight to close. (10 dc sts made). Sl st into top of first dc to join. (Reminder: never turn after a round).
Round 2: Ch 2. Dc in first st. 2 dc in each st around. (19 sts. Reminder: chains never count as sts). Sl st into top of first dc to join.
Round 3: Ch 2. FPdc around the ch-2 from the previous round. *Dc in next 2 sts. FPdc around the same st as your last dc st (around the stem of the dc from the previous round directly below).* Repeat from * to * around until there is 1 st left. Dc in last st. (29 sts). Sl st into top of first FPdc to join.
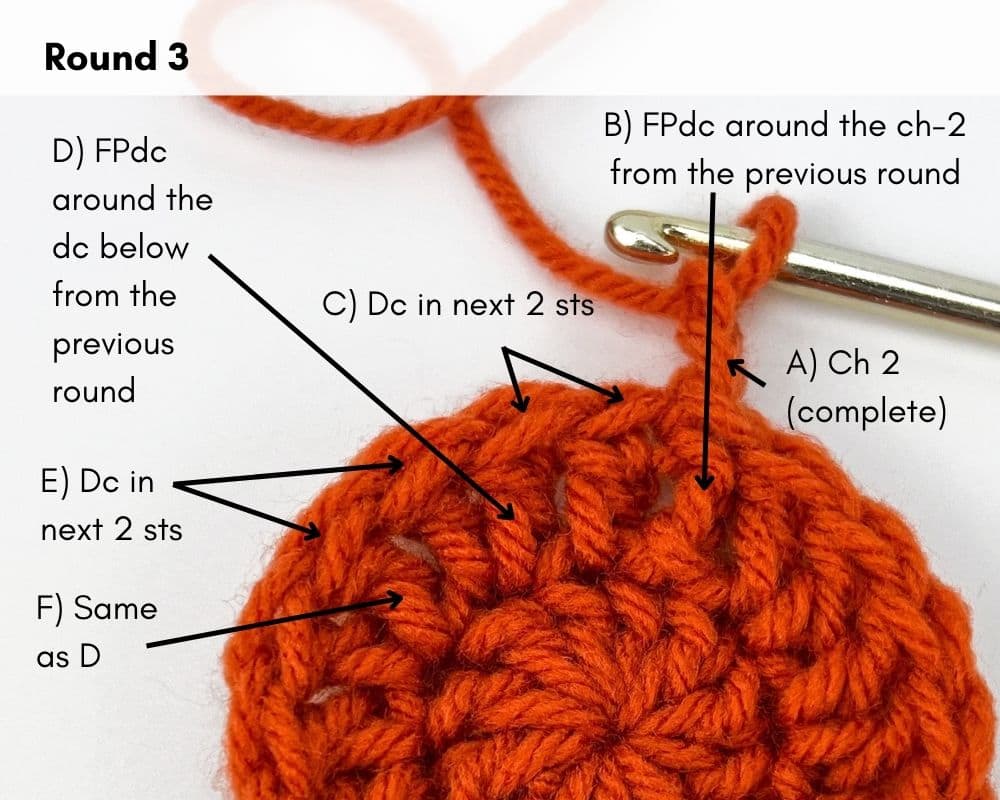
After Round 3, work should measure approx. 3.5” across.
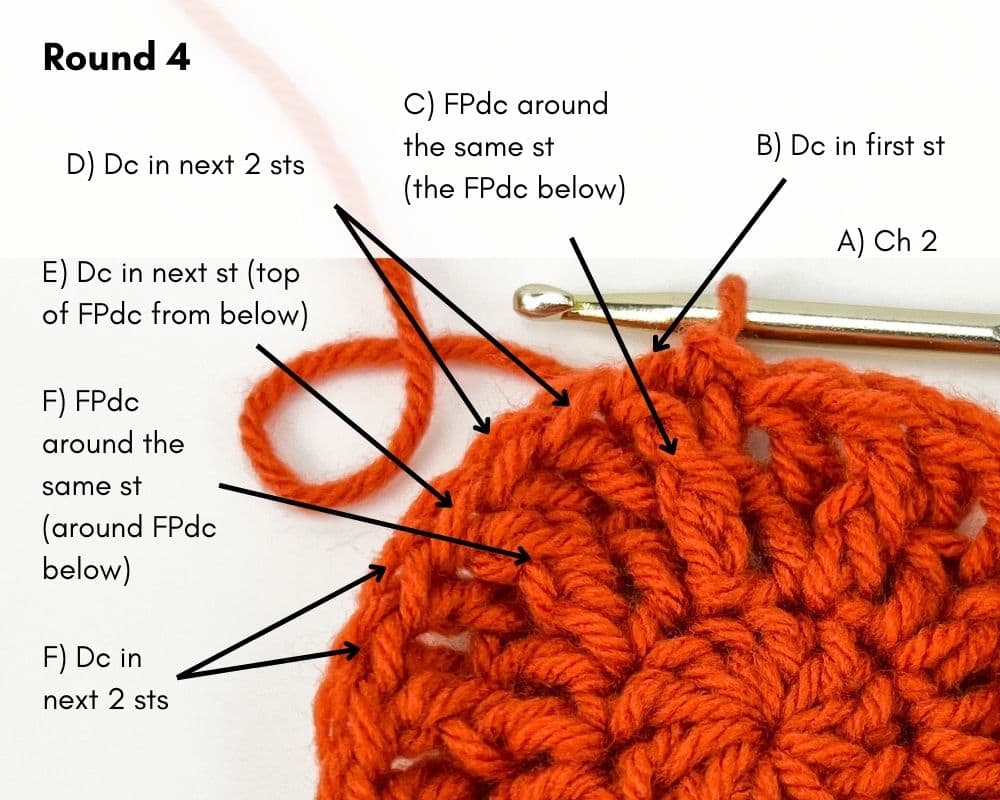
Round 4: Ch 2. Dc in first st (the top of the FPdc from below). FPdc around same st (around the FPdc below). *Dc in next 2 sts. Dc in the next st (the top of the FPdc from below). FPdc around the same st (around the FPdc below).* Repeat from * to * around until there is 1 st left. Dc in last st. (39 sts). Sl st into top of first dc to join.
Round 5: Ch 2. Dc in first st. Dc in next st (the top of the FPdc below). FPdc around same st (around the FPdc below). *Dc in next 3 sts. Dc in next st (the top of the FPdc below). FPdc around the same st (around the FPdc below).* Repeat from * to * around until there is 1 st left. Dc in last st. (49 sts). Sl st into top of first dc to join.
Measurements after Round 5: approx. 5.5” across.
Round 6: Ch 2. Dc in first st. Dc in next st. Dc in next st (the top of the FPdc below). FPdc around the same st (around the FPdc below). *Dc in next 4 sts. Dc in next st (the top of the FPdc below). FPdc around the same st (around the FPdc below).* Repeat from * to * around until there is 1 st left. Dc in last st. (59 sts). Sl st into top of first dc to join.
Round 7: Ch 2. Dc in first st. Dc in next 2 sts. Dc in next st (the top of the FPdc below). FPdc around the same st (around the FPdc below). *Dc in next 5 sts. Dc in next st (the top of the FPdc below). FPdc around the same st (around the FPdc below).* Repeat from * to * around until there is 1 st left. Dc in last st. (69 sts). Sl st into top of first dc to join.
At this point, the pattern has different instructions for toddler/child and adult sizes. For the adult size, jump ahead to the instructions for Adult Round 8 further below.
Toddler/Child Size (Round 8 – 10)
Toddler/Child Round 8: Ch 2. Dc in first st. Dc in next 3 sts. *Dc in the next st (the top of the FPdc from below). FPdc around the same st (around the FPdc below). Sk the next st. Dc in next 5 sts.* Repeat from * to * around until there are 2 sts left. Dc in the next st (the top of the FPdc from below). FPdc around the same st (around the FPdc below). Sk the last st. (69 sts). Sl st into top of first dc to join.

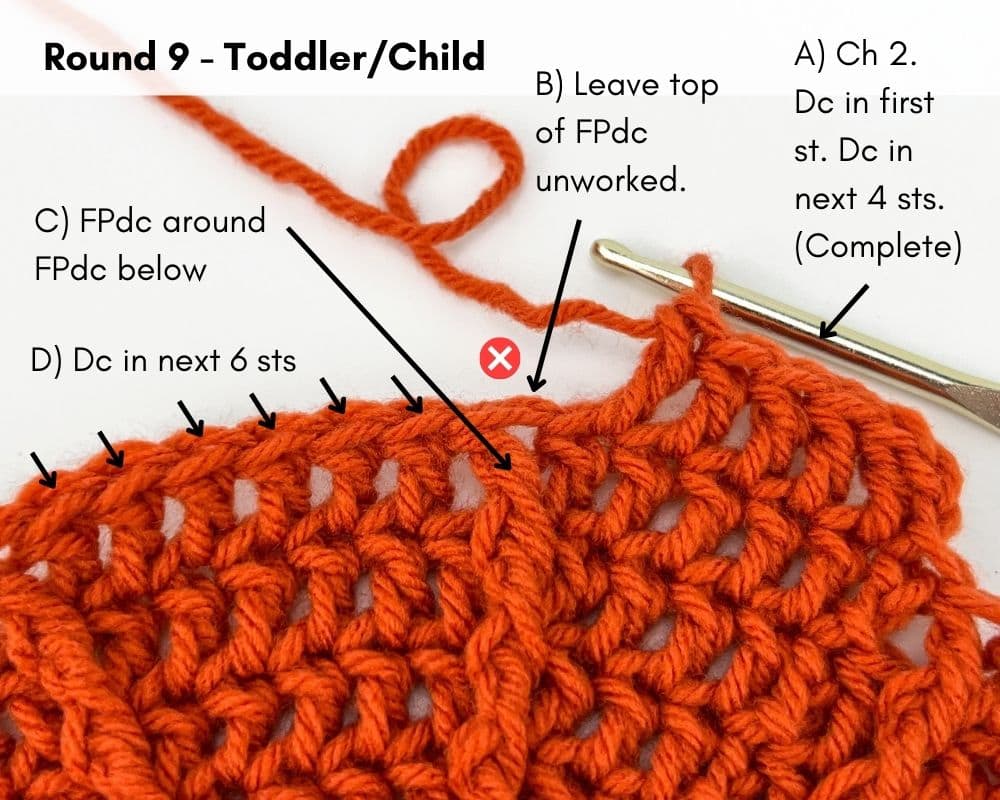
Toddler/Child Round 9: Ch 2. Dc in first st. Dc in next 4 sts. *(Leave top of FPdc below unworked). FPdc around FPdc below. Dc in next 6 sts.* Repeat from * to * around until there is 1 st left. (Leave top of FPdc below unworked). FPdc around FPdc below. (69 sts). Sl st into top of first dc to join.
Toddler/Child Round 10: Ch 2. Dc in first st. Dc2tog (reminder: in this pattern, dc2tog always means to dc the next 2 sts together). Dc in next 2 sts. *(Leave the top of the FPdc from below unworked). FPdc around FPdc below. Dc in next 2 sts. Dc2tog. Dc in next 2 sts.* Repeat from * to * around until there is 1 st left. (Leave the top of the FPdc from below unworked). FPdc around FPdc below. (59 sts). Sl st into top of first dc to join.
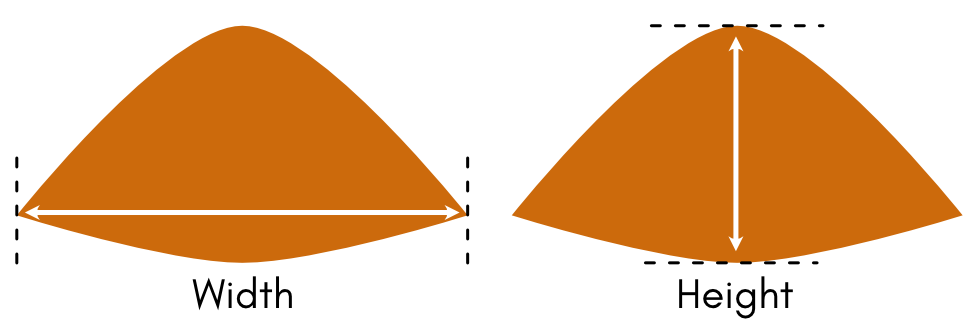
After Toddler/Child Round 10, work should measure approx. 10.5” wide x 5.5” high. (From now on, measure the width from the furthest ends closest to the bottom and height from the tip of the top of the hat down to lowest part of the bottom).
At this point, the pattern has specific instructions for toddler and child. For the child size, jump to the instructions for Child Round 11 further below.
Toddler Size (Round 11 – 13)
Toddler Round 11: Ch 2. Dc in first st. Dc2tog. Dc in next st. *(Leave the top of the FPdc from below unworked). FPdc around FPdc below. Dc in next st. Dc2tog. Dc in next 2 sts.* Repeat from * to * around until there is 1 st left. (Leave the top of the FPdc from below unworked). FPdc around FPdc below. (49 sts). Sl st into top of first dc to join.
Toddler Round 12: Ch 2. Sk the first st. Dc in next 2 sts. *Dc in next st (the top of the FPdc from below). FPdc around the same st (around the FPdc below). Sk the next st. Dc in next 3 sts.* Repeat from * to * around until there is 1 st left. Dc in the next st (the top of the FPdc from below). FPdc around the same st (around the FPdc below). (49 sts). Sl st into top of first dc to join.
Toddler Round 13: Ch 1. Sc in first st. Sc in next 2 sts. *(Leave the top of the FPdc from below unworked). Front post single crochet (FPsc) around FPdc below. Sc in next 4 sts.* Repeat from * to * around until there is 1 st left. (Leave the top of the FPdc from below unworked). FPsc around FPdc below. (49 sts). Sl st into top of first sc to join.
After Toddler Round 13, work should measure approx. 9” wide and 6.5” high.
Do not fasten off – begin hat ribbing.
Child Size (Round 11 – 15)
Child Round 11: Ch 2. Sk first st. Dc in next 3 sts. *Dc in next st (top of FPdc from below). FPdc around same st (around the FPdc from below). Sk the next st. Dc in next 4 sts.* Repeat from * to * around until there is 1 st left. Dc in next st (top of FPdc from below). FPdc around same st (around the FPdc from below). (59 sts). Sl st into top of first dc to join.
Child Round 12: Ch 2. Dc in first st. Dc in next 3 sts. *(Leave the top of the FPdc below unworked). FPdc around FPdc below. Dc in next 5 sts.* Repeat from * to * around until there is 1 st left. (Leave the top of the FPdc below unworked). FPdc around FPdc below. (59 sts). Sl st into top of first dc to join.
Child Round 13: (For this round, you will be decreasing in every other section). Ch 2. Dc in first st. Dc in next 3 sts. *(Leave the top of the FPdc below unworked). FPdc around FPdc below. Dc in next st. Dc2tog. Dc in next 2 sts. (Leave the top of the FPdc below unworked). FPdc around FPdc below. Dc in next 5 sts.* Repeat from * to * around until there are 7 sts left. (Leave the top of the FPdc below unworked). FPdc around FPdc below. Dc in next st. Dc2tog. Dc in next 2 sts. (Leave the top of the FPdc below unworked). FPdc around FPdc below. (54 sts). Sl st into top of first dc to join.
After Child Round 13, work should measure approx. 10.25” wide and 6.5” high.
Child Round 14: Ch 2. Sk first st. Dc in next 3 sts. *Dc in the next st (the top of FPdc from below). FPdc around the same st (around the FPdc below). Sk the next st. Dc in next 3 sts. Dc in the next st (the top of FPdc from below). FPdc around the same st (around the FPdc below). Sk the next st. Dc in next 4 sts.* Repeat from * to * around until there are 6 sts left. Dc in the next st (the top of FPdc from below). FPdc around the same st (around the FPdc below). Sk the next st. Dc in next 3 sts. Dc in the next st (the top of FPdc from below). FPdc around the same st (around the FPdc below). (54 sts). Sl st into top of first dc to join.
Child Round 15: Ch 1. Sc in first st. Sc in next 3 sts. *(Leave the top of the FPdc below unworked). Front post single crochet (FPsc) around FPdc below. Sc in next 4 sts. (Leave the top of the FPdc below unworked). FPsc around FPdc below. Sc in next 5 sts. Repeat from * to * around until there are 6 sts left. (Leave the top of the FPdc below unworked). FPsc around FPdc below. Sc in next 4 sts. (Leave the top of the FPdc below unworked). FPsc around FPdc below. (54 sts). Sl st into top of first sc to join.
After Child Round 15, work should measure 9.5” wide and 7” high.
Do not fasten off – begin hat ribbing.
Adult Size (Round 8 – 16)
Adult Round 8: Ch 2. Dc in first st. Dc in next 3 sts. *Dc in next st (top of FPdc from below). FPdc around same st (around the FPdc from below). Dc in next 6 sts.* Repeat from * to * around until there are 2 sts left. Dc in next st (top of FPdc from below). FPdc around same st (around the FPdc from below). Dc in last st. (79 sts). Sl st into top of first dc to join.
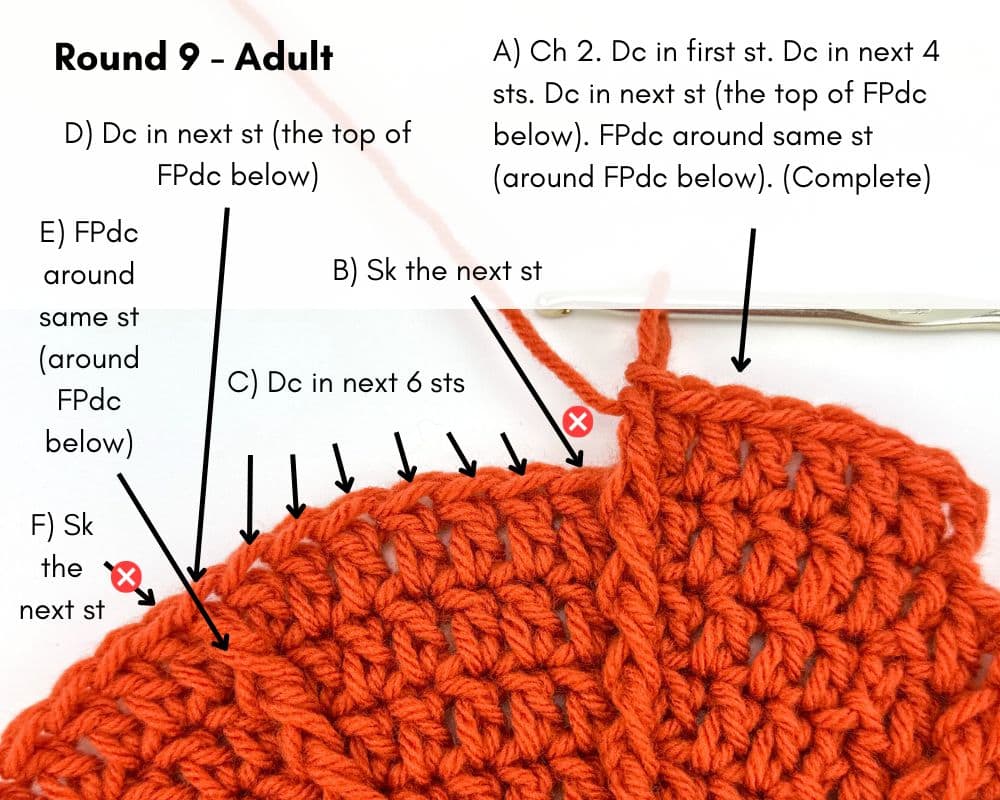
Adult Round 9: Ch 2. Dc in first st. Dc in next 4 sts. *Dc in next st (the top of FPdc below). FPdc around same st (around FPdc below). Sk the next st. Dc in next 6 sts.* Repeat from * to * around until there are 2 sts left. Dc in next st (the top of FPdc below). FPdc around same st (around FPdc below). Sk last st. (79 sts). Sl st into top of first dc to join.
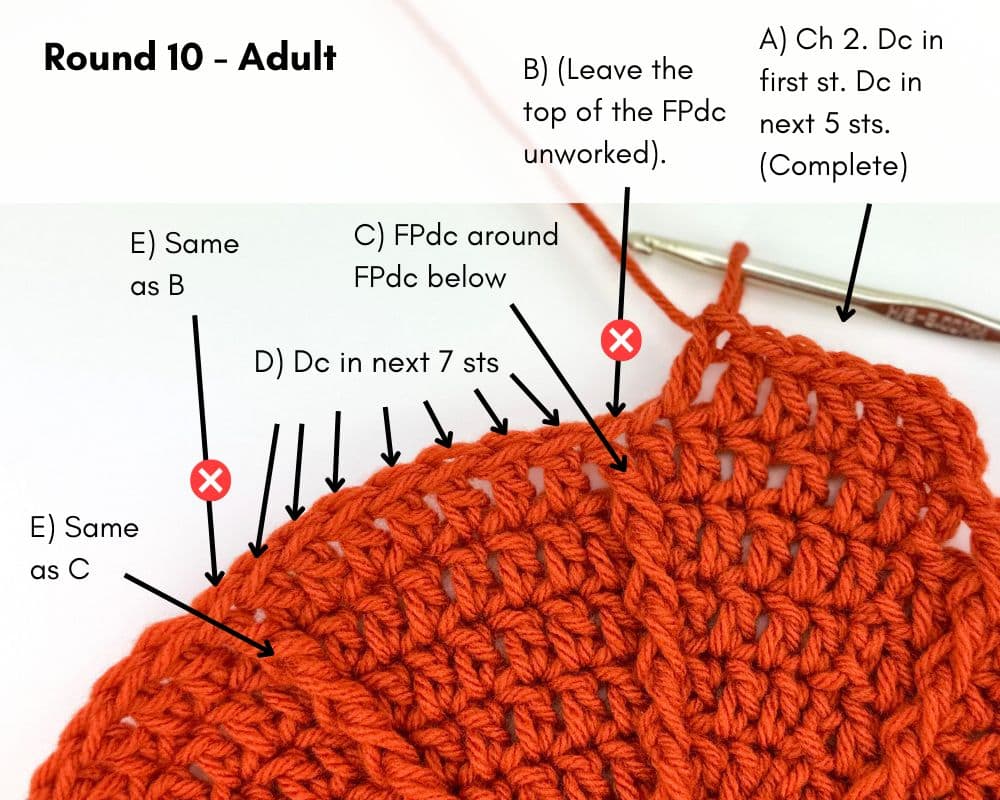
Adult Round 10: Ch 2. Dc in first st. Dc in next 5 sts. *(Leave the top of the FPdc unworked). FPdc around FPdc below. Dc in next 7 sts.* Repeat from * to * around until there is 1 st left. (Leave the top of the FPdc unworked). FPdc around FPdc below. (79 sts). Sl st into top of first dc to join.
Adult Round 11: Ch 2. Dc in first st. Dc2tog (reminder: in this pattern, dc2tog always means to dc the next 2 sts together). Dc in next 3 sts. *(Leave the top of the FPdc unworked). FPdc around FPdc below. Dc in next 2 sts. Dc2tog. Dc in next 3 sts.* Repeat from * to * around until there is 1 st left. (Leave the top of the FPdc unworked). FPdc around FPdc below. (69 sts). Sl st into top of first dc to join.
After Adult Round 11, work should measure approx. 12.5” wide x 6” high. From now on, measure the width from the furthest ends closest to the bottom and height from the tip of the top of the hat down to lowest part of the bottom).
Adult Round 12: Ch 2. Sk first st. Dc in next 4 sts. *Dc in the next st (top of FPdc below). FPdc around same st (around the FPdc below). Sk the next st. Dc in next 5 sts.* Repeat from * to * around until there is 1 st left. Dc in the next st (top of FPdc below). FPdc around same st (around the FPdc below). (69 sts). Sl st into top of first dc to join.
Adult Round 13: Ch 2. Dc in first st. Dc in next 4 sts. *(Leave the top of the FPdc unworked). FPdc around FPdc below. Dc in next 6 sts.* Repeat from * to * around until there is 1 st left. (Leave the top of the FPdc unworked). FPdc around FPdc below. (69 sts). Sl st into top of first dc to join.
Adult Round 14: (For this round, you will be decreasing in every other section). Ch 2. Dc in the first st. Dc in next 4 sts. *(Leave the top of the FPdc below unworked). FPdc around FPdc below. Dc in next 2 sts. Dc2tog. Dc in next 2 sts. (Leave the top of the FPdc unworked). FPdc around FPdc below. Dc in next 6 sts.* Repeat from * to * around until there are 8 sts left. (Leave the top of the FPdc unworked). FPdc around FPdc below. Dc in next 2 sts. Dc2tog. Dc in next 2 sts. (Leave the top of the FPdc unworked). FPdc around FPdc below. (64 sts). Sl st into top of first dc to join.
After Adult Round 14, work should measure approx. 13” wide and 8” high
Adult Round 15: Ch 2. Sk first st. Dc in next 4 sts. *Dc in the next st (the top of the FPdc below). FPdc around the same st (around the FPdc below). Sk the next st. Dc in next 4 sts. Dc in the next st (the top of the FPdc below). FPdc around the same st (around the FPdc below). Sk the next st. Dc in next 5 sts.* Repeat from * to * around until there are 7 sts left. Dc in the next st (the top of the FPdc below). FPdc around the same st (around the FPdc below). Sk the next st. Dc in the next 4 sts. Dc in the next st (the top of the FPdc below). FPdc around the same st (around the FPdc below). (64 sts). Sl st into top of first dc to join.
Adult Round 16: Ch 1. Sc in first st. Sc in next 4 sts. *(Leave the top of the FPdc unworked). Front post single crochet (FPsc) around FPdc below. Sc in next 5 sts. (Leave the top of the FPdc unworked). FPsc around FPdc below. Sc in next 6 sts.* Repeat from * to * around until there are 7 sts left. (Leave the top of the FPdc unworked). FPsc around FPdc below. Sc in next 5 sts. (Leave the top of the FPdc unworked). FPsc around FPdc below. (64 sts). Sl st into top of first sc to join.
After Adult Round 16, work should measure 11.5” wide and 8.5” high.
Do not fasten off – begin hat ribbing.
Crochet Pumpkin Hat Ribbing (All Sizes)
The ribbing is 1.25” from the edge of the hat. To make the ribbing smaller or larger, decrease or increase the number of chains on Step 1.
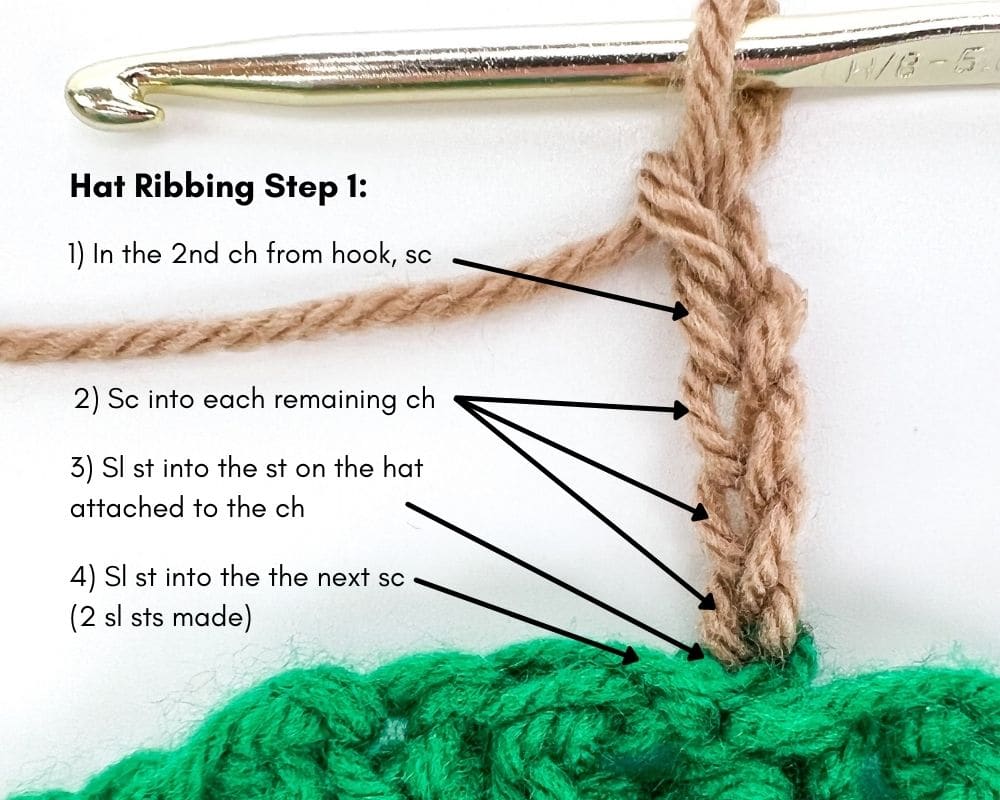
Step 1: Ch 5 (or your desired number of chains). Do not turn. In the second ch from hook, sc in the top loop of the chain. Sc into each remaining chain (into the top loop). You will have created 4 sc sts in total. Sl st into the first st on the hat (the st attached to the chain). Sl st into the next st on the hat. (2 sl sts made).
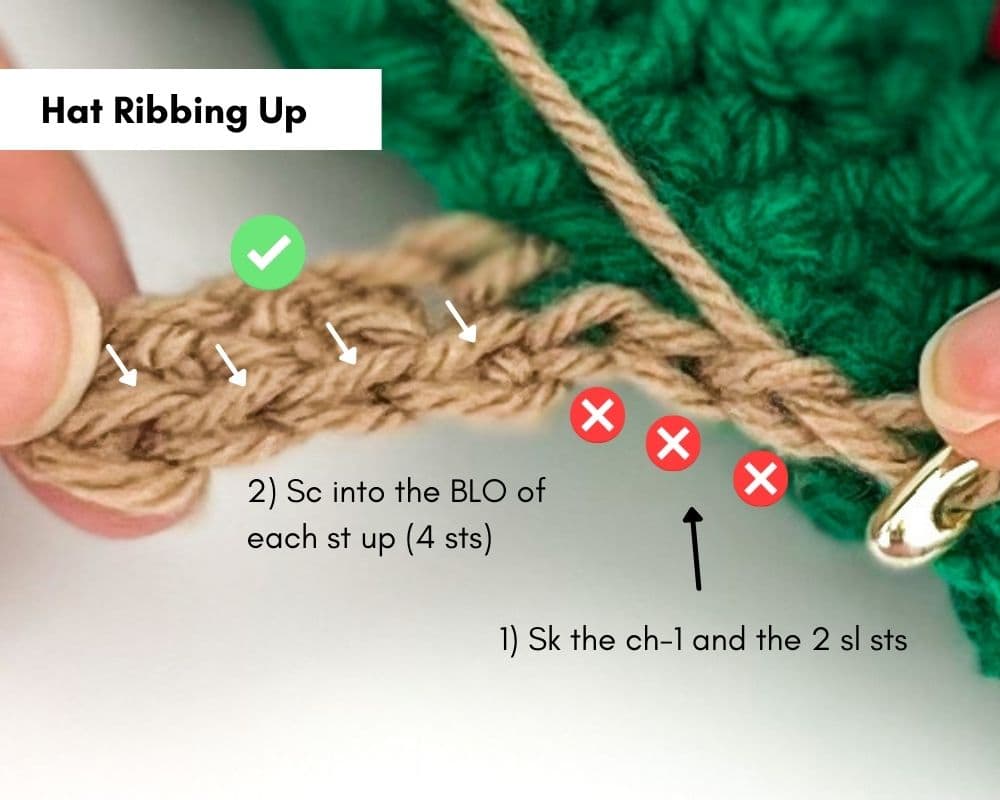
Ribbing Up: Ch 1 and turn. Sk the ch-1 and the 2 slip stitches. In the first st, sc into the back loop only (BLO) which is the loop furthest away from you. Sc into the BLO of each st up. (4 sc sts in total).
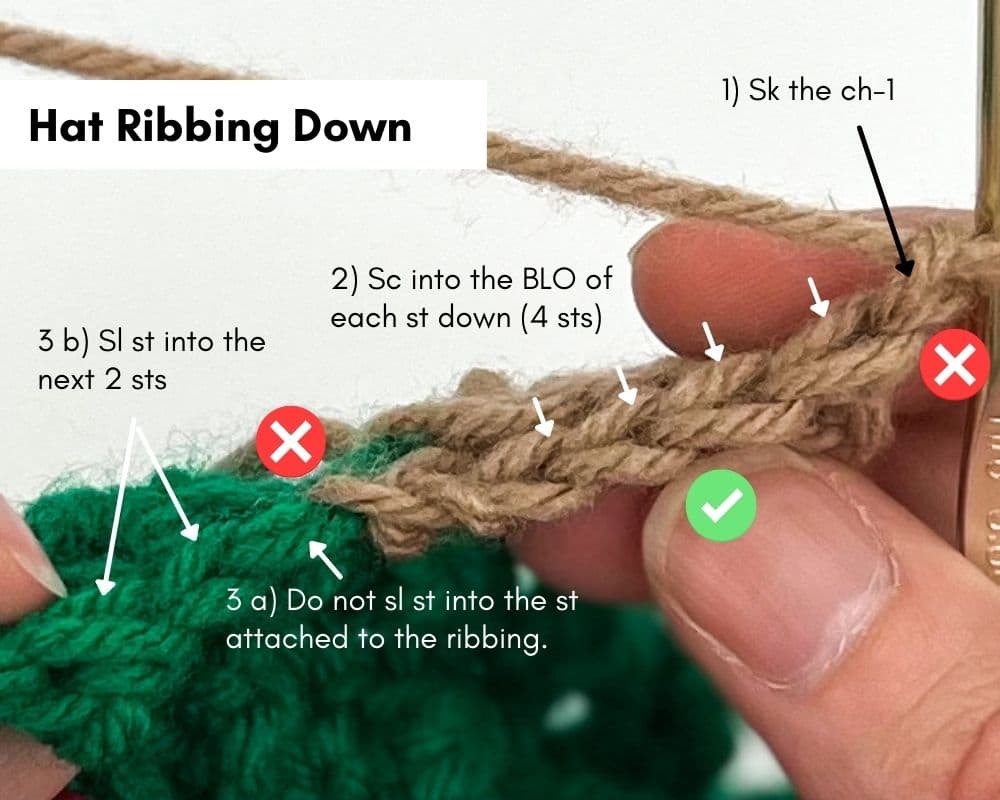
Ribbing Down: Ch 1 and turn. Sk the ch-1. Sc into the BLO of each st down. (The last st can be tricky to see as it can get quite tight. Always count your sts). (4 sts in total). Sl st into the next st on the hat – ensure it’s the next st, not the st attached to the ribbing. Sl st into the next st on the hat (2 sl sts made).
Work Ribbing Around: Repeat Ribbing Up and Ribbing Down all the way around. You will finish by slip stitching into the last 1 or 2 sts (whether you have 1 or 2 sts left at the end of the round doesn’t matter).
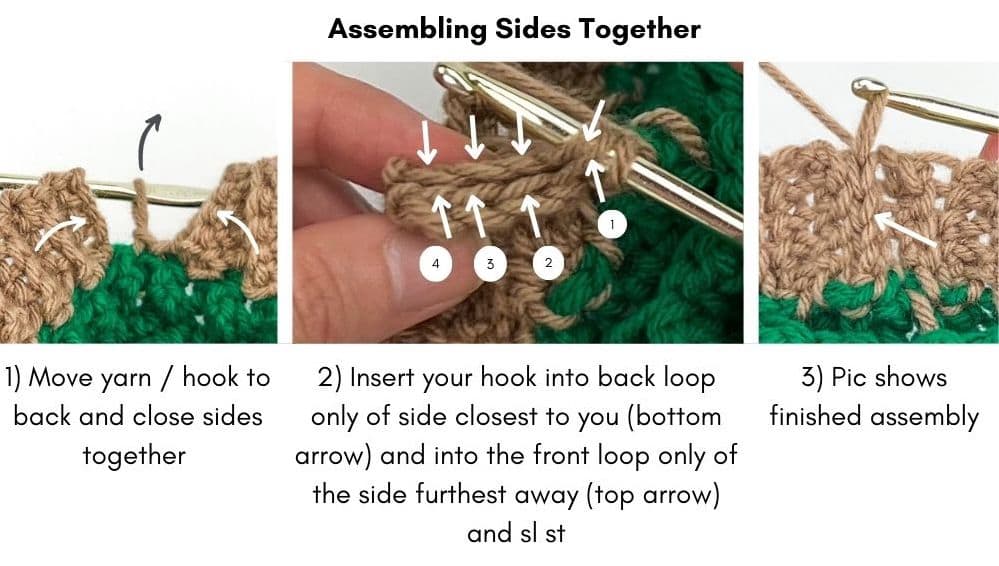
Assembling The Beginning and End of Ribbing:
After your last sl st, move your yarn and hook to the back of your work and pull the beginning and end sides together (like you are closing a book). From the back, line up the 4 sc on each side so they are even with each other.
Starting with the first of 4 scs and working up, insert your hook into the back loop only of side closest to you and into the front loop only on the side furthest away and sl st. Repeat all the way up (4 sl sts).
Fasten off and weave in all loose ends.
Crochet Stem for Pumpkin Hat
How to Crochet a Pumpkin Stem on a Hat
The stem for a crochet pumpkin hat is really easy to make. The stem is made by making a circle, then a round of working into the back loops followed by several rounds of making single crochet stitches around. Follow the instructions below to learn how to crochet a pumpkin stem on a hat.
Stem Instructions (All Sizes)
Note: I did not use stuffing for the stem.
Start: With brown yarn, make a Magic Ring/Circle.
Round 1: Make 10 sc into the Magic Ring. Pull end of Magic Ring tight to close. (10 sc). Sl st into top of first sc to join. (Reminder: never turn after a round).
Round 2: Ch 1. In the first st, sc into the back loop only (BLO), which is the loop furthest away from you. Sc into the BLO of each st around. (10 sc). Sl st into both loops of the top of first sc to join.
Work into both loops from now on.
Round 3: Ch 1. In the first st, sc. Sc in each st around. (10 sc). Sl st into top of first sc to join.
Rounds 4 – 7: Repeat Round 3.
Do not fasten off.
Leaves Instructions (All Sizes)
Attach green yarn by placing a strand of green on your hook and pulling it through the loop of brown that is currently on your hook. Fasten off brown yarn.
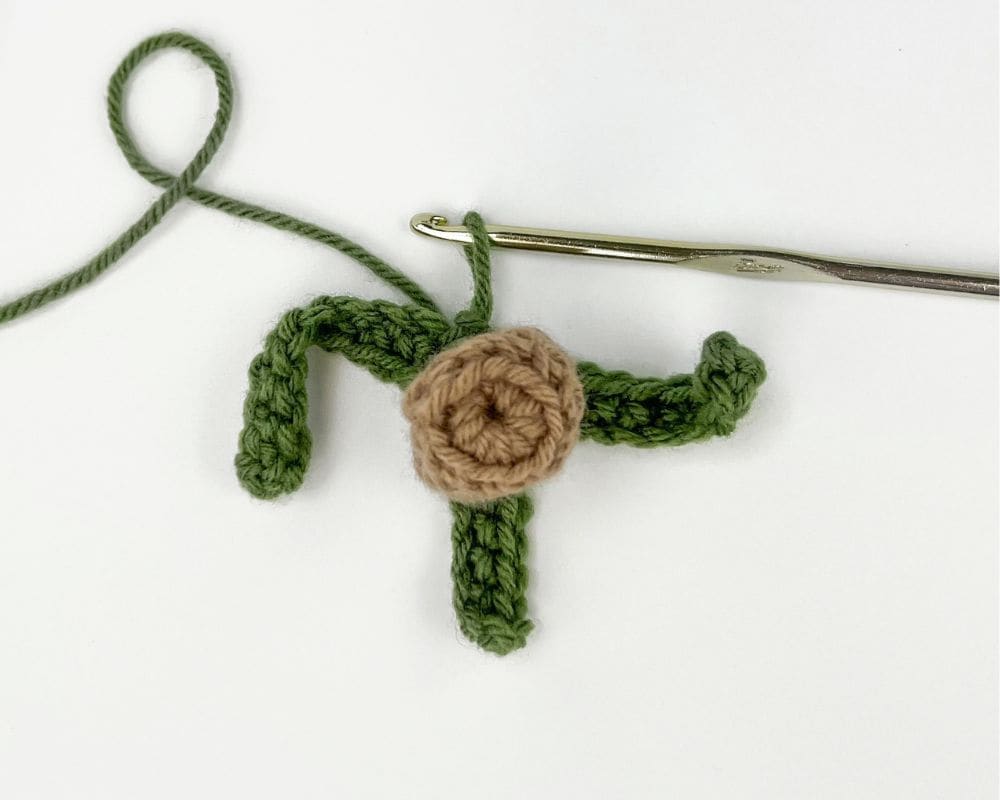
Round 1:
With green, ch 11. In second ch from hook, sc. Sc in next 9 chains. (10 sc). Sl st into next st on the Stem (not the first st/the st attached to the chain).
Sl st into next 3 sts on the Stem. Ch 6. In the second ch from hook, sc. Sc in next 4 chains. (5 sc). Sl st into next st on the Stem.
Sl st into next 2 sts on the Stem. Ch 8. In second ch from hook, sc. Sc in next 6 chains. (7 sc). Sl st into next st on the Stem. Sl st into the next st on the Stem. Sl st into the first ch (the bottom of the ch 11 that started the round) to join.
Round 2:
Ch 3. (Do not turn). Tr in the same ch. (Work up, into each ch). Tr in the next ch. Dc in next 2 chains. Hdc in next 2 chains. Sc in next 2 chains. Sl st in next 2 chains. Ch 1. (Work down the other side, into each sc). Sl st in next 2 sts. Sc in next 2 sts. Hdc in next 2 sts. Dc in next 2 sts. Tr in next 2 sts. Ch 3. Sl st into same st.
Sl st into next 3 sts (the slip stitches from the previous round). Sl st into the bottom ch (the first of the ch-6 from the previous round). Ch 3. Tr in same ch. (Work up, into each ch). Dc in next ch. Hdc in next ch. Sc in next ch. Sl st in next ch. Ch 1. (Work down the other side, into each sc). Sl st in next st. Sc in next st. Hdc in next st. Dc in next st. Tr in next st. Ch 3. Sl st into same st.
Sl st into next 2 sts (the slip stitches from the previous round). Sl st into the bottom ch (the first of the ch-8 made from previous round). Ch 3. Tr in same ch. (Work up, into each ch). Dc in next 2 chains. Hdc in next ch. Sc in next 2 chains. Sl st in next ch. Ch 1. (Work down the other side, into each sc). Sl st in next st. Sc in next 2 sts. Hdc in next st. Dc in next 2 sts. Tr in next st. Ch 3. Sl st into same st. Sl st into next st (the slip stitch from the previous round).
Fasten off leaving a 24” in tail. Weave in all other ends except for the 24” tail.
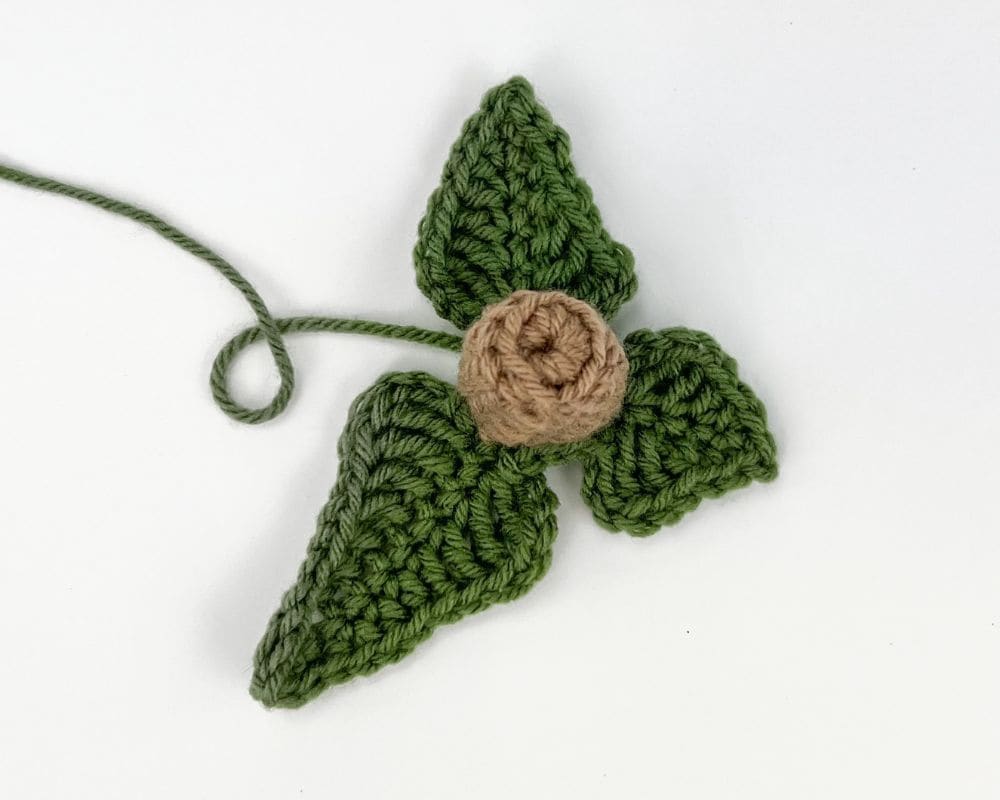
Using a yarn needle and the 24” tail, attach the Stem and Leaves to the top of the hat by weaving the yarn in and out around the slip stitches made in green around the stem.
Weave in loose ends.
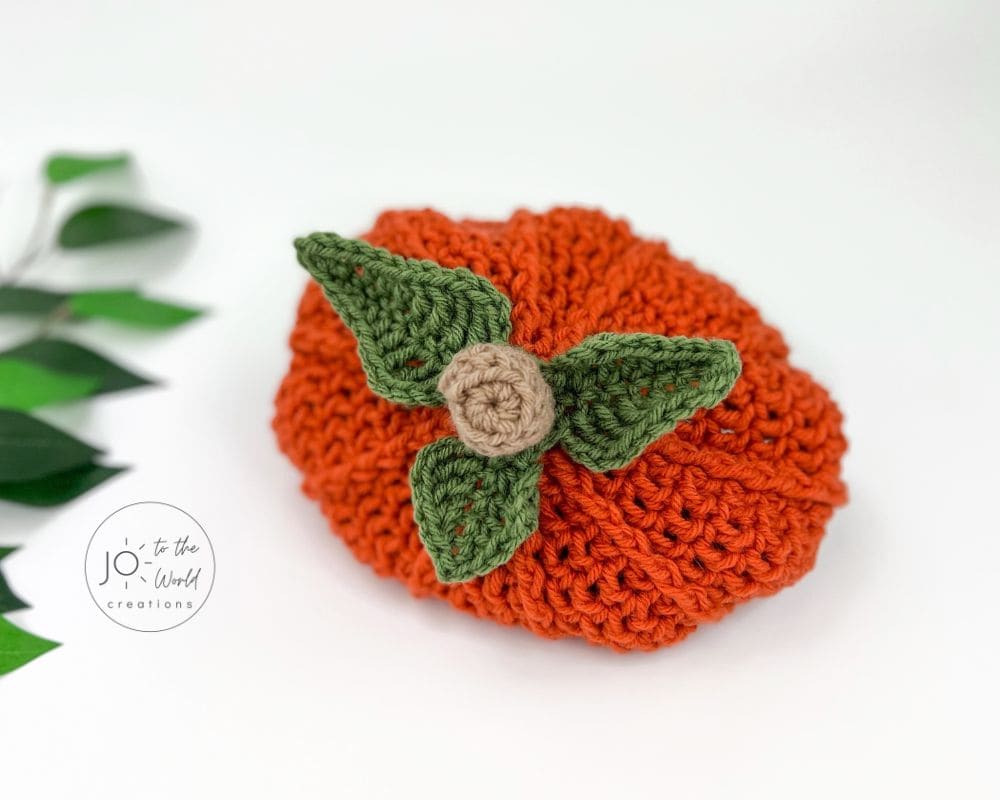
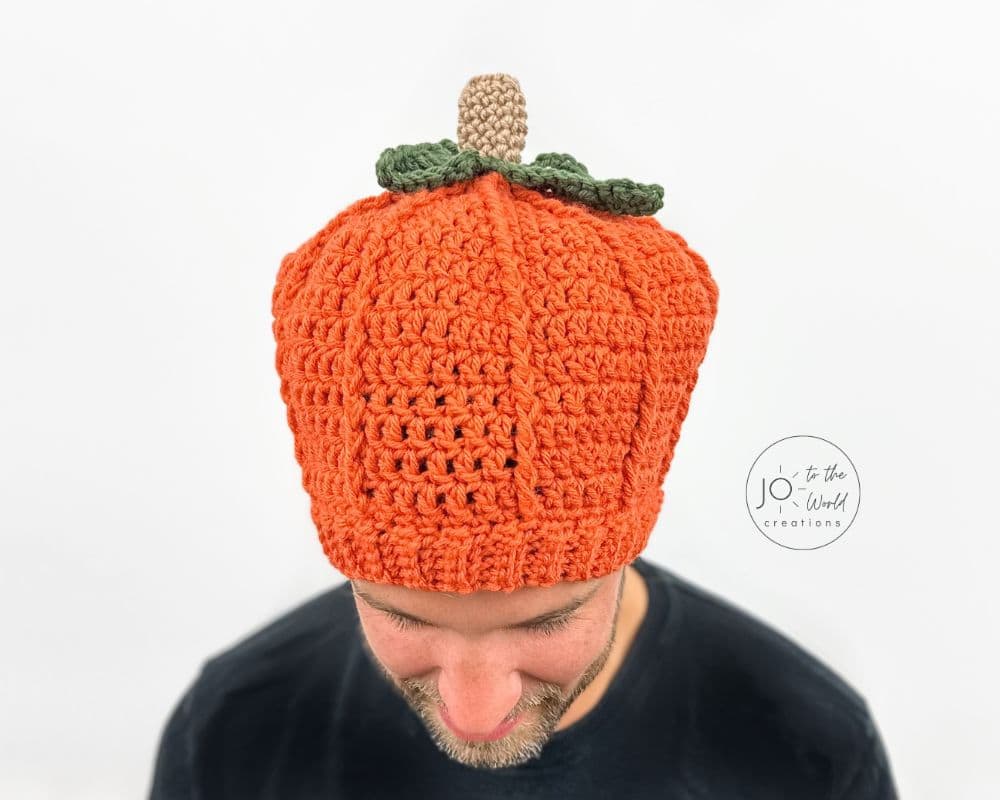
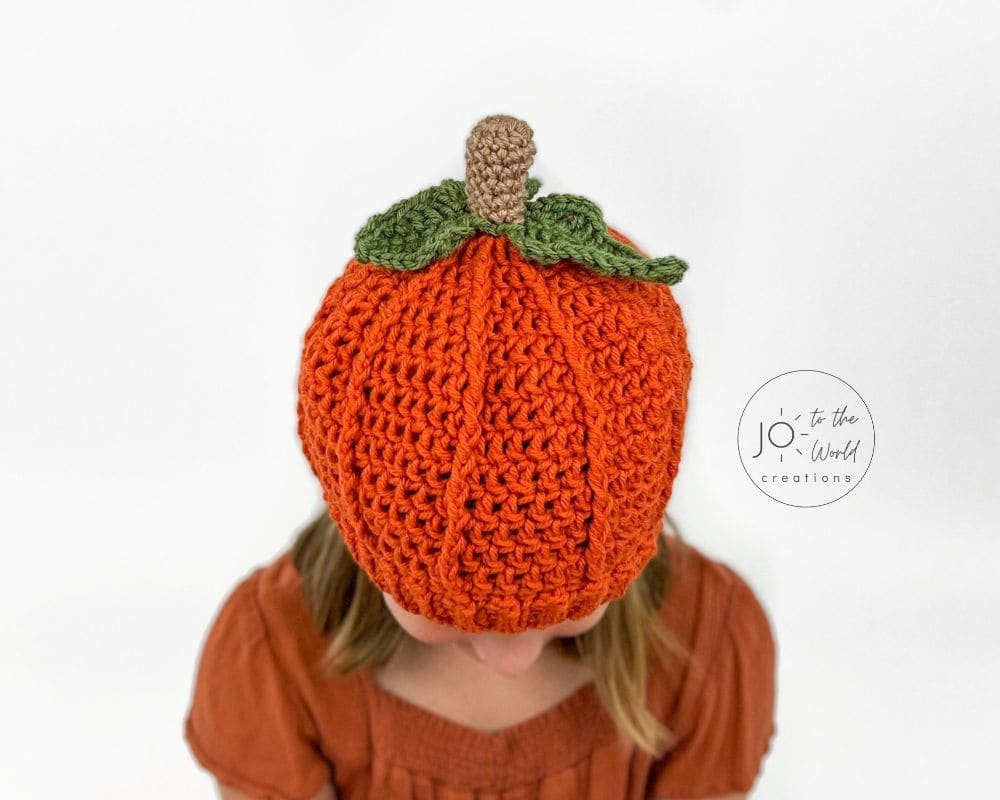
And now you have a new pumpkin hat!
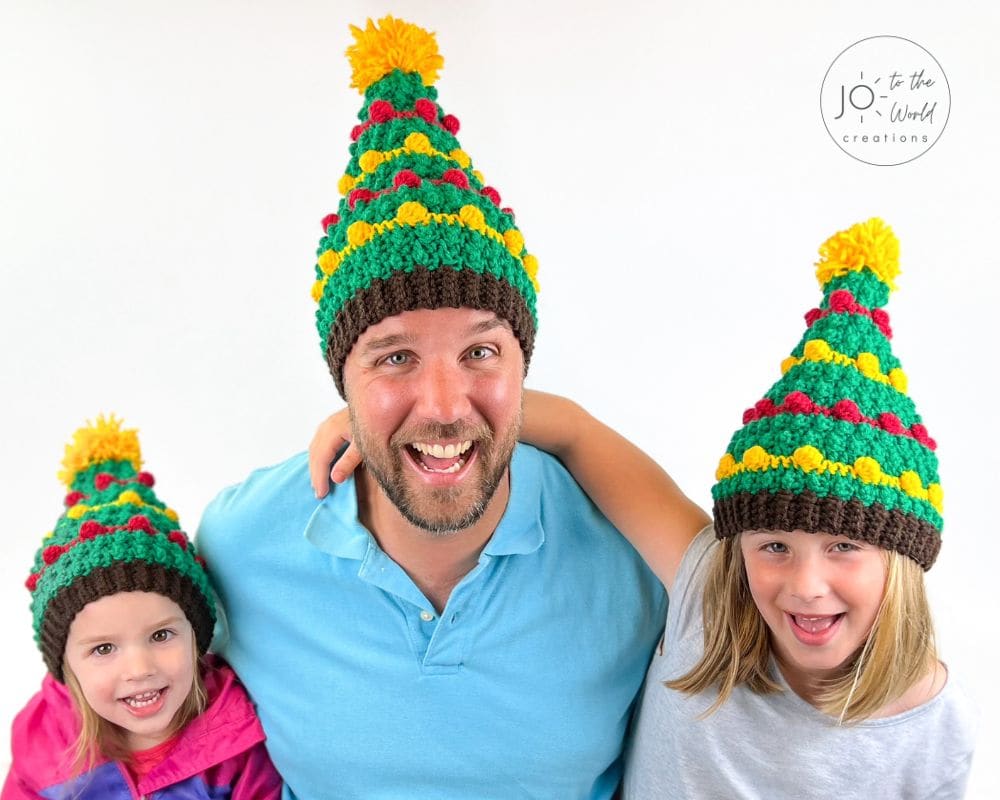
Next, make a Crochet Christmas Tree Hat for the whole family!
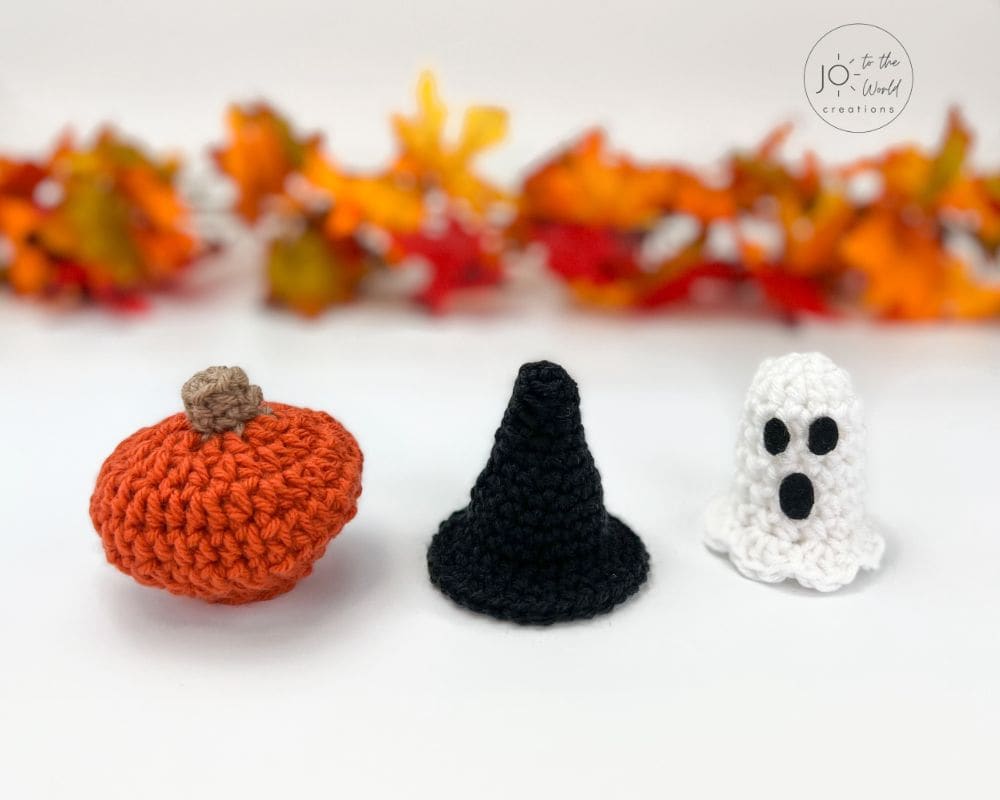
More Fall Crochet Patterns


I’m Jo, the designer behind Jo to the World Creations, and I’m dedicated to helping you make the perfect crochet gift! I love designing and sharing free crochet patterns that you can make for every gift occasion.
About →Let’s Connect
Download. Print. Keep.
Get Instant Access to ALL Printable Patterns
Make your crocheting more enjoyable, relaxing and productive with printable PDF patterns.
- 100+ premium crochet patterns.
- Download, save and print from any device.
- No ads or popups!
Not sure yet? Take a look at the Pattern Library and see all the patterns you can download once you’re a member.

Save with Pattern Bundles
For a limited time, I’ve grouped some of my most popular crochet patterns and I’m offering them as pattern bundles where you can get the printable versions for one low, discounted price. Check out these incredible Crochet Pattern Bundles.
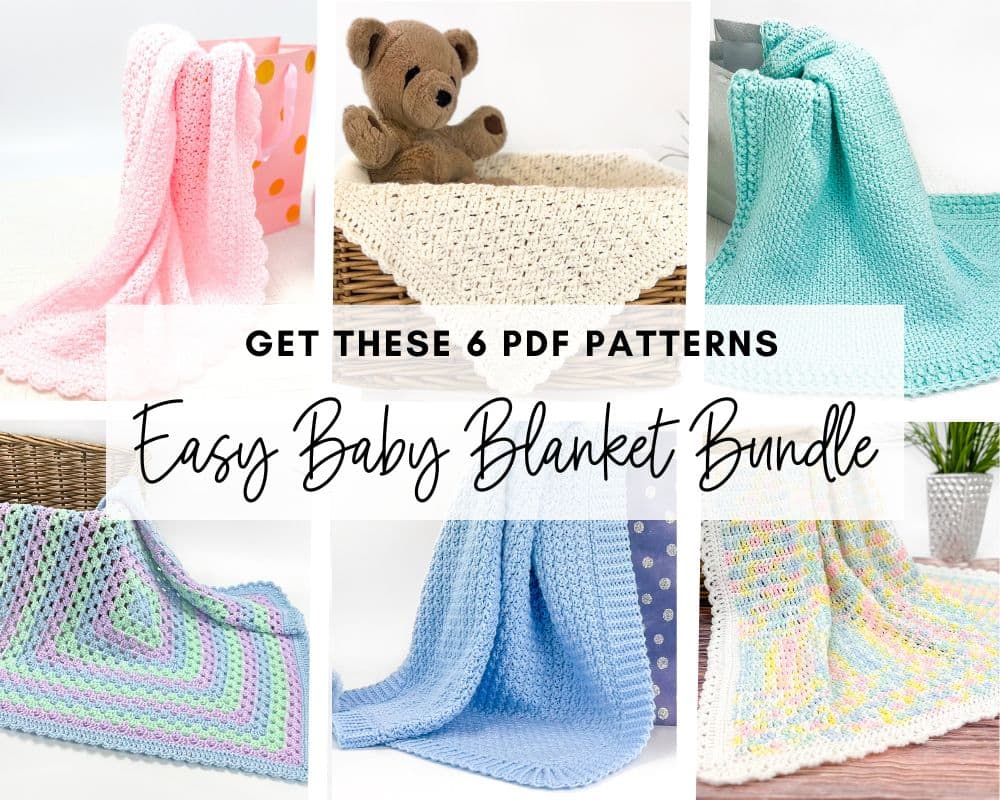
Easy Baby Blanket Bundle
With this Easy Baby Blanket Bundle, you’ll get SIX easy crochet baby blankets as printable downloads. Each pattern includes step-by-step instructions and a full video tutorial.
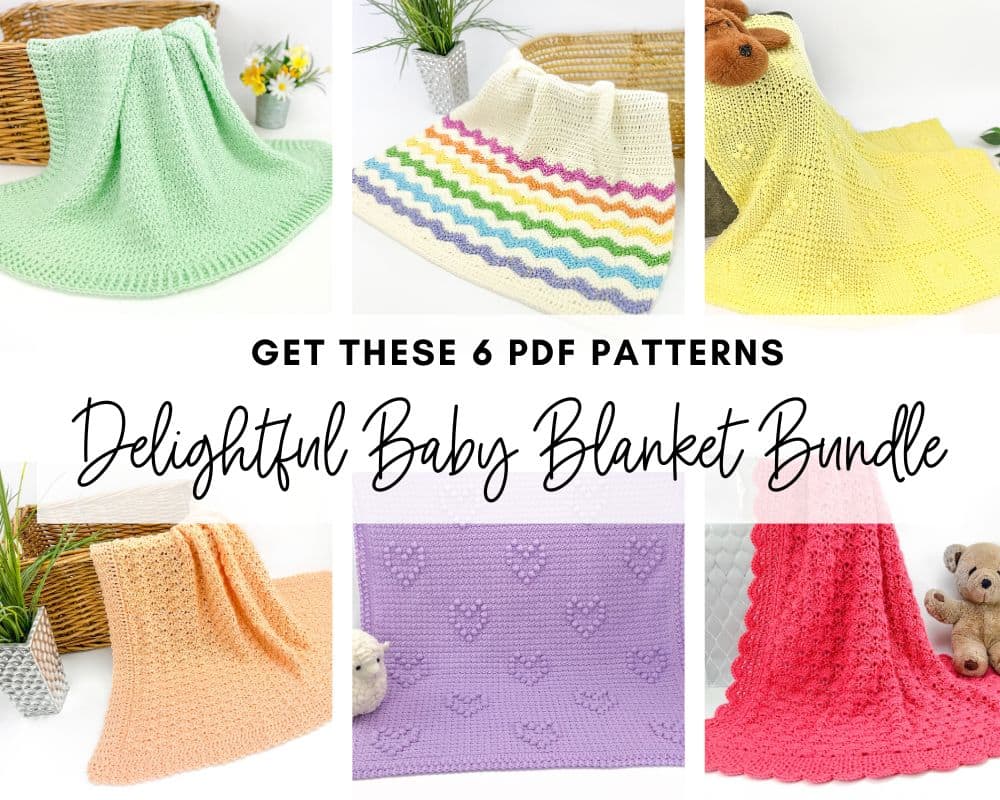
Delightful Baby Blanket Bundle
This incredible deal includes six SIX blanket patterns that are a delight to make and create truly stunning blankets – all as printable PDFs for one low, discounted price.
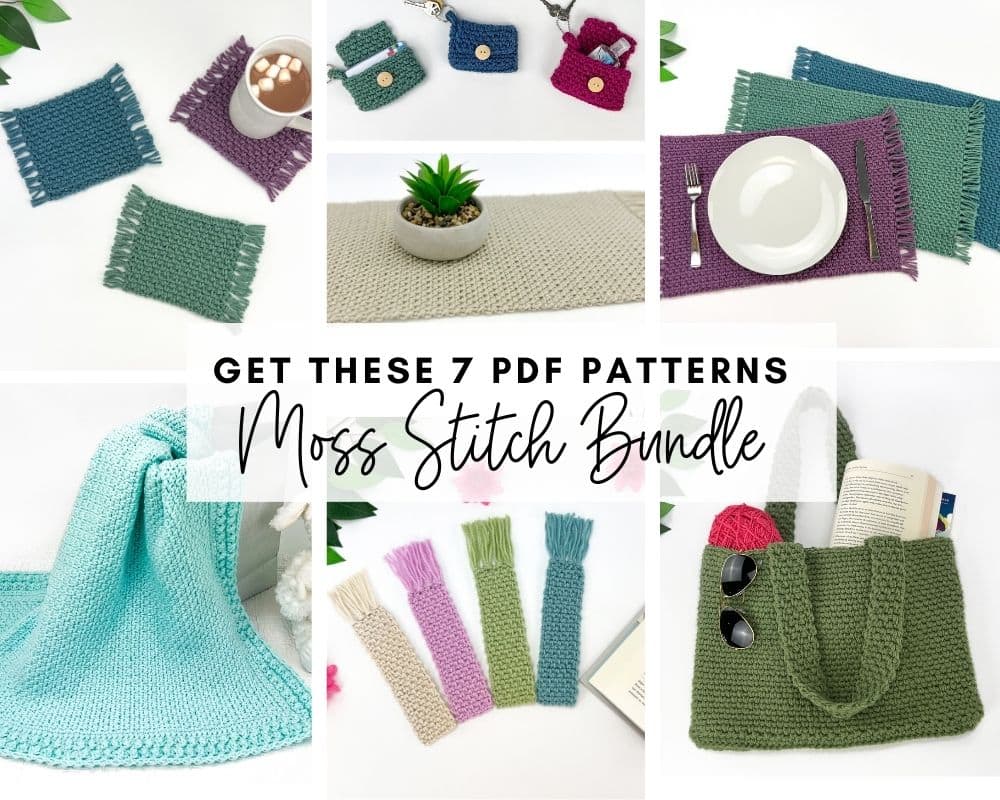
Moss Stitch Pattern Bundle
All your favorite Moss Stitch patterns in one bundle! Get SEVEN easy Moss Stitch crochet patterns as ad-free, print-ready PDFs to print, save and keep forever.
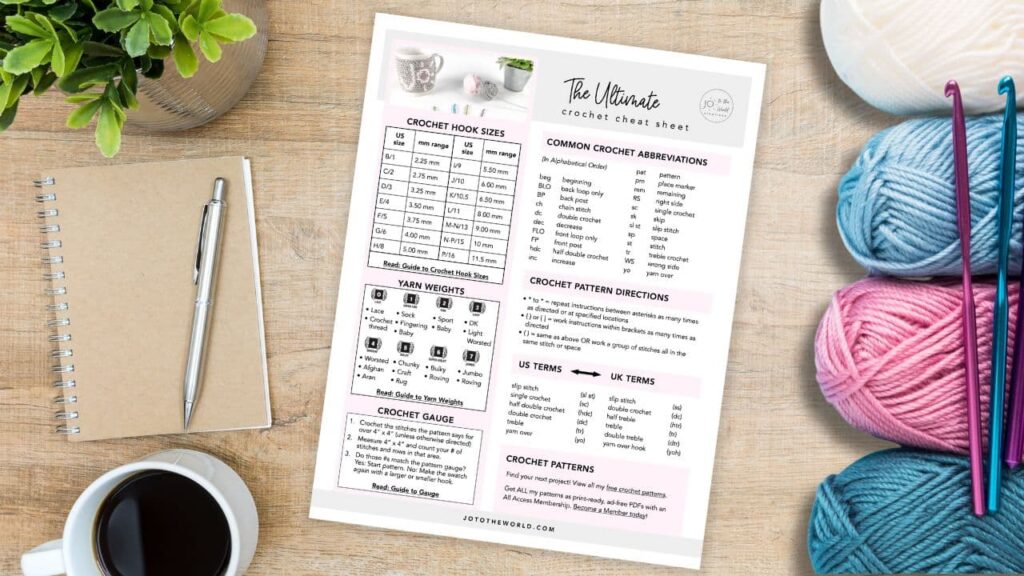
Free Crochet Cheat Sheet
Get instant access to this Ultimate Crochet Cheat Sheet! Plus you’ll receive free patterns for crochet gifts delivered right to your inbox!
Featured Crochet Patterns


Pattern Collections


Free Patterns for Crochet Gifts
Never miss a pattern! Get all my secrets to making incredible crochet gifts as well as new free crochet patterns and exclusive deals when you sign up for my newsletter (it’s free!).