
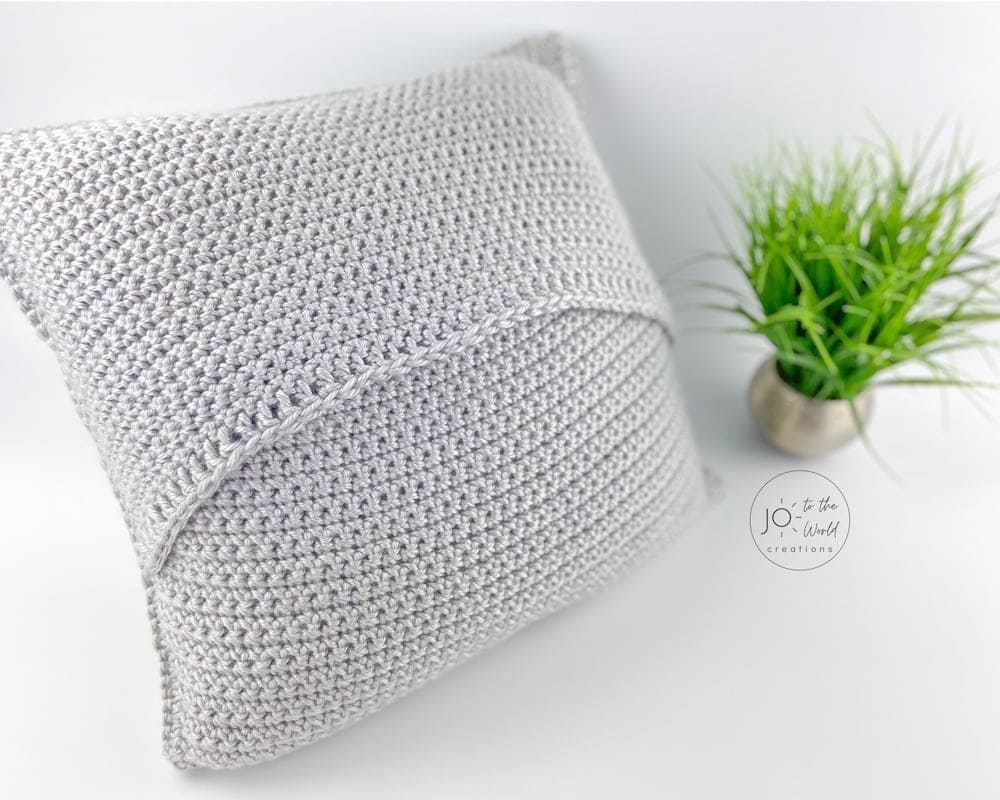
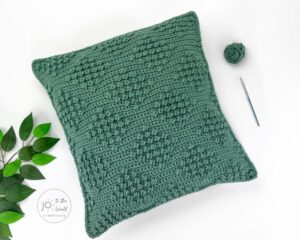
Paw Print Pillow Cover – Free Crochet Pattern
This free crochet pattern for a Paw Print Pillow Cover is a quick, easy, fun crochet project for your home decor and makes a paw-fect crochet gift for men, women, friends – any pet/dog/animal lover. It’s a simple crochet pillowcase pattern and photo tutorial, a great intro to colorwork (Fair-Isle and Intarsia), and creates a beautiful removable, cushion cover.
Before we begin, I would like to thank you for visiting Jo to the World Creations, a site dedicated to helping you give the gift of crochet.
More free patterns (that make awesome crochet gifts) are on the way! Sign up for my emails, follow me and never wonder “What should I make for…” again!
FREE PATTERNS FOR CROCHET GIFTS
Delivered to your inbox
AND GET A FREE PDF OF THE LOVE PILLOW
& A FREE CROCHET CHEAT SHEET
Unsubscribe at any time.
Delivered Socially
Follow Me on

Affiliate Disclosure: This post may contain affiliate links meaning I may receive a commission for purchases made through links in this post at no extra cost to you. As an Amazon Associate, I earn from qualifying purchases.
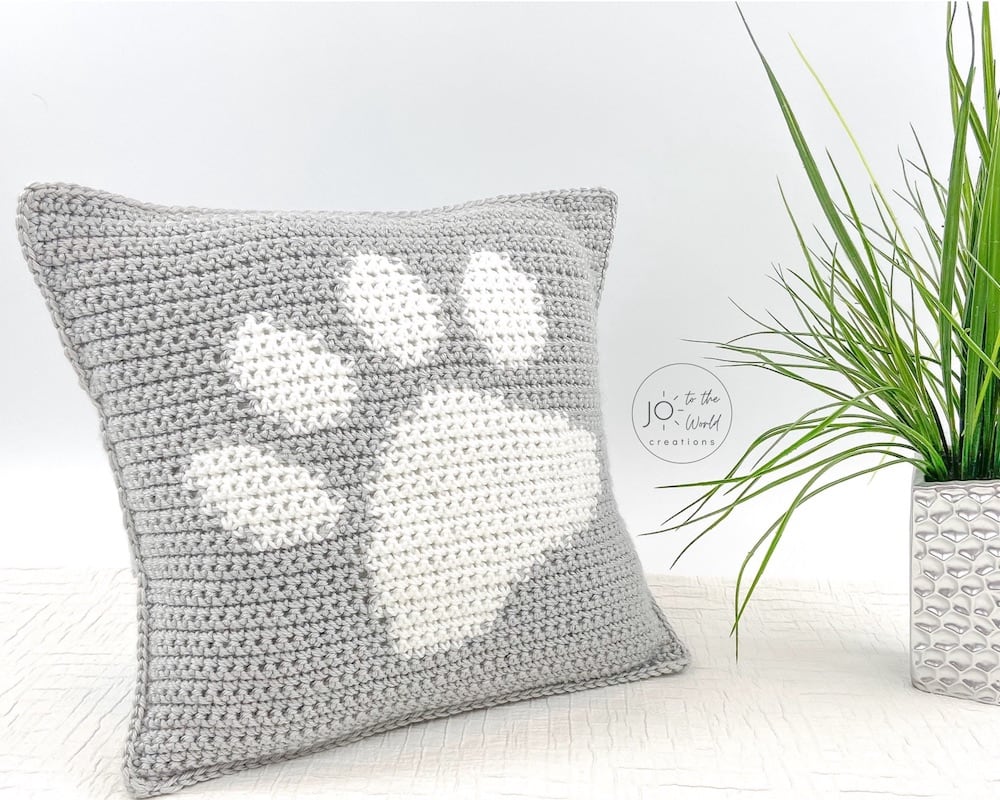
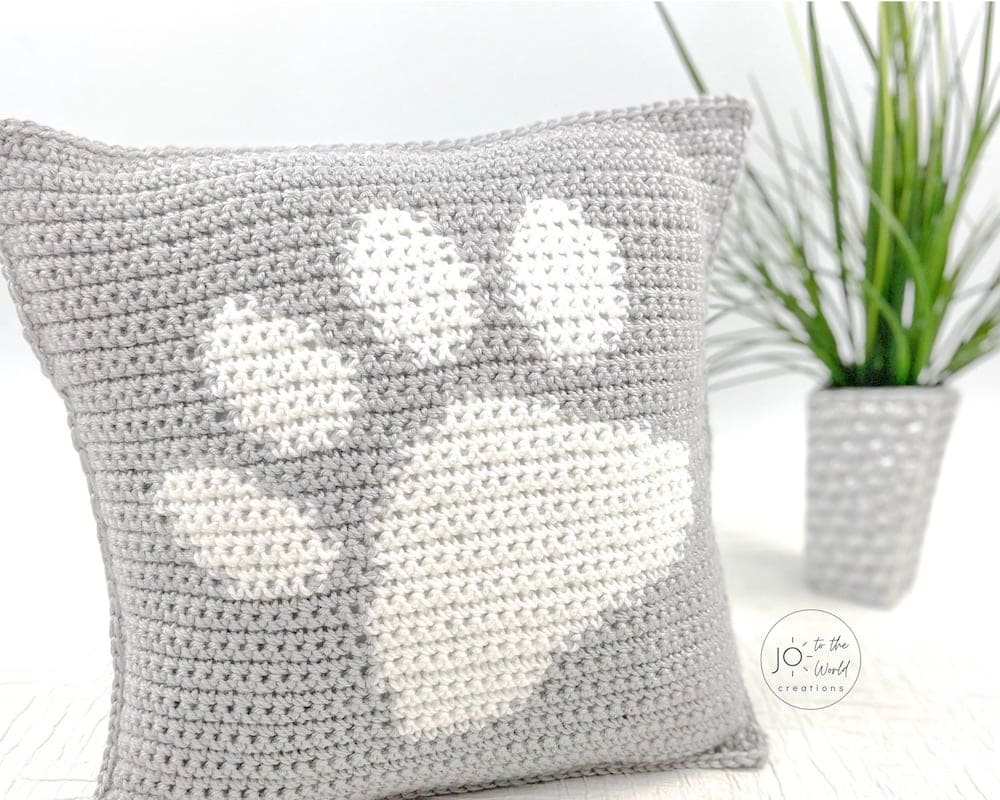
Paw Print Pillow Cover Crochet Pattern
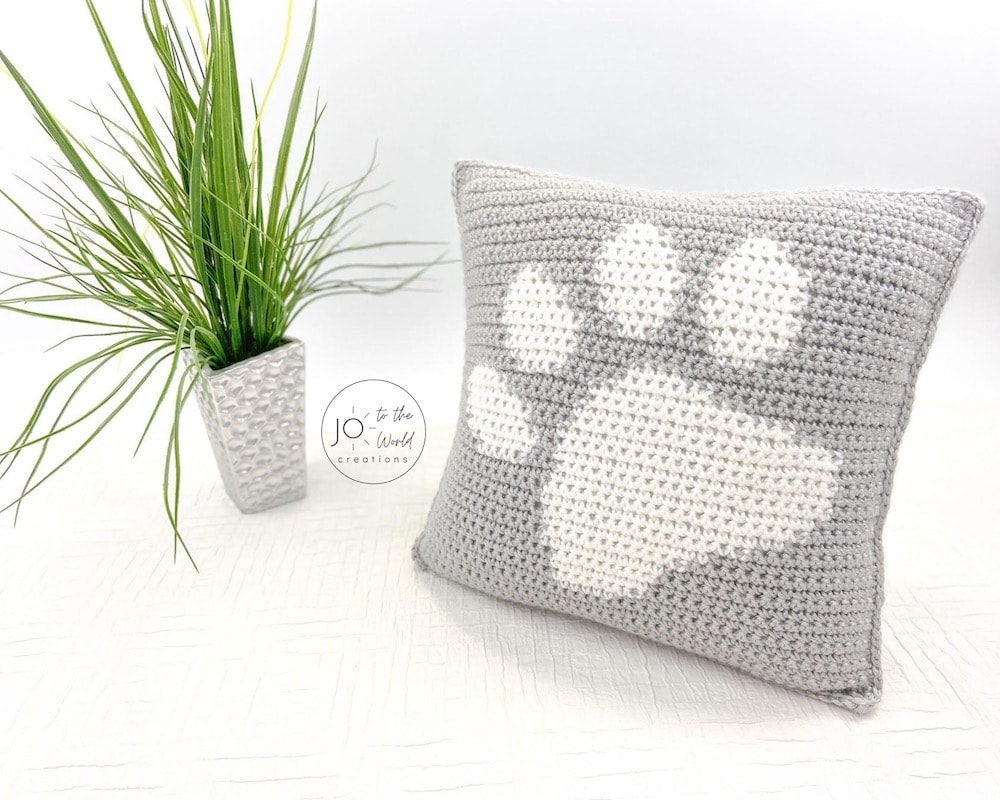
Looking for a fun, easy, fast, unique crochet gift idea or project that will look great in your home? This Paw Print Pillow Cover Crochet Pattern is an easy to follow, carefully designed pattern that works up quickly and looks fantastic when completed. It creates a professional-looking, super soft, removable 18″ x 18″ cushion cover. The only question is whether you keep it to enhance your own home decor or give it as a gift! It’s a terrific crochet gift for men or women, anyone who is a pet lover!
Get the PDF!
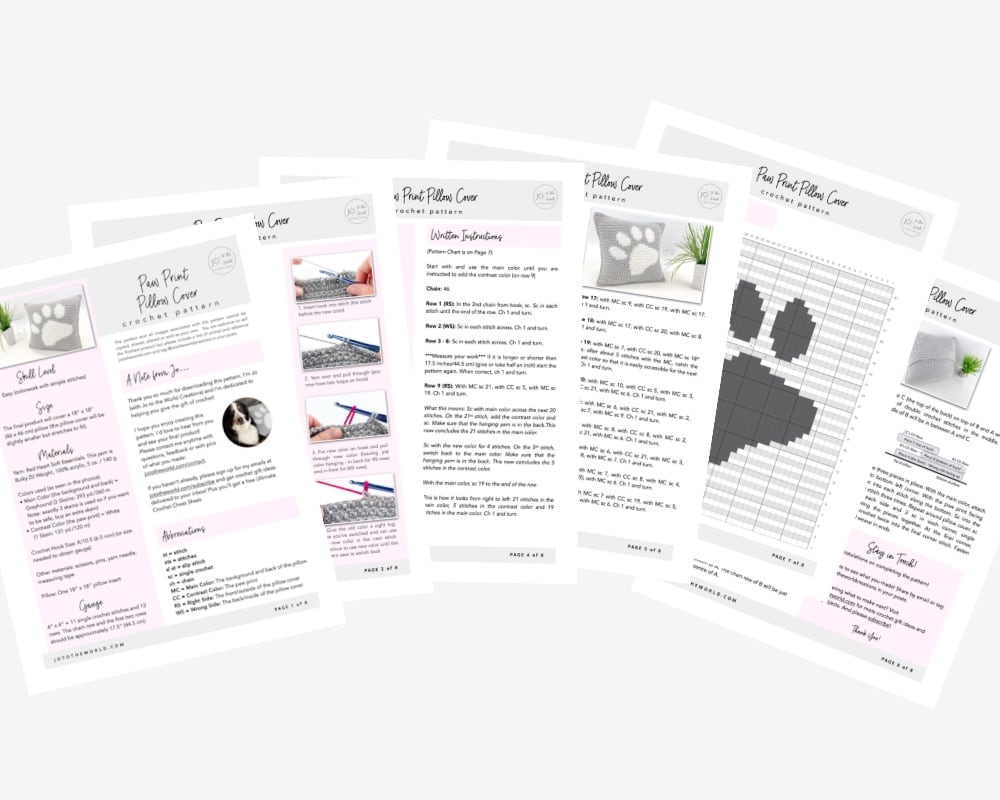
Purchase the printer-friendly PDF of this pattern that you can instantly download! It includes everything from this free pattern but you can easily save, print, mark up, access anytime and keep forever.
When you purchase the PDF of this pattern, you’ll also get a FREE copy of the “How to Crochet with Two Colors Guide.”
You can also purchase it on Etsy or Ravelry.

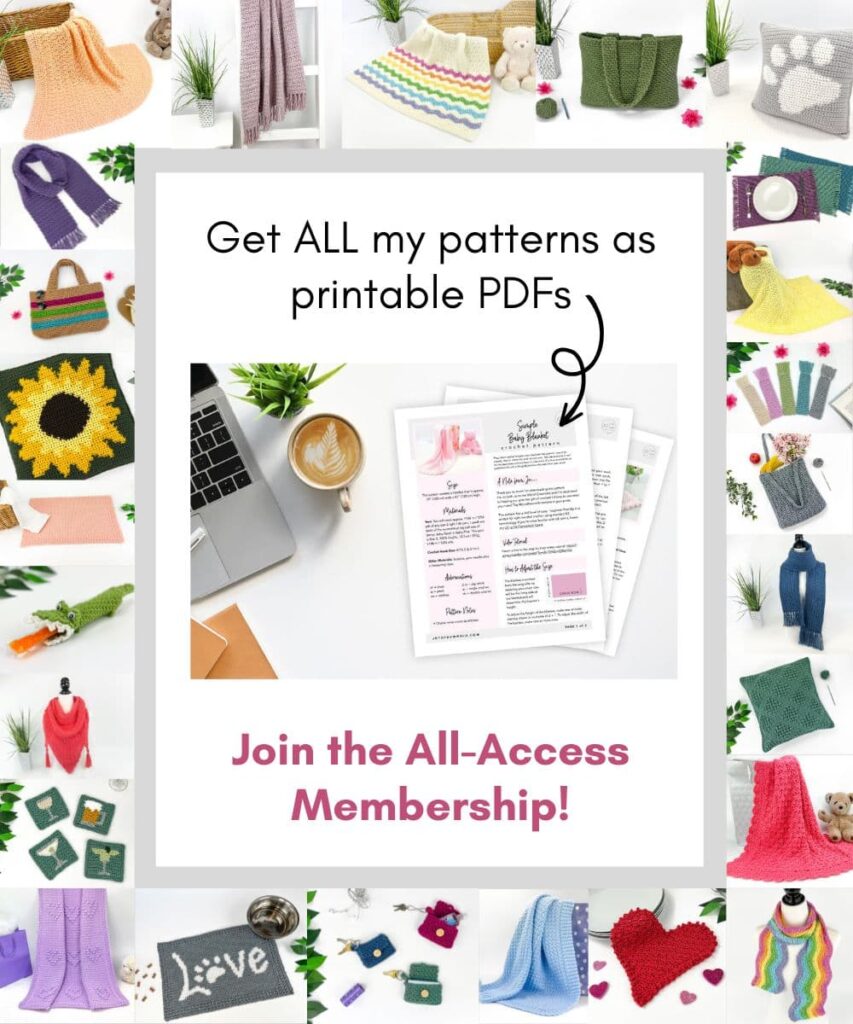
All-Access Membership
For only $0.14 a day, you can get this pattern as a PDF and my entire library of 100+ print-ready, ad-free PDF crochet patterns!
Make More Paw Print Patterns
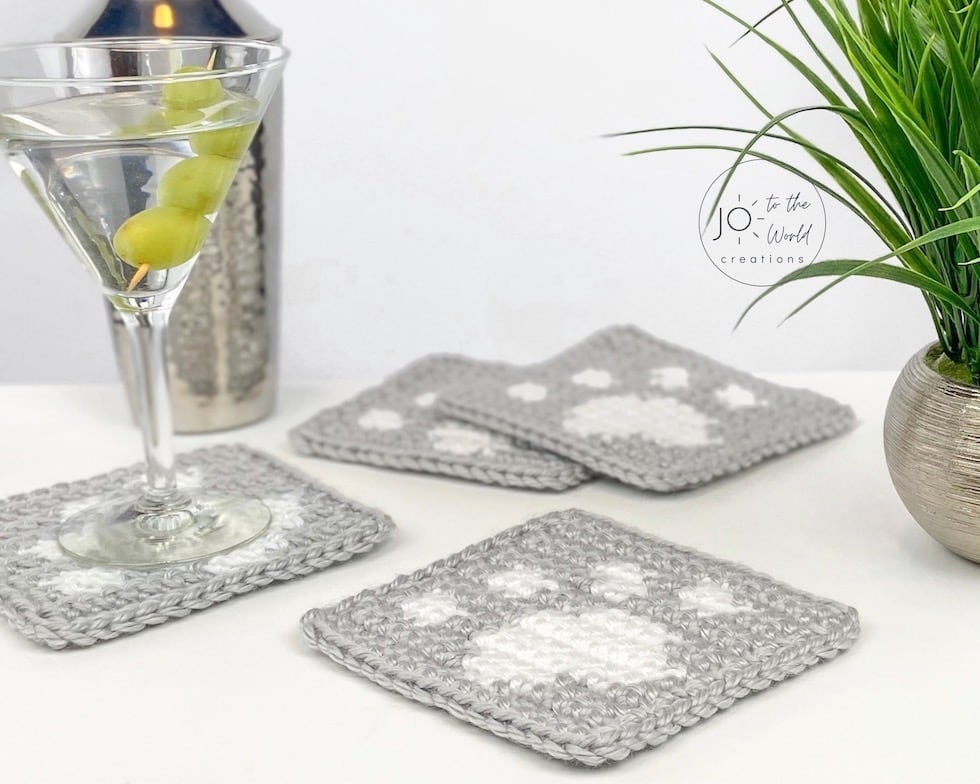
Add to your paw print collection with this free pattern: Paw Print Coasters Crochet Pattern
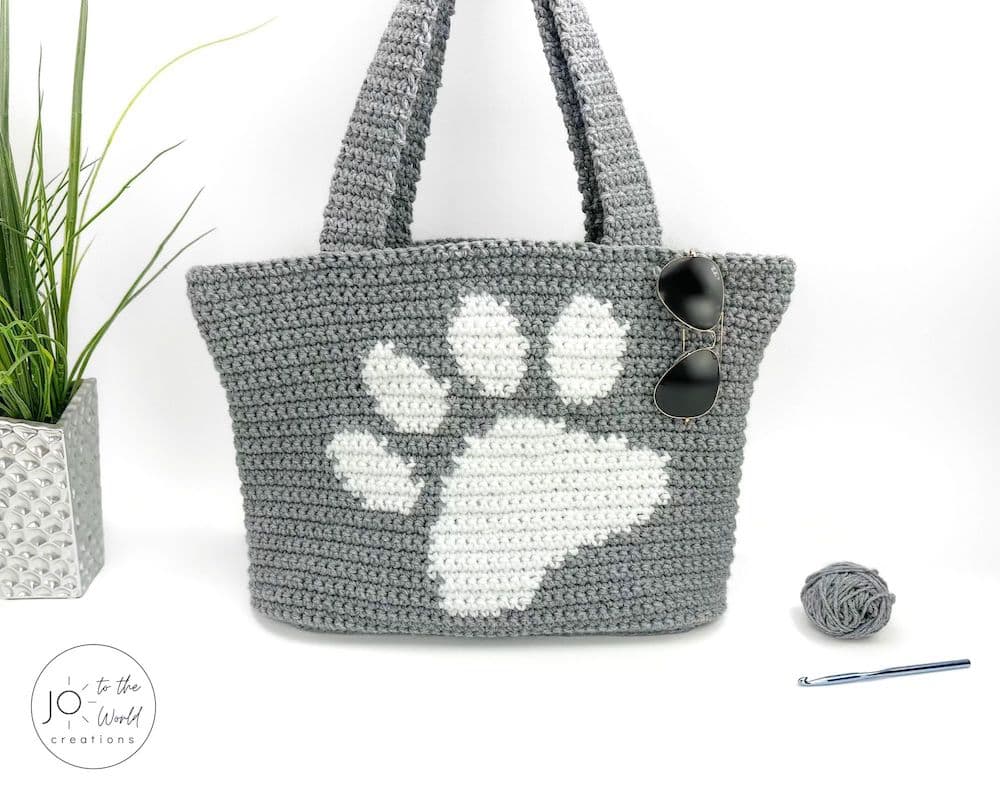
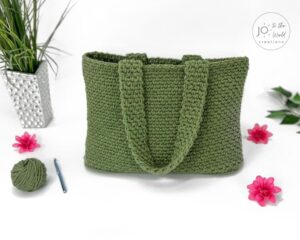
Make a paw-fect tote bag with this Crochet Paw Print Bag Pattern!
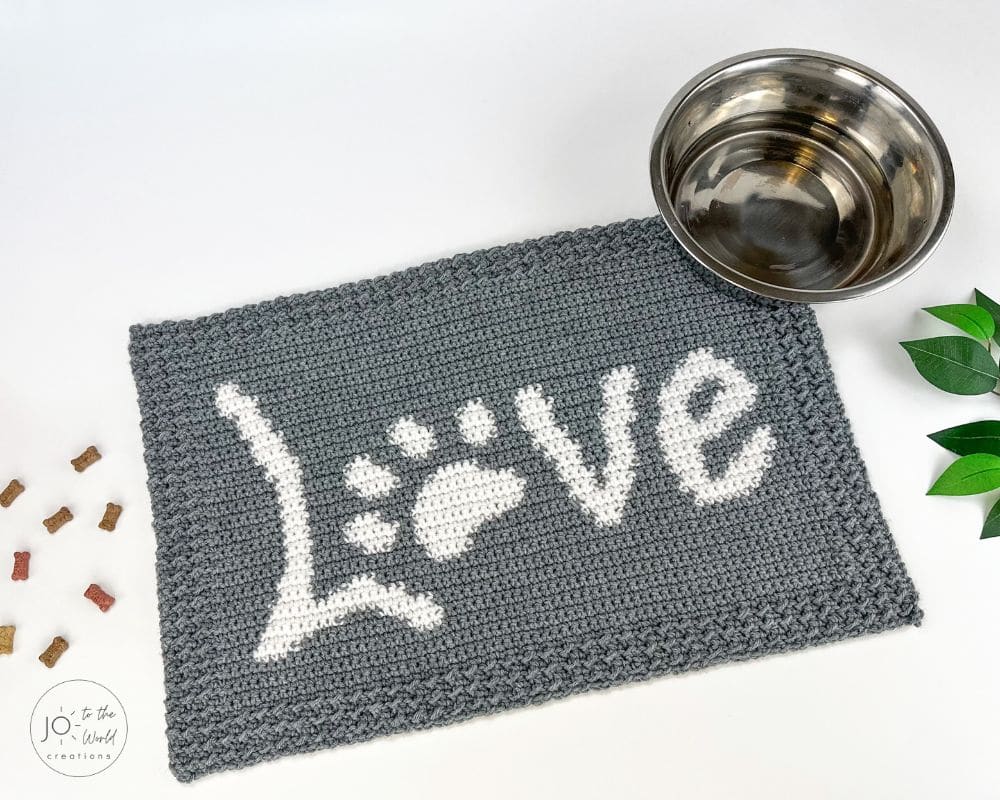
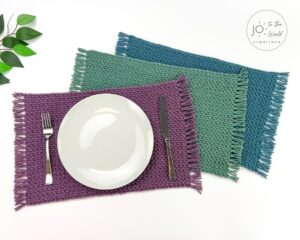
Keep your pet’s eating area tidy and add to your home decor with this Paw Print Love Mat Crochet Pattern.
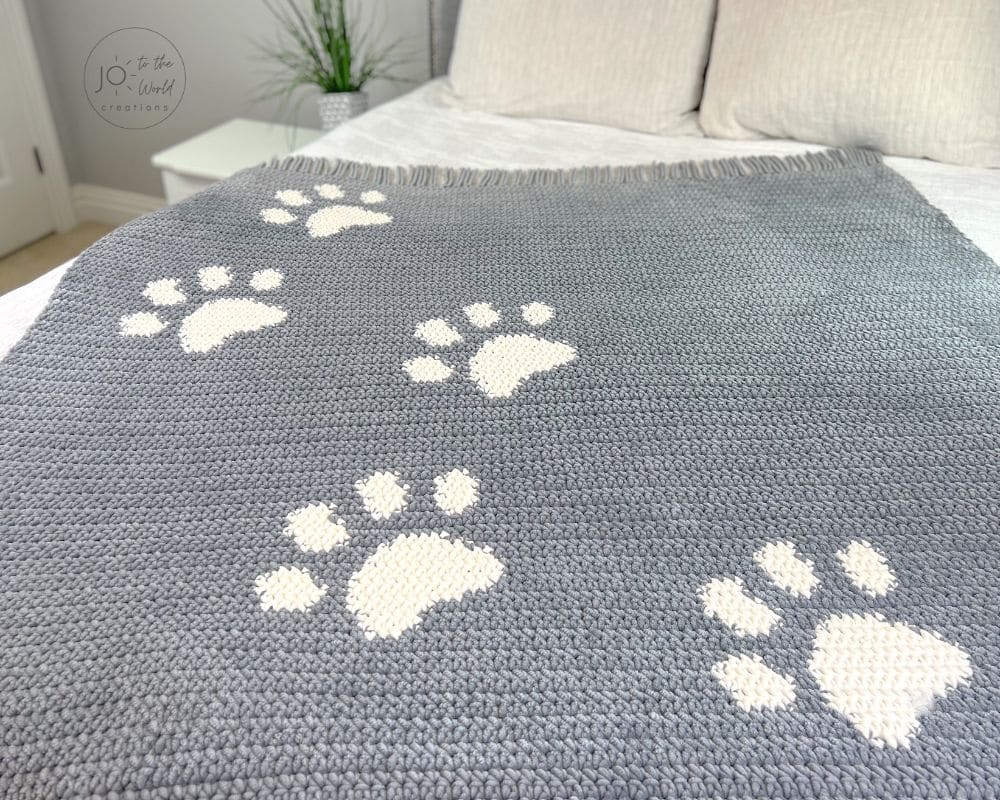
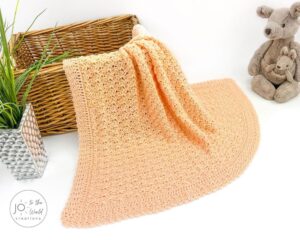
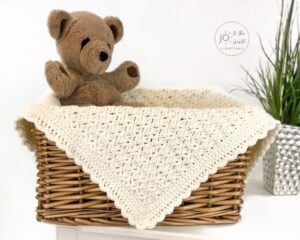
And complete the look with this free Paw Print Blanket!
Get the Bundle
For a limited time, get five paw print patterns as print-ready PDFs that you can instantly download for one low discounted price!
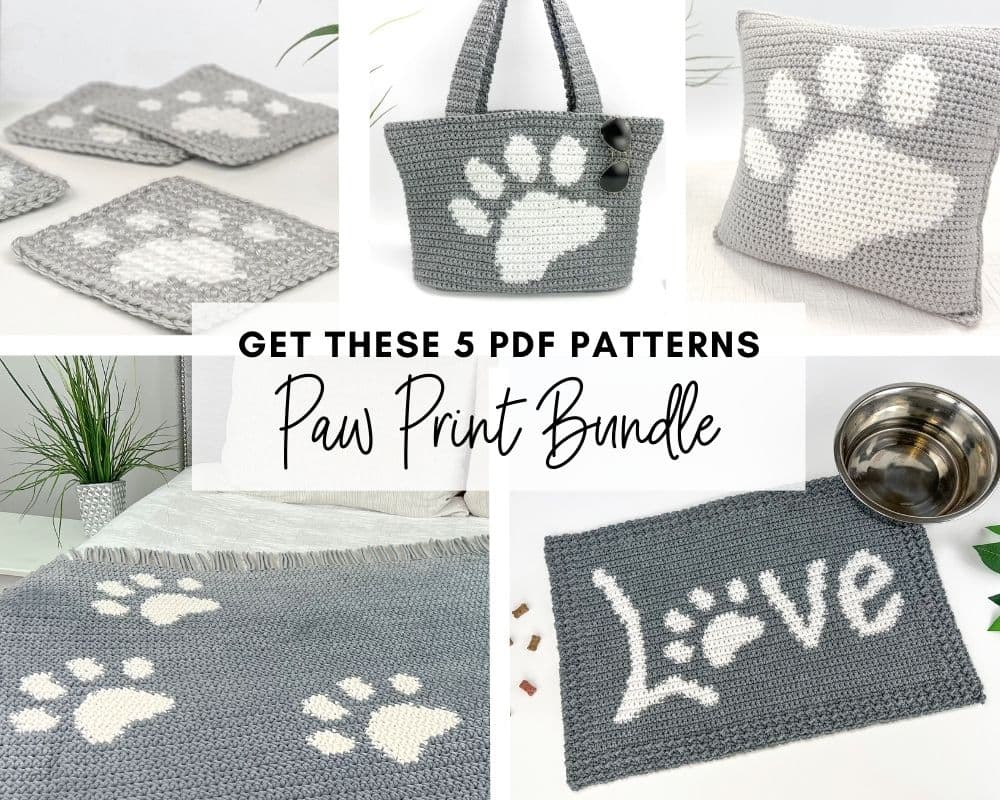
Get the Paw Print Pattern Bundle!
Paw Print Pillow Cover
Video Tutorial
Watch how to complete this pattern or scroll down for the written instructions.

About This Crochet Pillow Case Pattern
The inspiration for this crochet pillow cover came from our dog, Charlie. We call him King Charles because he is really is the king of our house. One of his many many quirks is that he is very particular about his pillows. He likes to have one on each side of him on the couch. If they are not to his liking, he will let us know by pawing the furniture non-stop until we fluff them for his optimal comfort.
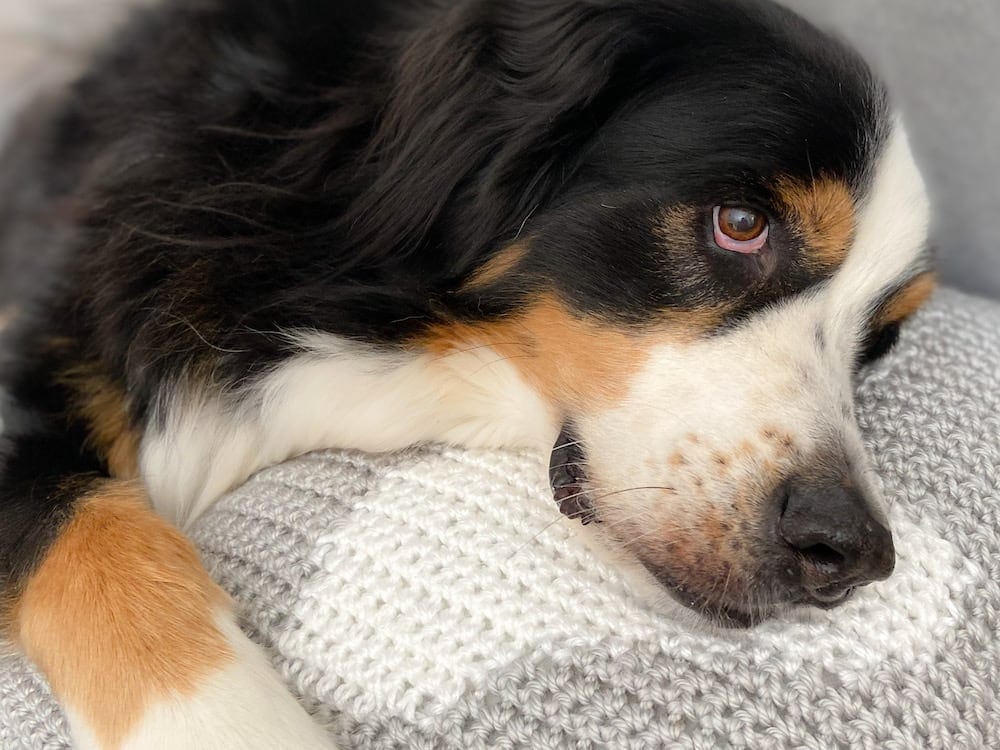
I wanted to design a crochet pillow cover in honor of him that would be a terrific gift for a pet lover. It was a ton of fun to make and was surprisingly really fast and easy. You can customize the colors to match your home decor or your gift recipient’s favorite color.
The yarn that I used (Red Heart Soft Essentials yarn) is super soft, absolutely perfect for a comfy, cozy soft crochet pillow cover.
It is King Charles tested and approved!

The pattern creates a pillow/cushion/throw cover that fits over an 18” x 18” pillow insert (46 x 46 cm).
It can be easily removed and hand-washed…thank goodness because after Charlie has swim in the ocean and then frolics in the mud, the white on this pillow won’t be white for long!
This Paw Print Pillow Cover crochet pattern is written in English for right-handed crochet using standard US crochet terminology. If you are more familiar with UK terminology, check out my US to UK Conversion Chart.
Paw Print Pillow Pattern Details
Skill Level
Easy – Colorwork & Simple Stiches
Size
The pattern creates a pillow/cushion/throw cover that fits over an 18” x 18” pillow insert (46 x 46 cm). The actual pillow cover is slightly smaller but stretches to fit.
Materials
Yarn: Red Heart Soft Essentials. This yarn is size 5 (bulky), 100% acrylic, 5 oz. / 140 g
Colors used (as seen in the photos):
- Main Color (the background and back) = Greyhound (3 Skeins: 393 yd./360 m – Note: exactly 3 skeins is used so if you want to be safe, buy an extra skein)
- Contrast Color (the paw print) = White (1 Skein: 131 yd./120 m)
Crochet Hook Size: K/10.5 (6.5 mm) (or size needed to obtain gauge)
Other Materials: scissors, pins, yarn needle, measuring tape
Pillow: One 18” x 18” pillow insert
Optional: large buttons for the back of the pillow cover
Gauge
4” x 4” = 11 single crochet stitches and 13 rows. The chain row and the first two rows should be approximately 17.5 inches (44.5 cm) wide.
Need help understanding gauge? Check out my Step-by-Step Guide to Crochet Gauge.
Abbreviations
- st = stitch
- sc = single crochet: insert hook into stitch, yarn over, pull through (2 loops on hook), yarn over and pull yarn through both loops
- ch = chain: yarn over, pull though loop on hook
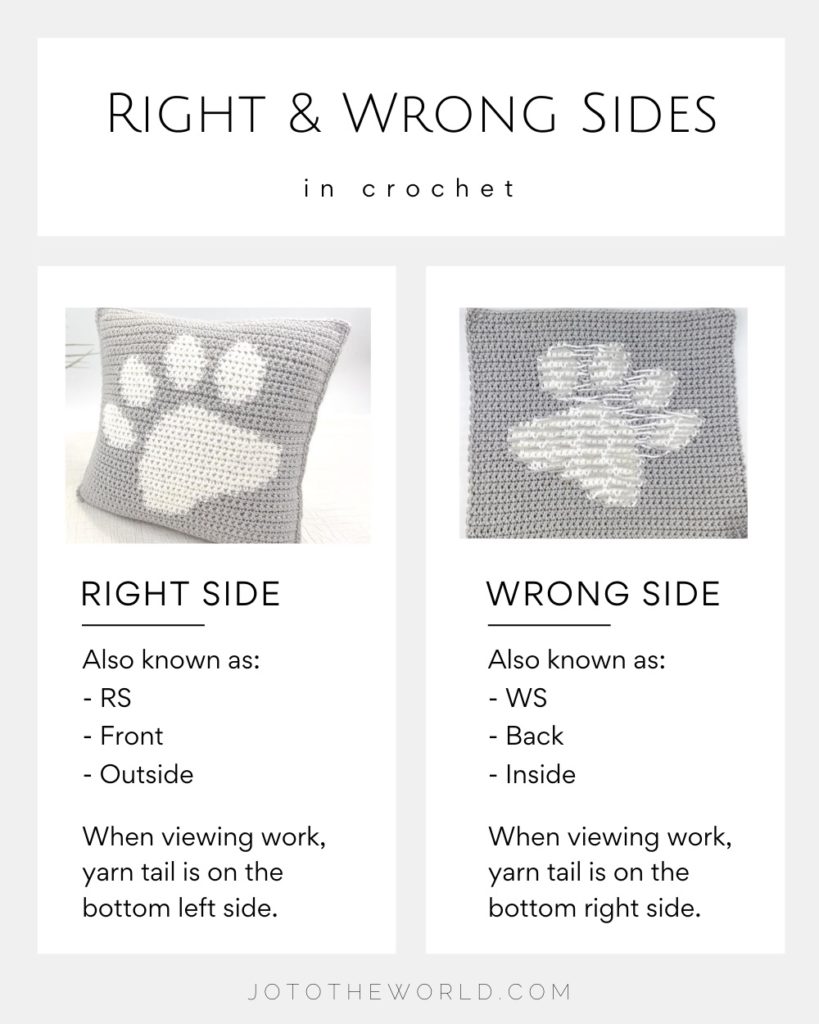
- MC = Main Color: The background and back of the pillow
- CC = Contrast Color: The paw print
- RS = Right Side: The front/outside of the pillow cover
- WS = Wrong Side: The inside of the pillow cover
Working with Two Colors
New to colorwork? Read my step-by-step guide: How to Crochet with Two Colors. You’ll be a pro in colorwork in no time!
For this Paw Print Pillow Cover Crochet Pattern, you will add/pick up and use the contrast color only when working on the paw print and carry the main color along the back until you are ready to use it again.
Once you get to the main color again, you will drop the contrast color (you don’t carry it to the end of the row). The rows are worked from right to left and then left to right so the contrast color will be right there when you need it again on the next row.
How to Add/Switch Colors:
With the color you are currently working with:
1) Insert hook into the next stitch and yarn over.
2) Still with the current color, pull yarn through stitch (you will have two loops on your hook) but instead of finishing the single crochet stitch…
3) Put the new color on hook
4) Pull through new color, leaving the old color hanging (keep it attached to ball of yarn, don’t cut).
On right side rows, the yarn will hang in the back, behind the work. For wrong side rows, the yarn will hang front of you. Give the previous color a slight tug to keep stitch tight.
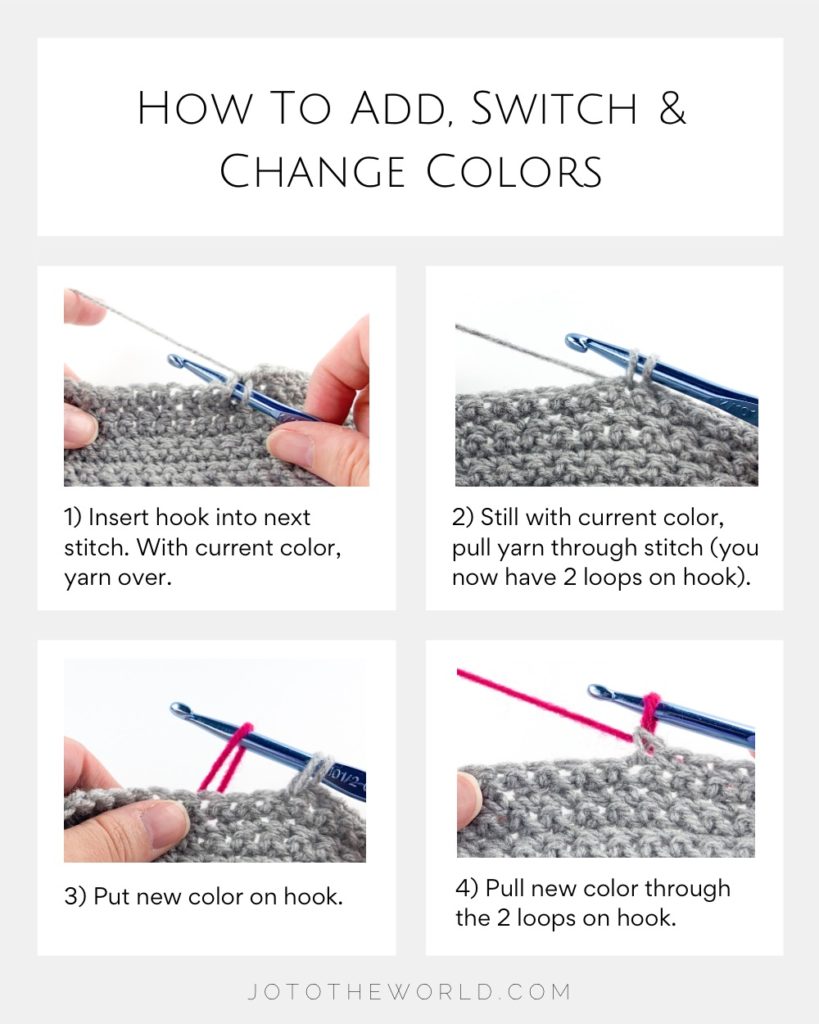
Now use the new color until the pattern says to switch back. To switch back, repeat the same steps.
Note: When you complete the color addition/switch, it counts as a stitch with the old color as you are setting up the next stitch with the new color.
Where to Add/Switch Color
When following the chart: always add/ switch color in the second half of the single crochet stitch (when you have two loops on your hook with the old color) BEFORE the chart shows the new color.
When following the written instructions: always add the new color in the second half of the last sc stitch of the current color (when you have two loops on your hook with the old color) BEFORE the written patterns says to use the new color.
Catching Floats
When working on the paw print with the contrast color, you will be carrying the main color along the back (the wrong side). These strands of yarn are “floating.” To prevent these pieces of carried yarn from becoming too long, we “catch” them and incorporate them into the back of a stitch every 4-6 stitches.
As you can see in the pic above on the right the strands are “caught” in the back to prevent them from becoming too long.
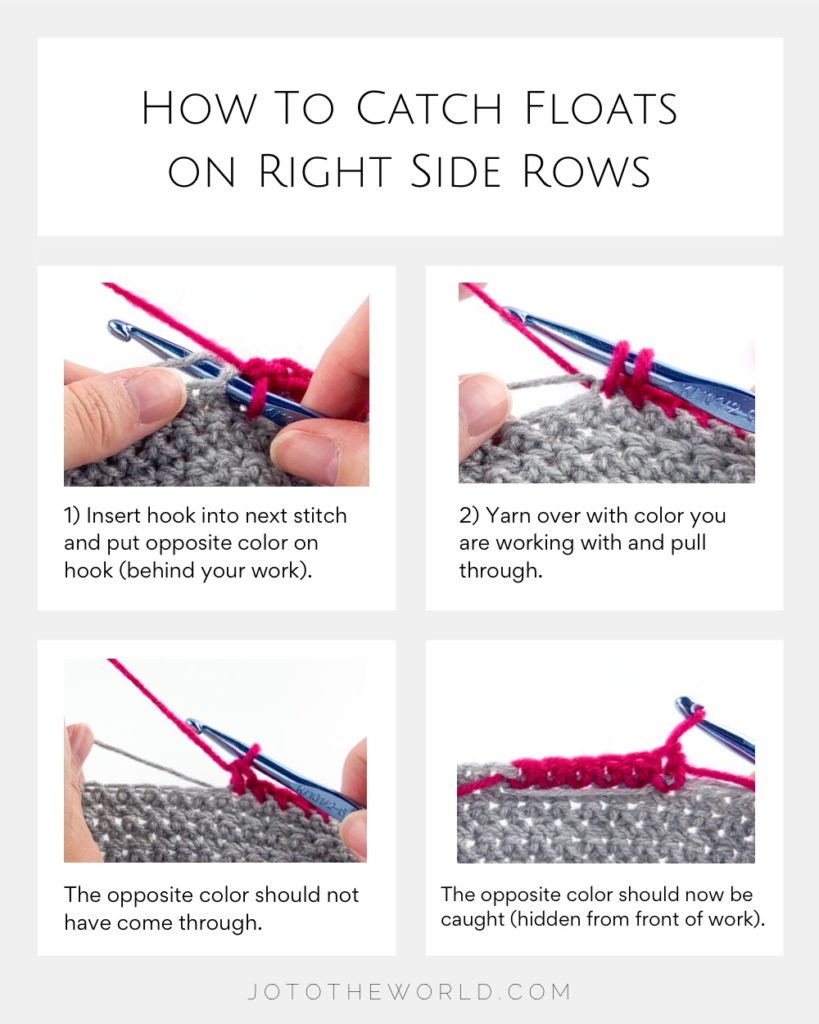
Catching Floats on the Right Side:
Insert your hook into the stitch and take the strand of the opposite color and place it on the hook (behind the stitch). Yarn over with the color you are working with and pull through. The opposite color should not have come through but instead be caught in the stitch (hidden from the front of the work). Give the opposite color a little tug.
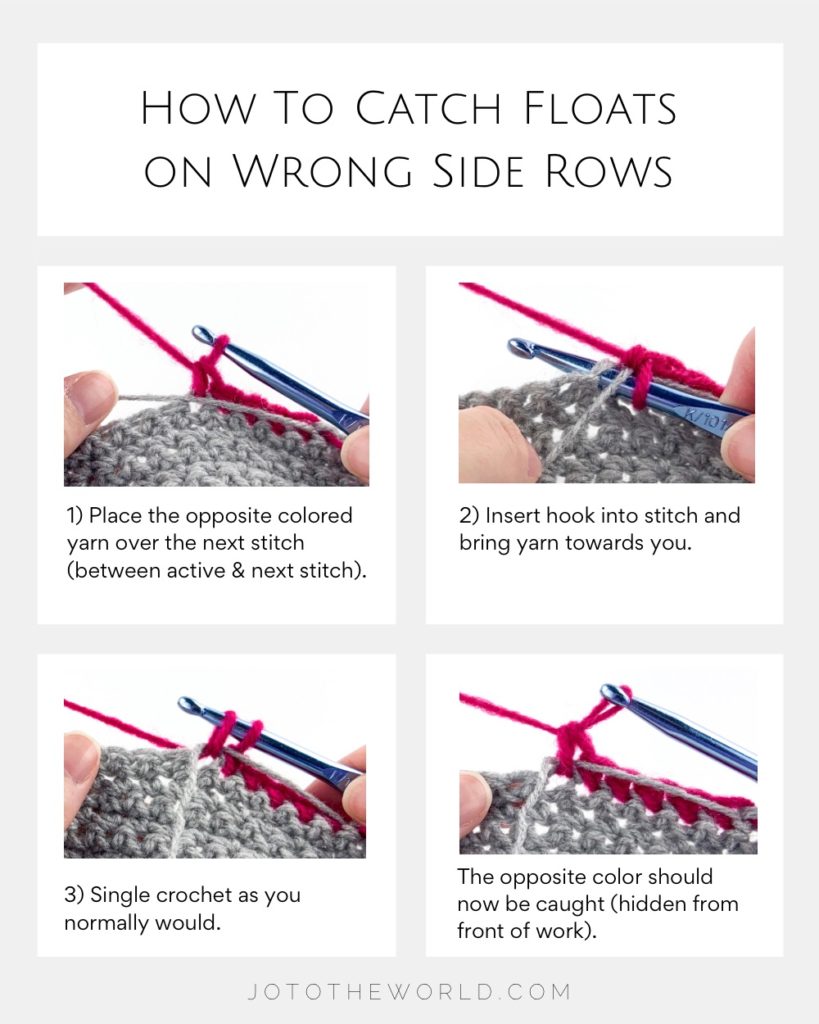
Catching Floats on the Wrong Side:
Take the strand of yarn you are trying to catch (the opposite color) and put it over the next stitch. Simply place it there (in the middle between your active stitch and the next stitch). Insert your hook into the next stitch. Take that piece of yarn that you just placed and bring it towards you. That puts the yarn in the middle between the yarn on your hook and your new stitch. Single crochet as you normally would. Give the opposite colour a little tug.
Catching Floats Notes:
• The pattern does not indicate when to catch floats. You need to remember to do this every 4-6 stitches.
• There are 6 times when you need to catch the contrast color (normally you just catch the main color). These six times are indicated on the pattern.
• Check each “catch” to ensure the opposite colored yarn is not visible from the front.
Please note: This pattern and all images associated with this pattern cannot be copied, shared, altered or sold on your own. You are welcome to sell the finished product but please include a link (if online) and reference jototheworld.com.
Paw Print Pillow Pattern Notes
- Each row has 45 stitches.
- Chain 1 does not count as a stitch.
- Catch your float every 4-6 stitches.
- Stretch your pillow wide after each row.
- Ensure all strands are always kept on the wrong side of the work.
- Add/switch color when you have two loops of the old color on the sc stitch BEFORE the new color stitch.
- There are 6 times when you need to catch the contrast color (normally just you catch the main color). These six times are indicated on the chart and written instructions.
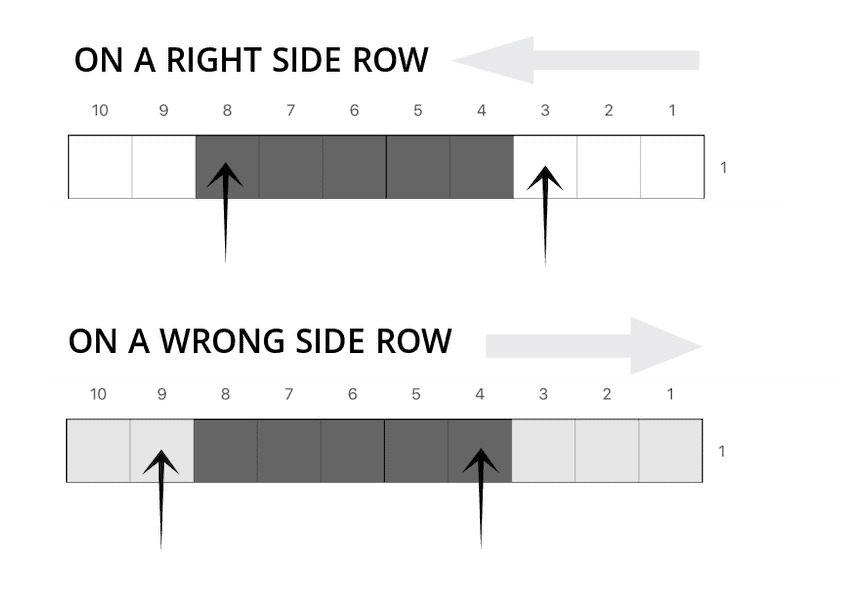
- Read the chart from right to left when working on right side rows and left to right when working on the wrong side. The chart is lightly shaded on wrong sides to help you remember. (The written instructions lists everything in the correct order)
How to Follow the Pattern Chart:
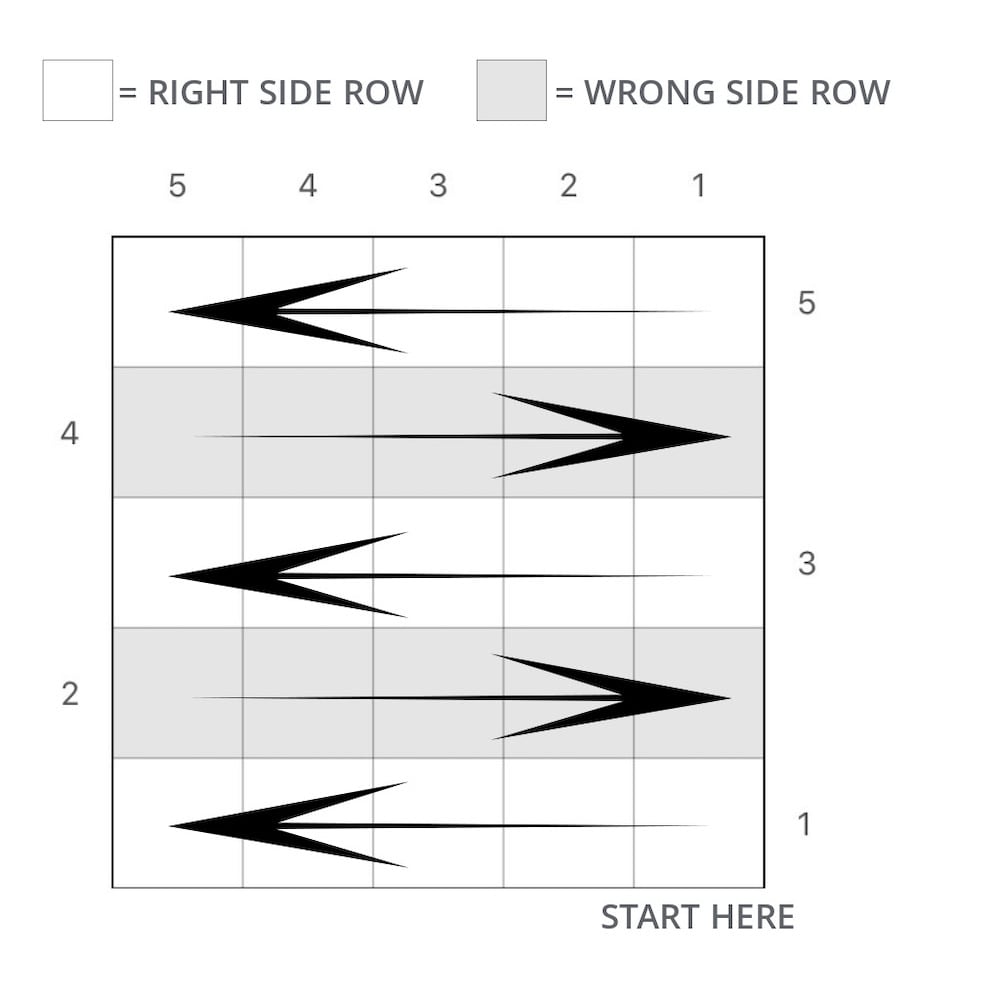
Just a Reminder!
This pattern is also available as a PDF, which includes everything listed below but as a printer-friendly PDF that you can instantly download, save, print, make notes on and keep forever.
You can also purchase it on Etsy or Ravelry.
Get this PDF with an All-Access Membership!
Only $0.14 a day!
- Instant Access to 100+ Premium PDF Crochet Patterns
- Make Gifts for Every Occasion!
- Save, Print & Keep Forever
- No Ads or Popups
- Happiness Guaranteed!
Paw Print Pillow Cover Crochet Pattern
Written Instructions
(See below for Pattern Chart)
Start with and use the main color until you are instructed to add the contrast color (on row 9)
Chain: 46
Row 1 (RS): In the 2nd chain from hook, sc. Sc in each stitch until the end of the row. Ch 1 and turn.
Row 2 (WS): Sc in each stitch across
***Measure your work*** If it is longer or shorter than 17.5 inches/44.5 cm) (give or take half an inch) start the pattern again. When correct, ch 1 and turn.
Row 3: Sc in each stitch across. Ch 1 and turn.
Row 4-8: Repeat row 3
Row 9 (RS): With MC sc 21, with CC sc 5, with MC sc 19. Ch 1 and turn.
What this means: Sc with main color across the next 20 stitches. On the 21st stitch, add the contrast color and sc. Make sure that the hanging yarn is in the back.This now concludes the 21 stitches in the main color.
Sc with the new colour for 4 stitches. On the 5th stitch, switch back to the main colour. Make sure that the hanging yarn is in the back. This now concludes the 5 stitches in the contrast color..
With the main color, sc 19 to the end of the row.
This is how it looks from right to left: 21 stitches in the main color, 5 stitches in the contrast color and 19 stitches in the main color. Ch 1 and turn.
Row 10 (WS): With MC sc 18, with CC sc 8, with MC sc 19.
What this means: Sc with main color across the next 17 stitches. On the 18th stitch, switch to the contrast color and sc. Make sure that the hanging yarn is towards you.
Sc with the contrast color for 7 stitches. (Remember to catch your float). On the 8th stitch, switch back to the main color. Make sure that the hanging yarn is in front of you.
With the main color, sc 19 to the end of the row.
(This is how it looks wth the wrong side facing you from right to left: 18 stitches in the main color, 8 stitches in the contrast color and 19 stitches in the main color). Ch 1 and turn.
Row 11: with main color (MC) single crochet (sc) 18, with contrast color (CC) sc 9, with MC sc 18. Ch 1 and turn.
Row 12: with MC sc 18, with CC sc 9, with MC sc 18. Ch 1 and turn.
Row 13: with MC sc 17, with CC sc 11, with MC sc 17. Ch 1 and turn.
Row 14: with MC sc 17, with CC sc 12, with MC sc 16. Ch 1 and turn.
Row 15: with MC sc 14, with CC sc 14, with MC sc 17. Ch 1 and turn.
Row 16: with MC sc 17 with CC sc 16, with MC sc 12. Ch 1 and turn.
Row 17: with MC sc 9, with CC sc 19, with MC sc 17. Ch 1 and turn.
Row 18: with MC sc 17, with CC sc 20, with MC sc 8. Ch 1 and turn.
Row 19: with MC sc 7, with CC sc 20, with MC sc 18* (Note: after about 5 stitches with the MC, catch the contrast color so that it is easily accessible for the next row) Ch 1 and turn.
Row 20: with MC sc 10, with CC sc 5, with MC sc 3, with CC sc 21, with MC sc 6. Ch 1 and turn.
Row 21: with MC sc 6, with CC sc 21, with MC sc 2, with CC sc 7, with MC sc 9. Ch 1 and turn.
Row 22: with MC sc 8, with CC sc 8, with MC sc 2, with CC sc 21, with MC sc 6. Ch 1 and turn.
Row 23: with MC sc 6, with CC sc 21, with MC sc 3, with CC sc 8, with MC sc 7. Ch 1 and turn.
Row 24: with MC sc 7, with CC sc 8, with MC sc 4, with CC sc 20, with MC sc 6. Ch 1 and turn.
Row 25: with MC sc 7 with CC sc 19, with MC sc 5, with CC sc 8, with MC sc 6. Ch 1 and turn.
Row 26: with MC sc 6, with CC sc 6, with MC sc 8* Note: after about 5 stitches with MC, catch the contrast color, with CC sc 15, with MC sc 10. Ch 1 and turn.
Row 27: with MC sc 13, with CC sc 12, with MC sc 9* Note: after about 4 stitches with MC, catch the contrast color, with CC sc 4, with MC sc 7. Ch 1 and turn.
Row 28: with MC sc 13, with CC sc 4, with MC sc 5, with CC sc 7, with MC sc 16. Ch 1 and turn.
Row 29: with MC sc 18 with CC sc 4, with MC sc 5, with CC sc 6, with MC sc 12. Ch 1 and turn.
Row 30: with MC sc 11, with CC sc 7, with MC sc 27* Note: after about 5 stitches with MC, catch the contrast color. After another 5 stitches with MC, catch the contrast color again. Ch 1 and turn.
Row 31: with MC sc 13, with CC sc 3, with MC sc 11* Note: after about 5 stitches with MC, catch the contrast color, with CC sc 7, with MC sc 11. Ch 1 and turn.
Row 32: with MC sc 10, with CC sc 8, with MC sc 3, with CC sc 3, with MC sc 4, with CC sc 5, with MC sc 12. Ch 1 and turn.
Row 33: with MC sc 11, with CC sc 6, with MC sc 3, with CC sc 5, with MC sc 3, with CC sc 7, with MC sc 10. Ch 1 and turn.
Row 34: with MC sc 10, with CC sc 6, with MC sc 3, with CC sc 6, with MC sc 2, with CC sc 7, with MC sc 11. Ch 1 and turn.
Row 35: with MC sc 11, with CC sc 7, with MC sc 2, with CC sc 6, with MC sc 4, with CC sc 5, with MC sc 10. Ch 1 and turn.
Row 36: with MC sc 11, with CC sc 2, with MC sc 5, with CC sc 7, with MC sc 2, with CC sc 7, with MC sc 11. Ch 1 and turn.
Row 37: with MC sc 11, with CC sc 7, with MC sc 2, with CC sc 7, with MC sc 18. Ch 1 and turn.
Row 38: with MC sc 18, with CC sc 6, with MC sc 3, with CC sc 7, with MC sc 11. Ch 1 and turn.
Row 39: with MC sc 12, with CC sc 5, with MC sc 4, with CC sc 6, with MC sc 18. Ch 1 and turn.
Row 40: with MC sc 19, with CC sc 4, with MC sc 5, with CC sc 4, with MC sc 13. Ch 1 and turn.
Row 41: with MC sc 14, with CC sc 2, with MC sc 7, with CC sc 3, with MC sc 19. Ch 1 and turn.
Cut the contrast color leaving a 6” tail.
Rows 42 – 48: with MC sc across entire row. Ch 1 and turn.
Fasten off and weave in all loose ends. Weave in the tail of the Contrast Color into only Contrast Color parts and weave in the tail of the Main Color into only Main Color parts.
Paw Print Pillow Cover Crochet Pattern Chart
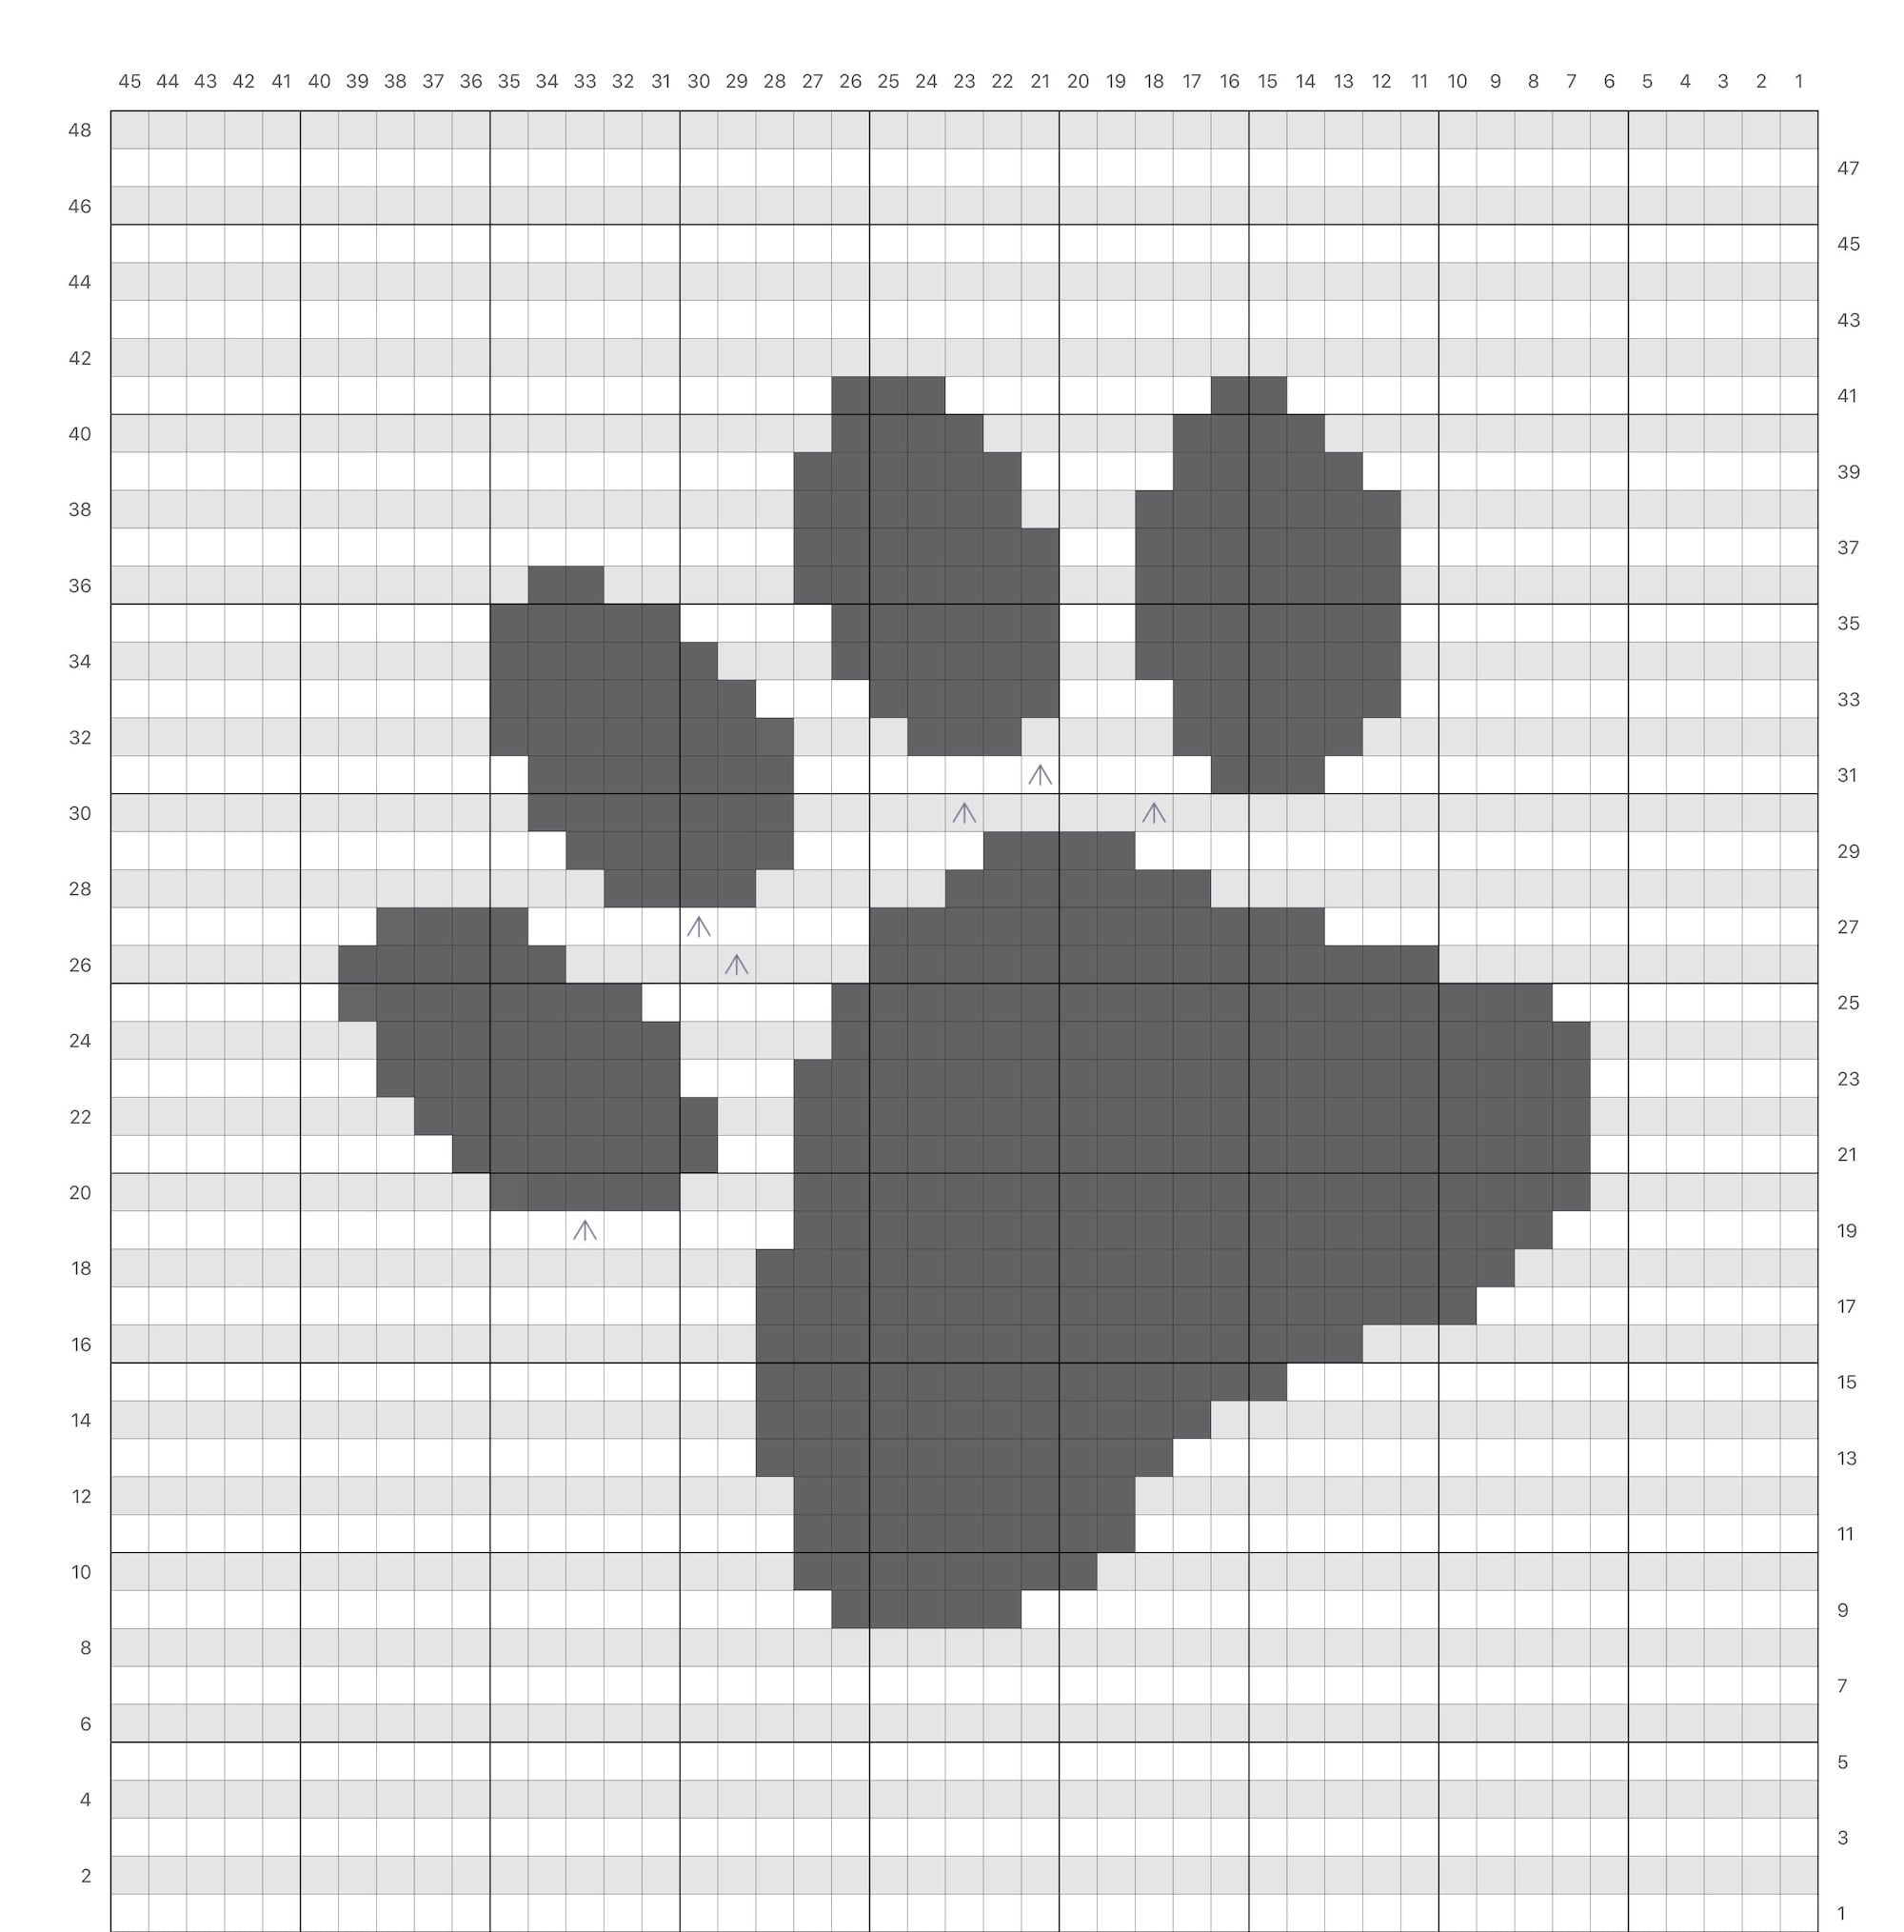
Pattern Chart Legend:
- White square = sc with Main Color (right side row)
- Light grey square = sc with Main Color (wrong side row)
- Dark grey square = sc with Contrast Color
- Upwards arrows = Catch the float of the contrast color
Back of Paw Print Pillow
Back of Pillow Notes:
- All rows have 45 stitches across
- Chain 1 does not count as a stitch
- When assembling the pillow, the completed front is called Piece A. The bottom of the back is called Piece B and the top of the back is called Piece C.
Piece B: Bottom of Back:
With main color, chain 46.
Row 1: Sc in the second chain from hook. Sc in each stitch across. Ch 1 and turn.
Row 2: Sc in each stitch across. Ch 1 and turn.
Repeat for a total of 34 rows (piece should measure approximately 10 inches tall). On the final row, do not ch 1 and turn. Fasten off and weave in ends.
Piece C: Top of Back:
With main color, chain 46.
Row 1: Sc in the second chain from hook. Sc in each stitch across. Ch 1 and turn.
Row 2-30: Sc in each stitch across. Ch 1 and turn. (Piece should measure approximately 9 inches tall.)
Row 31: Double crochet in each stitch across. Fasten off and weave in ends.
Paw Print Pillow Cover Assembly
Place A (the front) face down, with the wrong side facing up (the paw toes at the top).
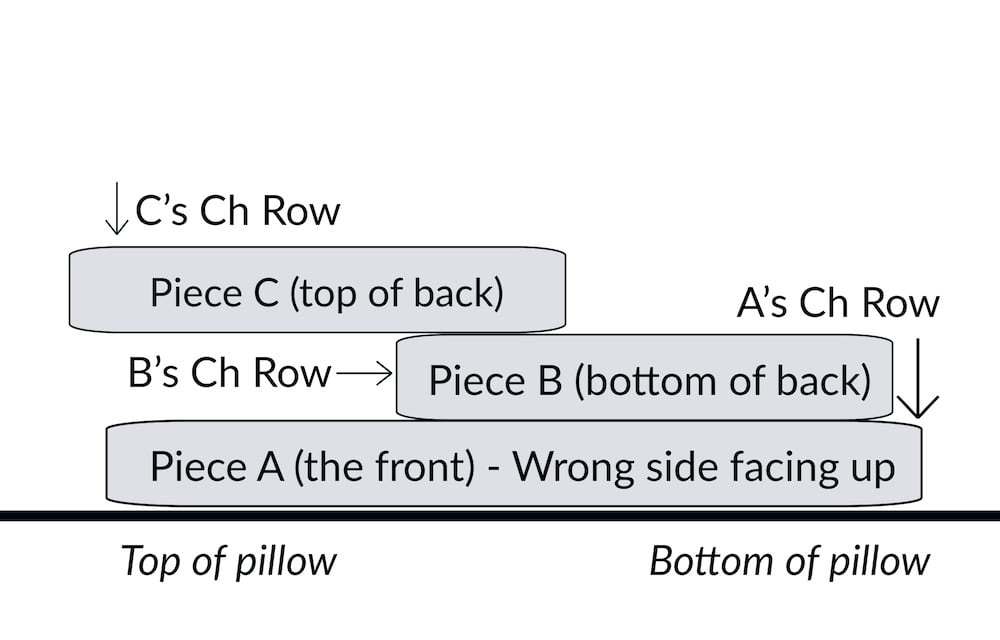
Place B (the bottom of the back) on top of A with the last row you completed on the bottom, in line with the bottom of A. The chain row of B will be just above the centre of A.
Place C (the top of the back) on top of B and A with the row of double crochet stitches in the middle. The middle of B will be in between A and C.
Pin the three pieces in place.
With the main color, attach yarn to bottom left corner. With the paw print facing you, sc into each stitch along the bottom. Sc into the corner stitch three times. Repeat around pillow cover: sc along each side and 3 sc in each corner, single crocheting the pieces together. At the final corner, single crochet twice into the final corner stitch. Fasten off and weave in ends.
Optional: you could sew on large buttons to top of Piece B that would go through the double crochet stitches made on Piece C to make the make more secure.
Congratulations on completing the Paw Print Pillow Cover crochet pattern! I hope you enjoyed creating this pillow cover.
More Patterns You Might Like


I’m Jo, the designer behind Jo to the World Creations, and I’m dedicated to helping you make the perfect crochet gift! I love designing and sharing free crochet patterns that you can make for every gift occasion.
About →Let’s Connect
Download. Print. Keep.
Get Instant Access to ALL Printable Patterns
Make your crocheting more enjoyable, relaxing and productive with printable PDF patterns.
- 100+ premium crochet patterns.
- Download, save and print from any device.
- No ads or popups!
Not sure yet? Take a look at the Pattern Library and see all the patterns you can download once you’re a member.
Save with Pattern Bundles
For a limited time, I’ve grouped some of my most popular crochet patterns and I’m offering them as pattern bundles where you can get the printable versions for one low, discounted price. Check out these incredible Crochet Pattern Bundles.
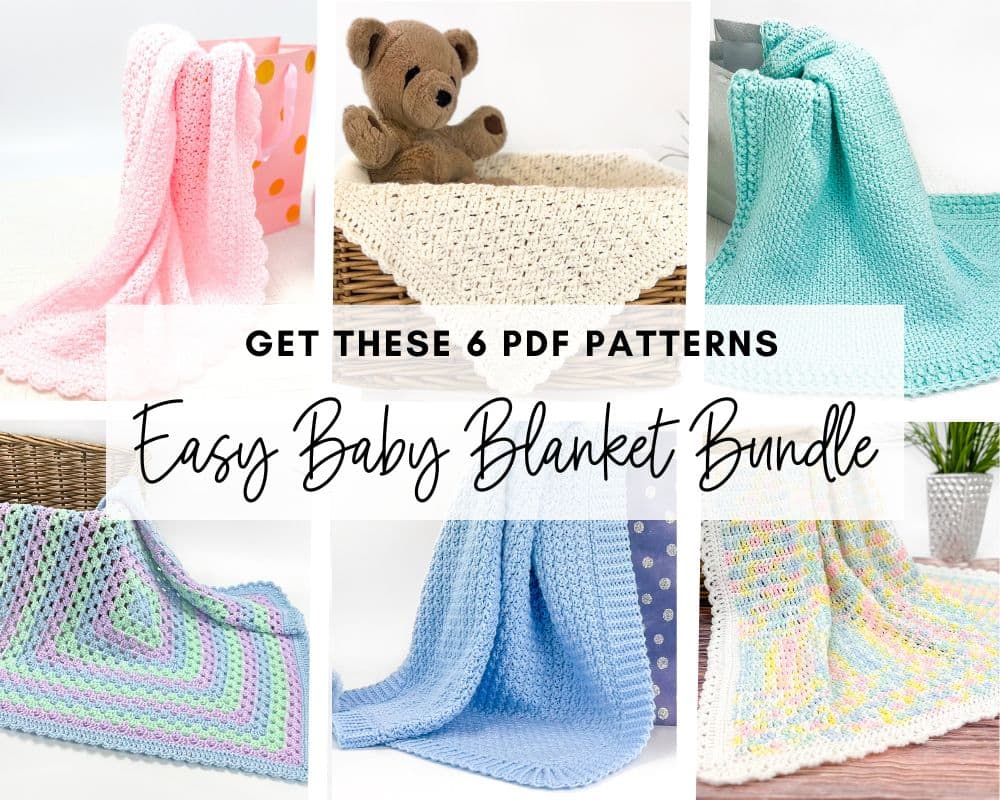
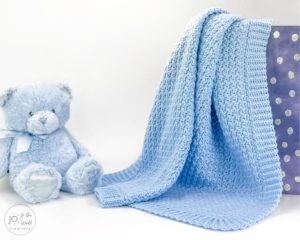
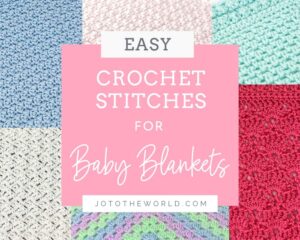
Easy Baby Blanket Bundle
With this Easy Baby Blanket Bundle, you’ll get SIX easy crochet baby blankets as printable downloads. Each pattern includes step-by-step instructions and a full video tutorial.
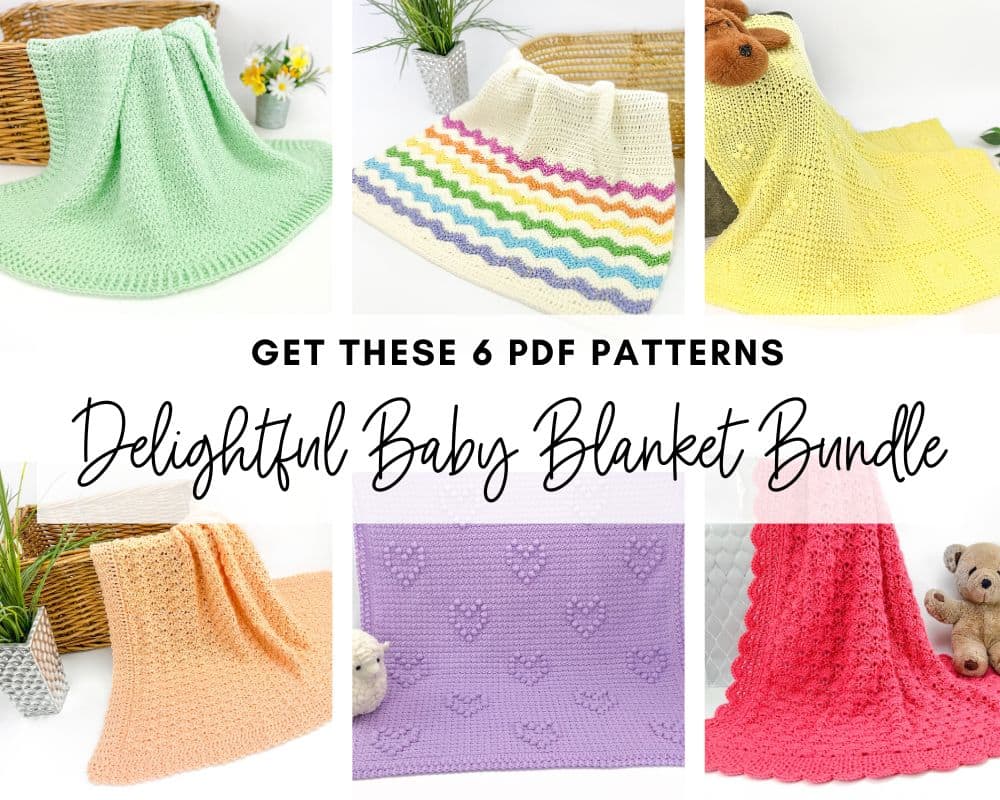
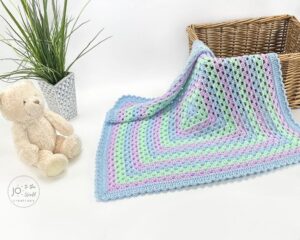
Delightful Baby Blanket Bundle
This incredible deal includes six SIX blanket patterns that are a delight to make and create truly stunning blankets – all as printable PDFs for one low, discounted price.
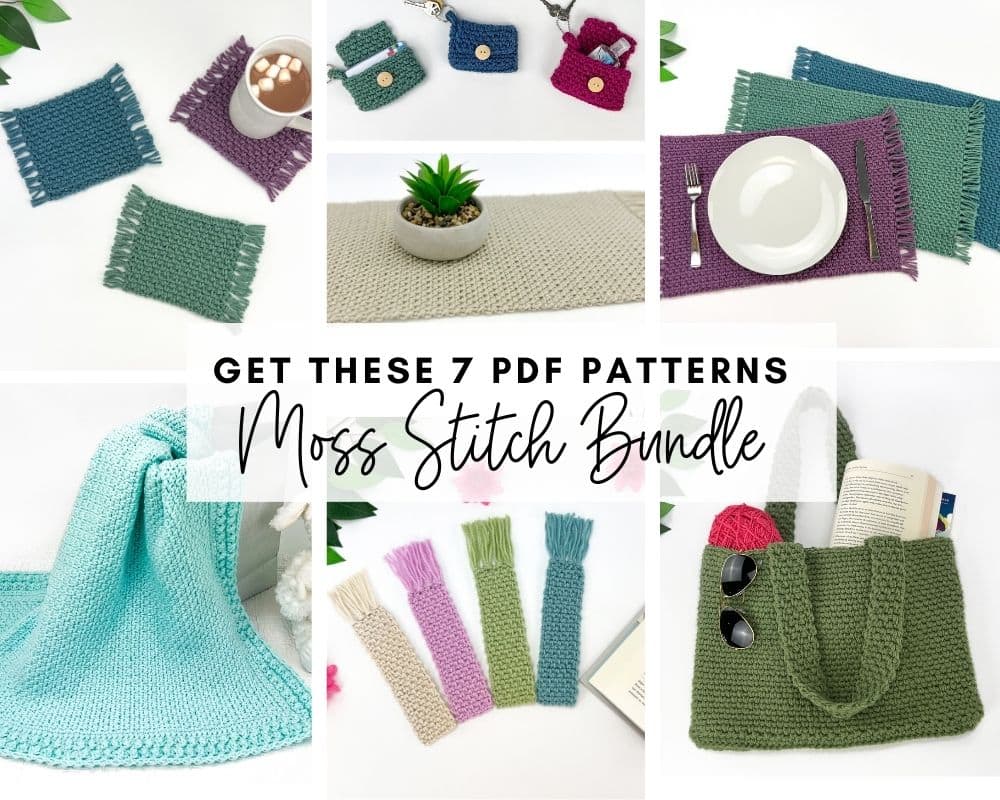
Moss Stitch Pattern Bundle
All your favorite Moss Stitch patterns in one bundle! Get SEVEN easy Moss Stitch crochet patterns as ad-free, print-ready PDFs to print, save and keep forever.
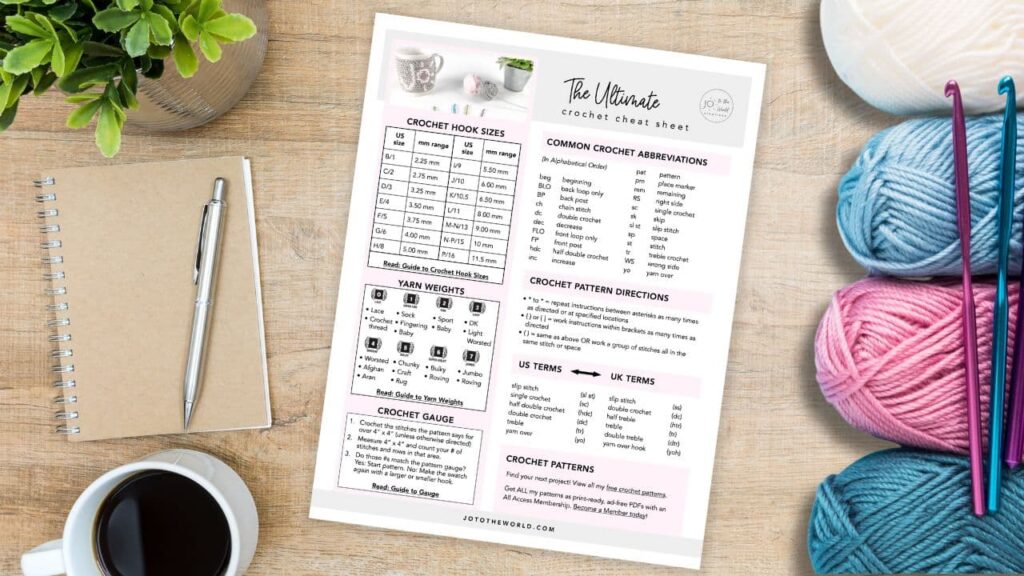
Free Crochet Cheat Sheet
Get instant access to this Ultimate Crochet Cheat Sheet! Plus you’ll receive free patterns for crochet gifts delivered right to your inbox!
Featured Crochet Patterns
Pattern Collections

Free Patterns for Crochet Gifts
Never miss a pattern! Get all my secrets to making incredible crochet gifts as well as new free crochet patterns and exclusive deals when you sign up for my newsletter (it’s free!).