
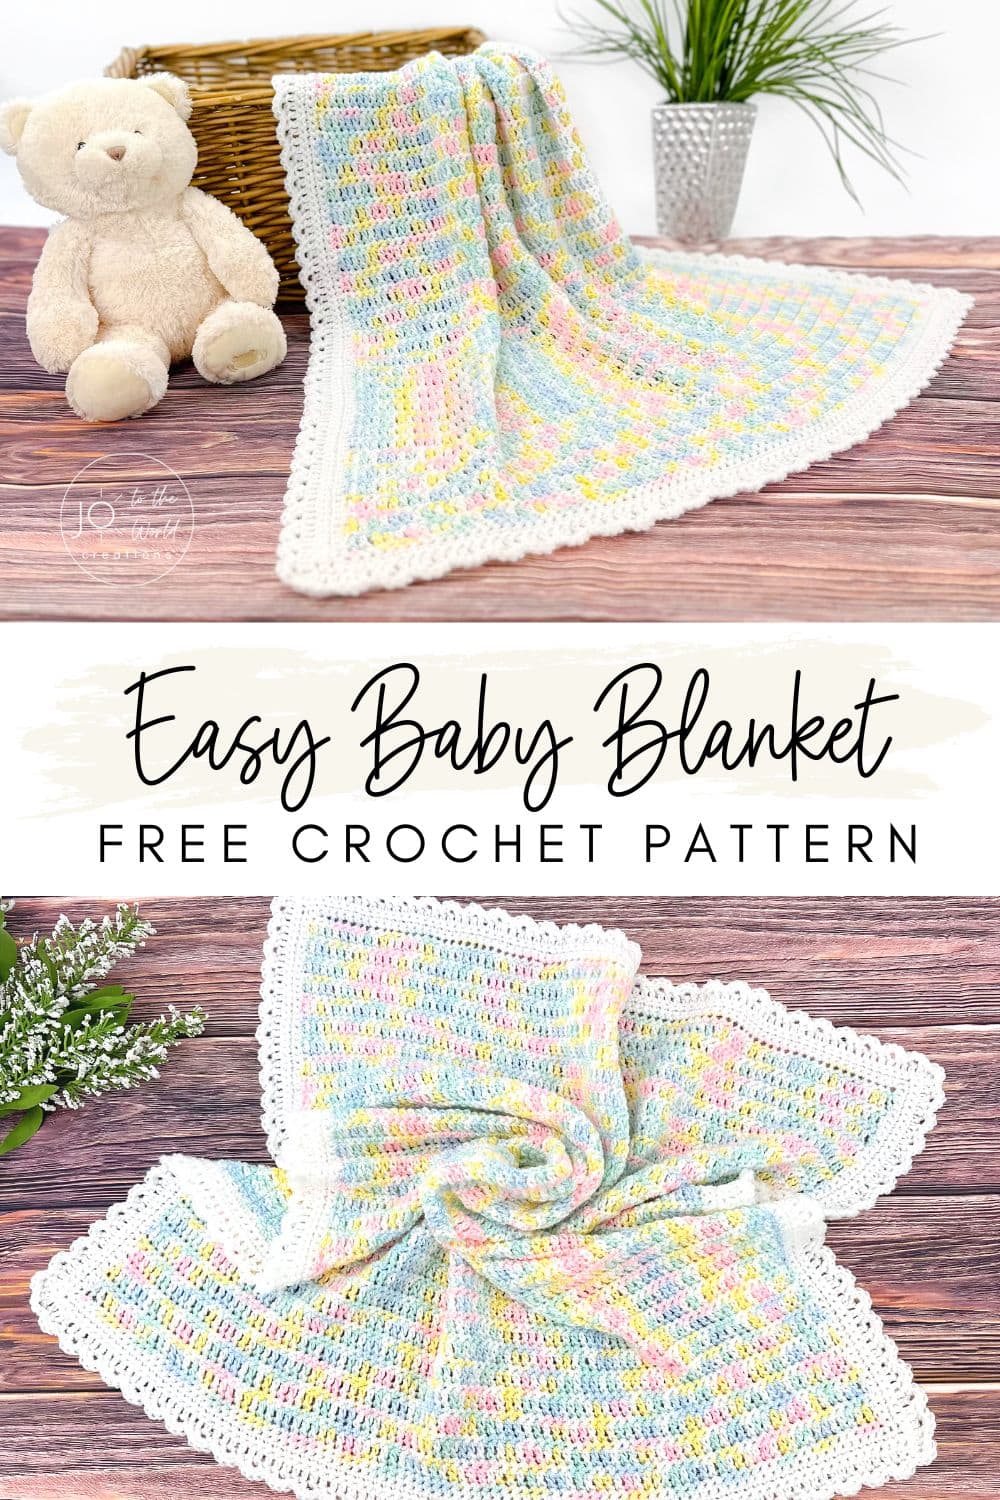
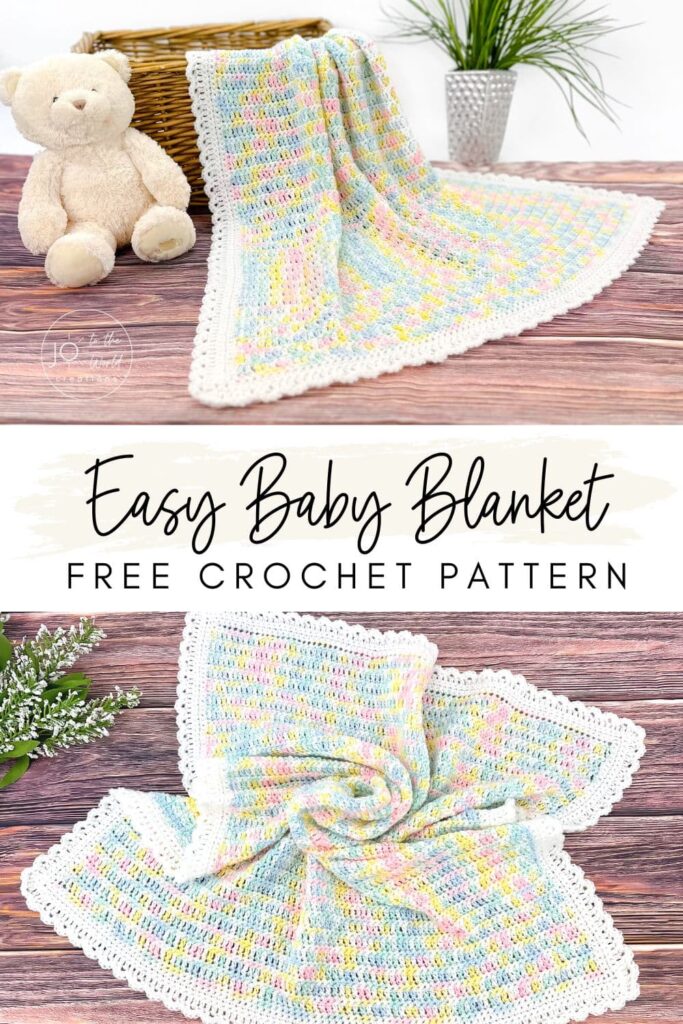
How to Crochet a Baby Blanket for Beginners – Free Pattern
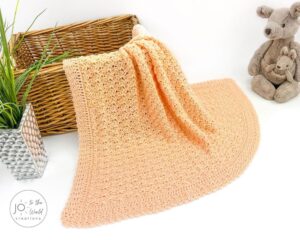
The ultimate step-by-step guide! Learn how to make a crochet baby blanket and crochet this beautiful, reversible, gender-neutral Beginner Baby Blanket Crochet Pattern with photos and a video tutorial!
Before we begin, I would like to thank you for visiting Jo to the World Creations, a site dedicated to helping you give the gift of crochet.
More free patterns (that make awesome crochet gifts) are on the way! Sign up for my emails, follow me and never wonder “What should I make for…” again!
FREE PATTERNS FOR CROCHET GIFTS
Delivered to your inbox
AND GET A FREE PDF OF THE LOVE PILLOW
& A FREE CROCHET CHEAT SHEET
Unsubscribe at any time.
Delivered Socially
Follow Me on
Crochet Baby Blanket Pattern for Beginners
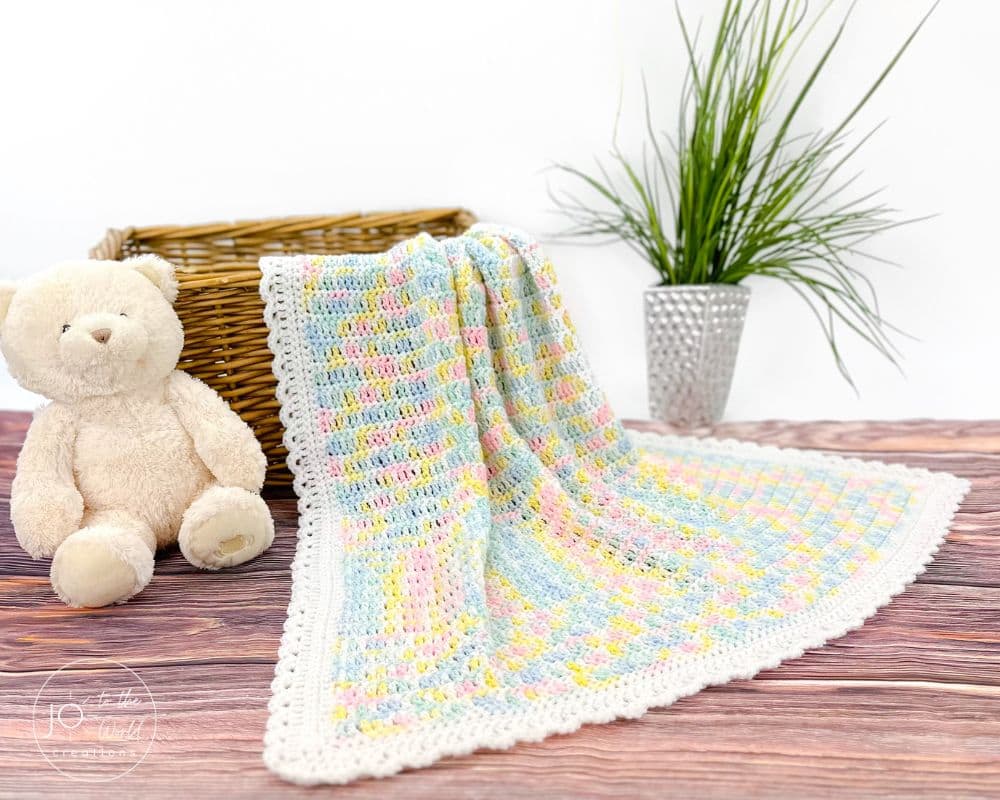
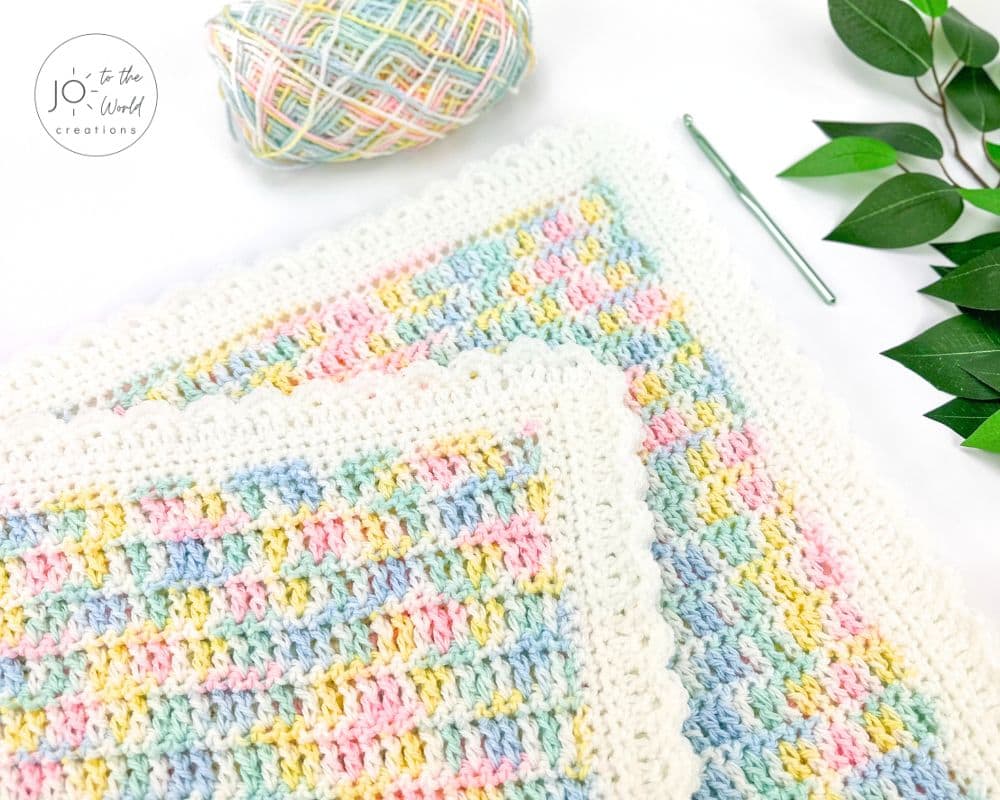
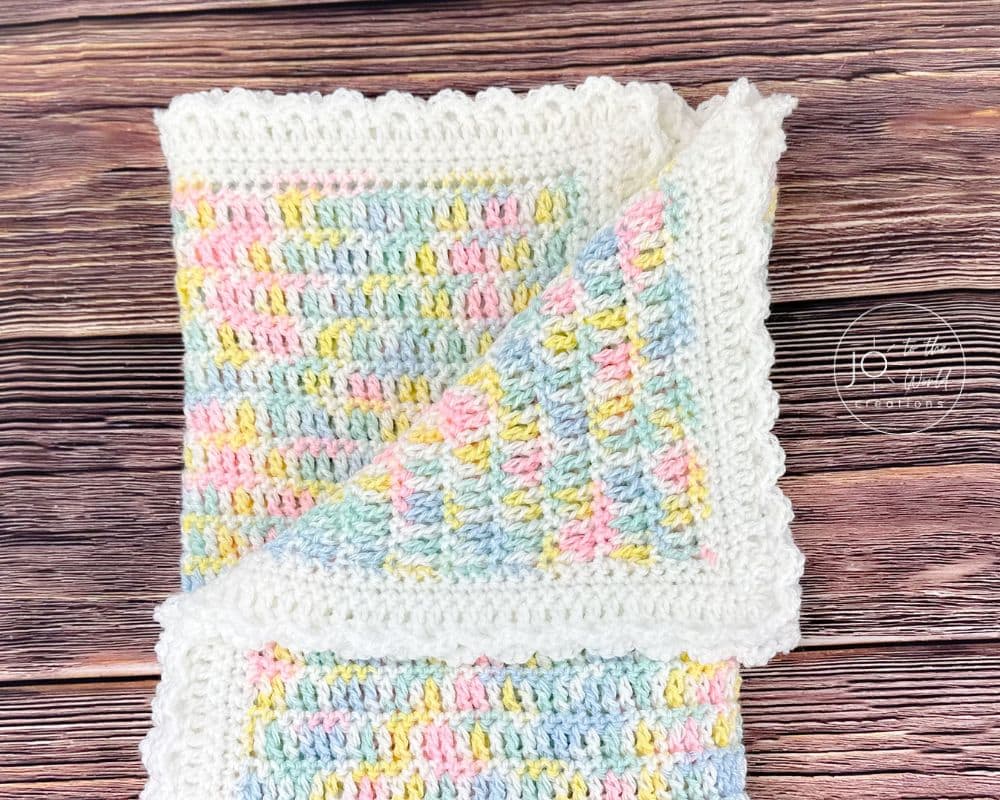
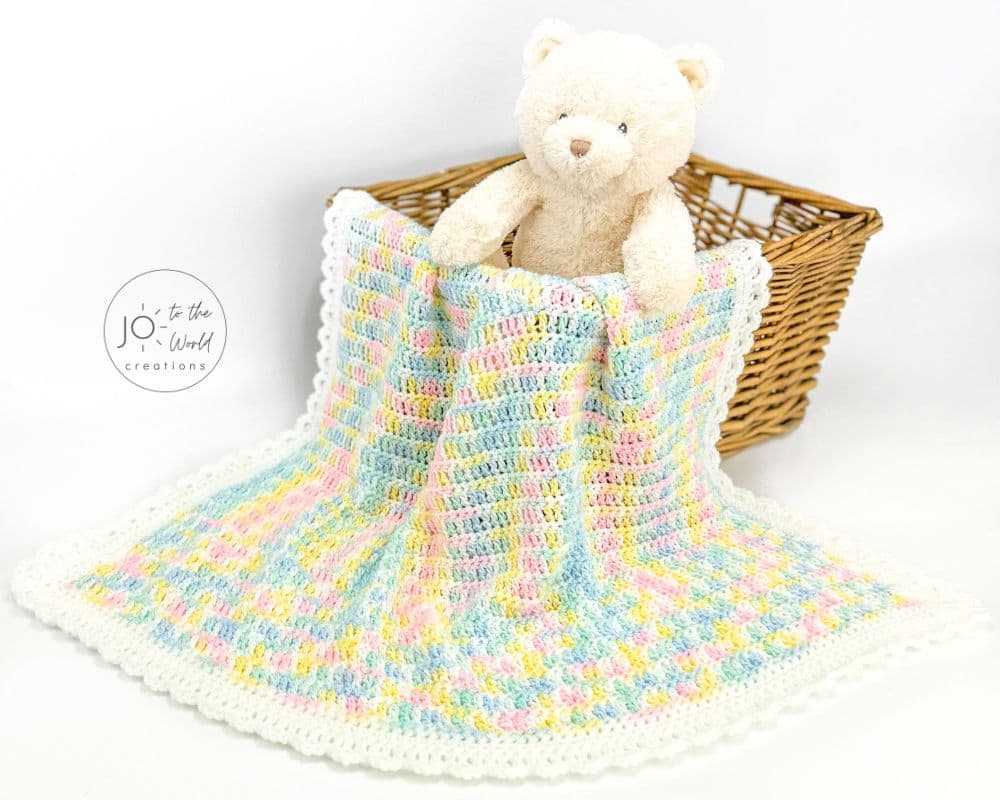
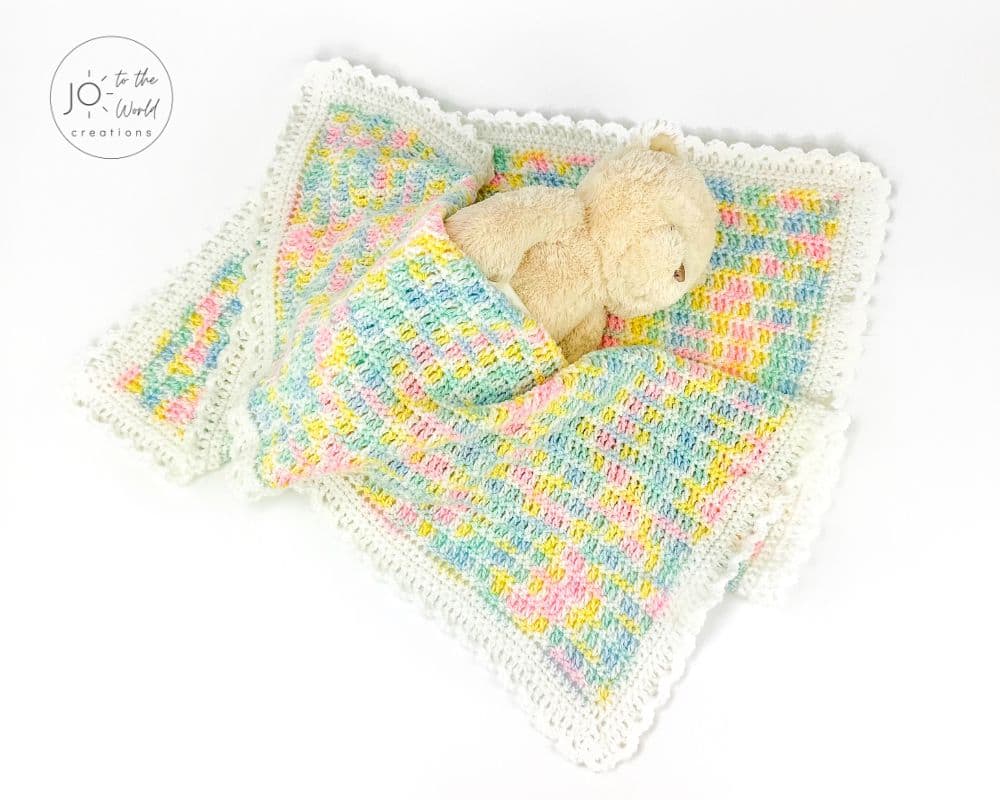
If you are new to crochet and would like to learn how to crochet a baby blanket, this Crochet Baby Blanket Pattern for Beginners is for you! It’s also great for experienced crocheters looking for a relaxing project.
With photos and a video tutorial, this step-by-step comprehensive guide on how to crochet a baby blanket and free pattern includes everything you need to know and will teach you from start to finish how to make this lightweight (yet still cozy), reversible and beautiful blanket.
You can jump right to any part of this pattern using the Table of Contents below.
Affiliate Disclosure: This post may contain affiliate links meaning I may receive a commission for purchases made through links in this post at no extra cost to you. As an Amazon Associate, I earn from qualifying purchases.
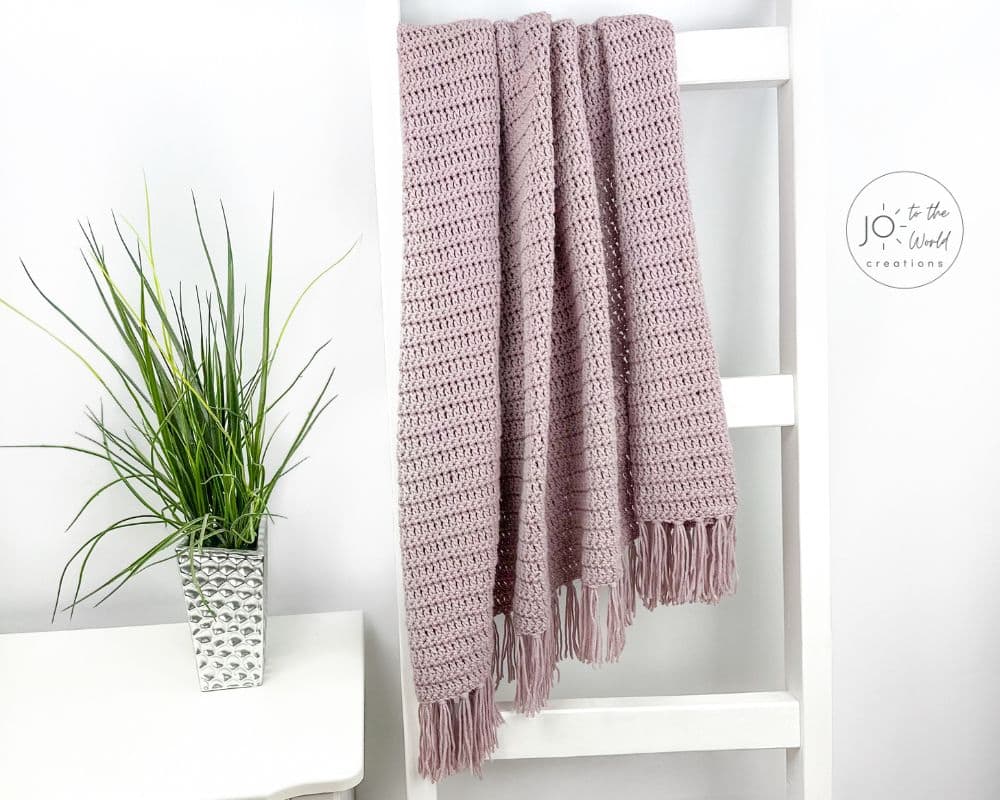
Looking to make a crochet throw blanket instead of a baby blanket? Learn How to Crochet a Throw Blanket for Beginners.
What Do You Need to Crochet a Baby Blanket?
There are six essential crochet supplies you will need to make this baby blanket:
- Yarn
- A Crochet Hook
- Yarn Needle
- Scissors
- Stitch Markers
- Measuring Tape
Yarn
Yarn comes in all different sizes and has different levels of thickness. To help people who use yarn regularly, such as knitters and crocheters, yarn is classified into categories called “yarn weights.”
Yarn weight is determined by the thickness of the strand of yarn, not by how much the skein (the ball of yarn) weighs. There are eight categories of yarn weights. They range from Size 0, which is the smallest (thinnest) to Size 7, which is the largest (thickest).
The image below shows yarn strands that are Size 1 to Size 6:

It’s important to understand the different yarn weights as the size of the yarn you use plays a very large role in determining the overall size, look and feel of your crochet project.
There are also different types of yarn such as cotton, polyester and acrylic yarn. The type of yarn also impacts the finished result of your project.
Learn more by reading my Guide to Yarn Sizes/Types & Yarn Weight Chart.
Recommended Yarn Weight & Amount of Yarn Required
When following a pattern for a baby blanket, you will see a section called Materials or Yarn, which includes the yarn details for that pattern. These details include the recommended yarn weight as well as the amount of yarn required.
For this Beginner Baby Blanket Crochet Pattern, here is the recommended yarn weight and amount of yarn required:
- You can use any size 3 (light) yarn. You will need approx. 775 yds for the blanket body and 225 yds for the blanket border (1000 yds in total).
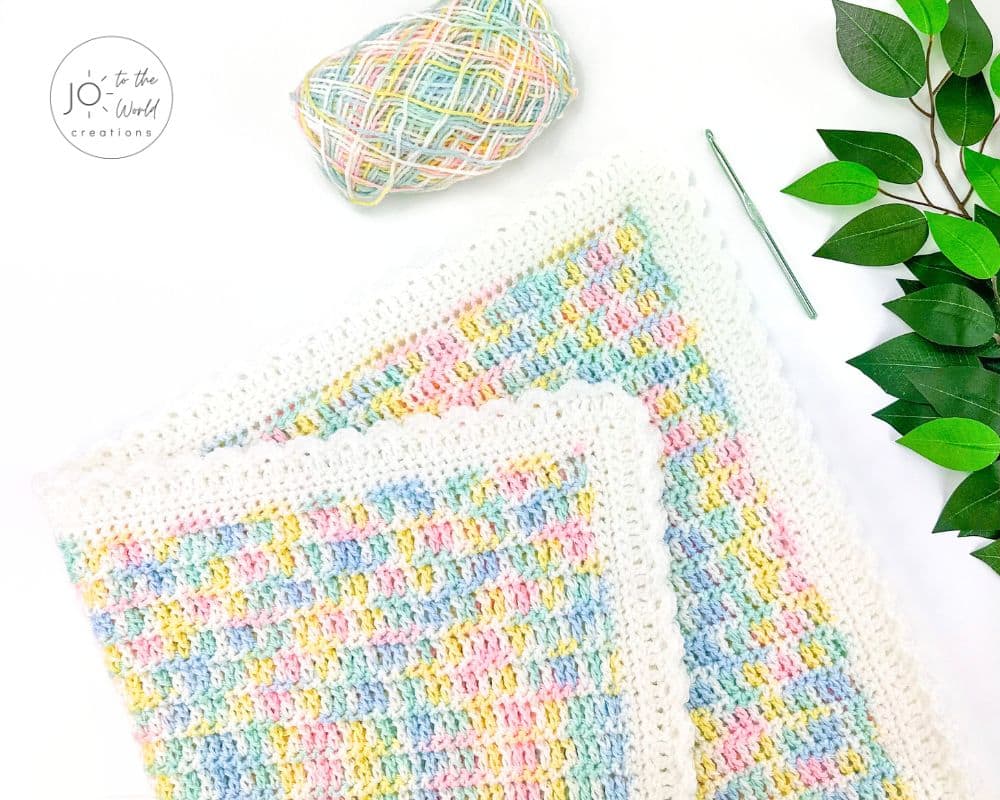
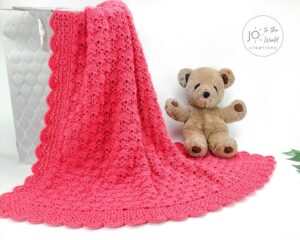
- For the blanket body, I used Bernat Softee Baby, Ombre in the color “Baby Baby.” This yarn is size 3 (light) and 100% acrylic. A skein is 310 yds / 283 m and 4.25 oz / 120 g. I used two and a half skeins of yarn.
- For the Border, I used Snuggly Wuggly by Loops & Threads in the color “White.” This yarn is size 3 (light) and 100% acrylic. A skein is 446 yds / 408 m and 5 oz / 141 g. I used half a skein of yarn.
Let’s go through what this means:
If you want your finished blanket to look as close as possible to the pictures, you can use the exact same yarn as the designer. In this example, you would get 3 skeins of Bernat Softee Baby, Ombre in the color “Baby Baby” and 1 skein of Snuggly Wuggly by Loops & Threads in the color “White.” Then you can start crocheting the blanket!
But what if you can’t find that yarn or want to use a different brand?
You can absolutely use a different brand of yarn. This is when you want to understand yarn weights and types to ensure that the yarn you select will work for the pattern.

First, you will want to ensure you are using the correct yarn weight. The yarn weight is listed on the yarn label. If the pattern calls for a size 3 (light) yarn, you’ll want to use yarn in that same weight category.
The most frequent question I receive is “your pattern calls for size 3 (light) yarn. Can I use size 4 (medium) yarn?”
Here is my answer: using a different yarn weight can (sometimes) significantly change the size, look and feel of the design as well as the amount of yarn required. I have designed and tested this blanket using this specific yarn weight and the hook size indicated below. Changes to either of these can create an entirely different design. For some of my baby blanket patterns that call for size 3 yarn, using a size 4 yarn creates a blanket that is heavier and denser with tighter stitches, which is the complete opposite of the lightweight (yet still cozy), relaxed, “flowy” design I had created.
Unless I have specified in the pattern that you can use size 3 or size 4 yarn, I recommend using the size indicated in the pattern.
With all that said, you are welcome to try using a different weight! Just know that changing the yarn weight can change the design, the size, the overall look and feel and the amount of yarn required. And as much as I wish I could help, I can’t recommend a hook size for a different yarn weight or tell you how much yarn you will need using a different yarn weight since I’ve designed, made and tested this pattern using size 3 yarn.
Yarn Types
For this Beginner Baby Blanket, I used a yarn that is 100% acrylic. If you use a yarn that is 100% cotton or a cotton blend (60% cotton & 40% acrylic) for example, the look and feel may be different – or it might not be…or it could be different in a really good way!

I really wish I could speak to the end result using all the different types of yarn but unfortunately, I can only speak to the type I used and designed the blanket with.
For some patterns, I indicate that you should use a specific yarn type. For example, for crochet dishcloths, I recommend using a yarn that is 100% cotton.
If the pattern does not indicate a specific yarn type, you are welcome to use a different type than I have used as long as you know the look and feel of your finished blanket may be slightly different.
Amount of Yarn Required
For this Baby Blanket Crochet Pattern for Beginners, I used two and a half skeins of Bernat Softee Baby and half a skein of Snuggly Wuggly by Loops and Threads. But not all skeins have the same amount of yarn. The amount of yarn in a skein varies significantly by brand.
You’ll want to look at how many yards of yarn are in a skein. If you bought three skeins of a different brand for example, and the skeins only had 100 yds of yarn per skein, you would be significantly short of yarn. Not fun!
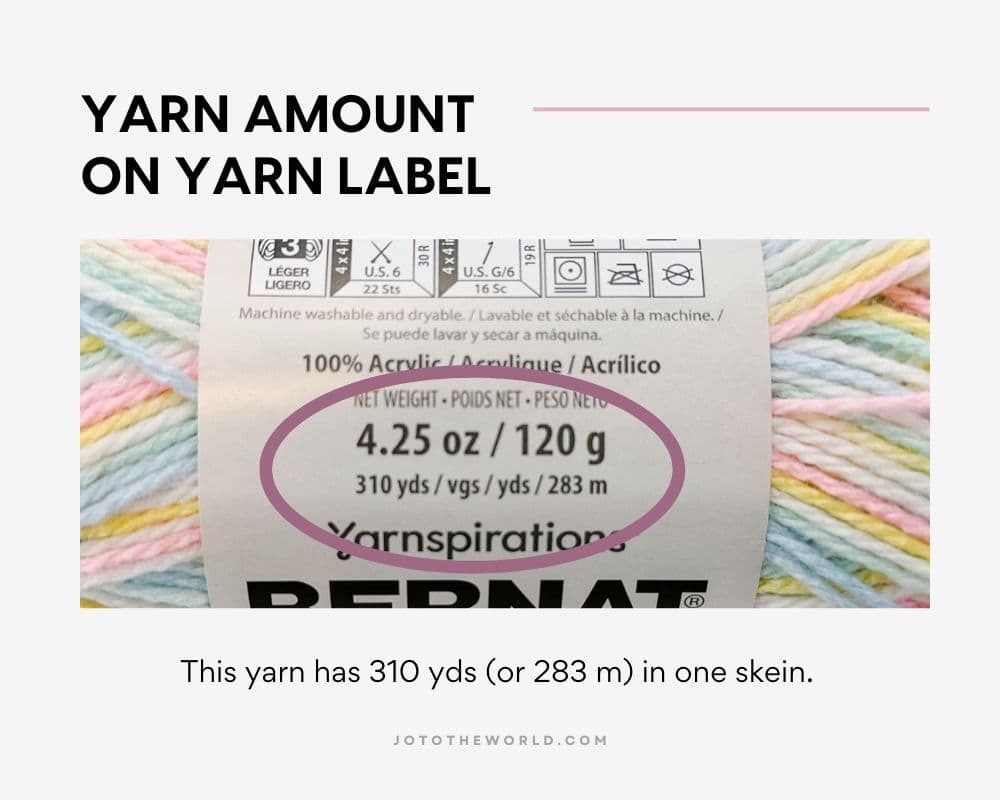
When you find the yarn you want to use, look at the skein label and see how many yards are in that skein. For this pattern, you will need approx. 775 yds for the blanket body and 225 yds for the blanket border (1000 yds in total).
If your skein has 200 yards of yarn, for example, you would need 4 skeins for the blanket body and 2 skeins for the blanket border.
Note that I used different yarns/colors for the blanket body and border but you are welcome to use one yarn/color for the entire blanket. If you are going to use one yarn/color for the entire blanket, you will need 1000 yds of that yarn/color.
Crochet Hook
For this Beginner Baby Blanket Crochet Pattern, I used an I/9 (5.50 mm) crochet hook.
Just like the yarn weight and type, the size of your crochet hook has a significant impact on the overall look, size and feel of your work. Learn more in this Guide to Crochet Hook Sizes.
Each yarn weight has a recommended hook size. If you look at your skein of yarn, you may see that it says to use a G/6 (4.00 mm) hook. It is absolutely okay if your yarn label does not recommend using an I/9 (5.50 mm) crochet hook. Mixing hook sizes with different size yarns allows you to achieve unique designs.
Scissors
For this pattern, you will need scissors. When you are finished with your yarn, you will cut it, leaving a long tail that you will then weave in with a yarn needle. I cut my tails to be approx. 8″ so that I have lots of yarn to work with when I weave in my loose ends.
Yarn Needle
You will need a yarn needle to weave in your loose ends. When you are finished the blanket, you will put those ends into a yarn needle and weave them into the stitches. A yarn needle (also called a Tapestry needle) has a larger eye than a sewing needle so that you can easily thread your yarn into it. You can use plastic or metal yarn needles.
Stitch Markers
For this pattern, you will need two stitch markers. I used safety pins but you can use any type of stitch markers you would like.
Measuring Tape
A measuring tape is not absolutely necessary but if you are going to check the gauge, adjust the size of the blanket or measure the height of the blanket before starting the border, you will want a measuring tape.
Terminology
In every crochet pattern, you should see somewhere these two essential pieces of information:
- Is the pattern for right or left-handed crochet?
- Does the pattern use US or UK crochet terminology?
This Beginner Baby Blanket Crochet Pattern is written for right-handed crochet using standard US terminology.
Right-Handed vs Left-Handed Instructions
When a pattern notes that it is written for right-handed crochet that means it does not include instructions for left-handed crochet. There are lots of patterns that have instructions for both. Many patterns can be adapted or even followed directly by left-handed crocheters.
Here is more information on Left-Handed Crochet.
This Beginner Baby Blanket and all of my patterns are written for right-handed crochet and unfortunately, I don’t have instructions for how to make them with left-handed crochet.
US vs UK Crochet Terminology
There is a major difference between US crochet terminology and UK crochet terminology. The way you make the stitches are the same but what the stitches are called are almost all completely different.
A single crochet stitch, for example, is a US crochet term whereas the same exact stitch is called a double crochet in UK terminology.
It’s very important to know which terminology the pattern uses else you could make all the stitches incorrectly.
This Beginner Baby Blanket Crochet Pattern uses standard US terminology. If you are more familiar with UK terminology, here’s my UK to US Crochet Terms Conversion Chart.
Crochet Baby Blanket Sizes
There is not one exact size or an established industry standard for what size a crochet baby blanket should be. Recommended sizing can vary significantly between designers and baby blanket patterns.
Crochet baby blankets range from 11″ x 11″ for a lovey/security blanket to 42″ x 60″ for a crib blanket. Learn more in this Guide to Crochet Blanket Sizes.
What is the Best Size for a Crochet Baby Blanket?
The average size of a baby blanket is approx. 32″ wide x 36″ high. The great thing about crocheting blankets is that the blanket size doesn’t need to be exact. If your baby blanket is smaller or larger than these measurements, it will still be wonderful.
Beginner Baby Blanket Pattern Sizing
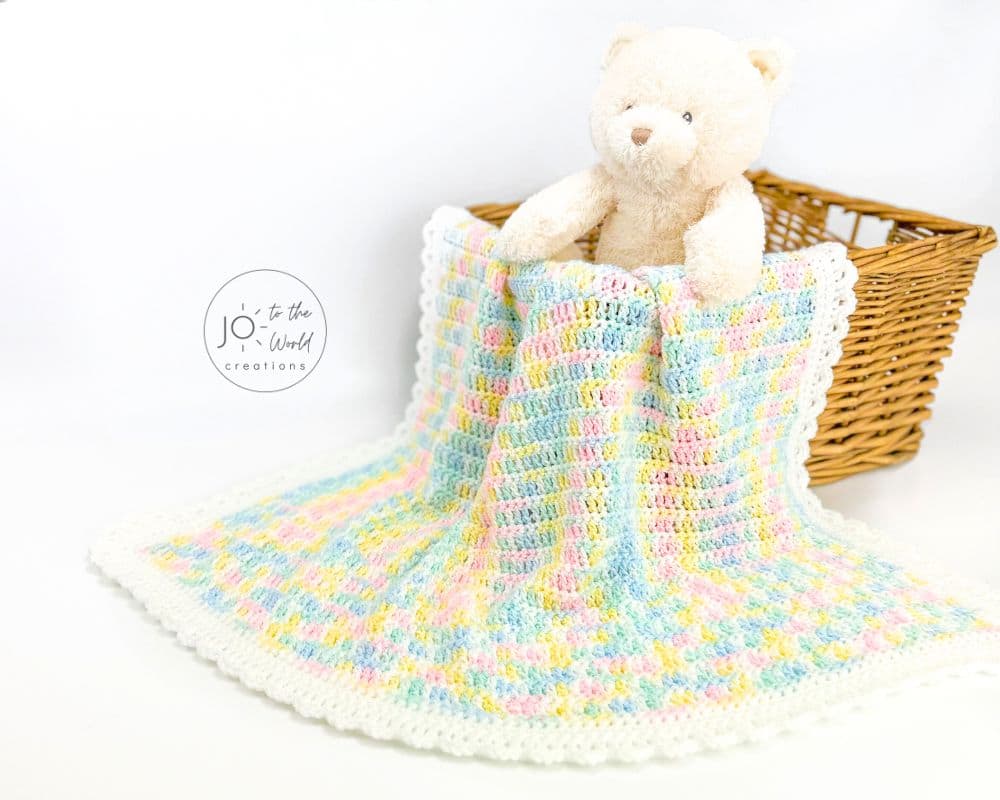
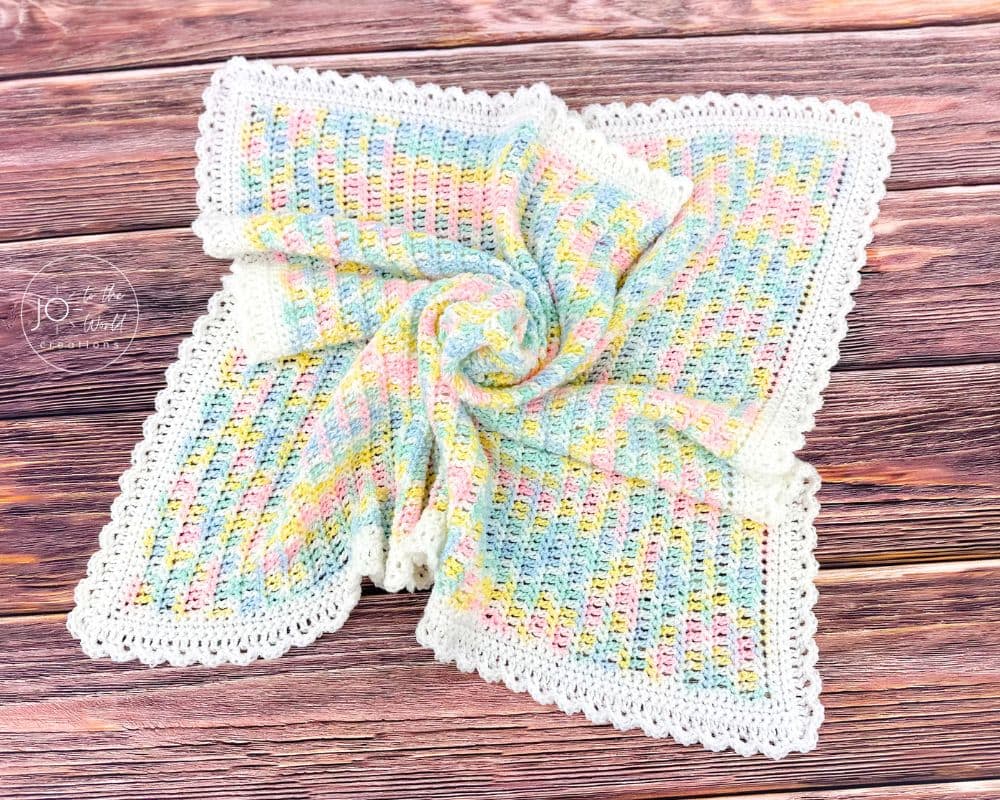
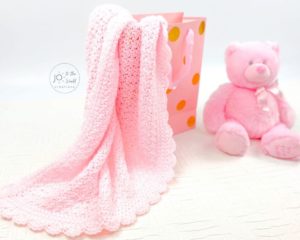
Following this Beginner Baby Blanket Crochet Pattern creates a baby blanket that is approx. 32″ wide and 36″ high, which is the average size of a baby blanket. These measurements include the border. The body of the blanket is approx. 28″ wide and 32″ high without the border.
How Many Chains to Make for a Baby Blanket?
Every baby blanket pattern will require a different number of starting chains. For this Beginner Baby Blanket Crochet Pattern, making 95 starting chains creates a blanket that is approx. 28″ wide. After adding the border, the finished width is approx. 32”.
How to Adjust the Size of this Blanket
This Baby Blanket Crochet Pattern for Beginners is made in multiples of any number + 1 and the number of starting chains determines the width. What this means is that you can use any number in the world and then add 1 to it. You may think, “that’s still any number in the world, isn’t it?” And the answer is kind of. But what if you wanted to have exactly 50 stitches in a row? Because of how the pattern starts (after making your starting chains, in Row 1, you skip the first chain and work into the second chain from the hook), unless you know that the pattern is in multiples of any number + 1, if you made 50 starting chains, you would only have 49 stitches in a row. If you want 50 stitches in each row, you’ll want to have 51 starting chains because this pattern is made in multiples of any number + 1.
To adjust the height of the blanket, keep making rows until you’ve reached your desired height. The pattern starts with a row of single crochet stitches. Then the pattern has a two-row repeat – a row of double crochet stitches and then a row of single crochet stitches. Ensure you finish the blanket body with a row of single crochet stitches.
Abbreviations
In crochet patterns, to stop the pattern from being too wordy, almost all the stitches are abbreviated. There are certain standard crochet abbreviations as indicated by the Craft Yarn Council. If a designer has a special stitch in the pattern that is not on the list of standard crochet abbreviations, it will be in its own section in the pattern, usually called “special stitches.”
In this Beginner Crochet Baby Blanket Pattern, only basic crochet stitches are used. Here are the abbreviations for these basic stitches that are used in this pattern:
- st = stitch
- sts = stitches
- ch = chain
- sc = single crochet
- dc = double crochet
- sl st = slip stitch
How to Crochet a Baby Blanket Instructions
Now let’s get to the fun part…crocheting a baby blanket!

Get the PDF!
Purchase the printer-friendly, ad-free PDF of this pattern. The PDF is a condensed version of this Beginner Baby Blanket Crochet Pattern that you can save, print, write notes on and keep forever! Or you keep scrolling down for the free instructions on how to crochet a baby blanket for beginners.
You can also purchase it on Etsy or Ravelry.

All-Access Membership
For only $0.14 a day, you can get this pattern as a PDF and my entire library of 100+ print-ready, ad-free PDF crochet patterns!
Video Tutorial
You can watch this step-by-step video tutorial showing how to crochet this baby blanket or keep scrolling down for the written instructions.

How to Start a Crochet Baby Blanket
If you have never crocheted before, you’ll want to know how to hold your crochet hook and how to hold yarn when crocheting.
Almost every pattern starts with making a specific number of starting chains. But what patterns don’t tell you is that you need to make a slip knot to start your chain row. Here are 4 ways to make a slip knot. Once you have a slip knot made, you can begin making your starting chains. In this pattern, we will be making 95 starting chains. This is commonly written as:
Start: Chain 95.
Here is how to start a crochet chain.
Row 1
For Row 1 (only) we are going to be working into the back ridge loops of the chain stitches we just made. These are bumps along the back.
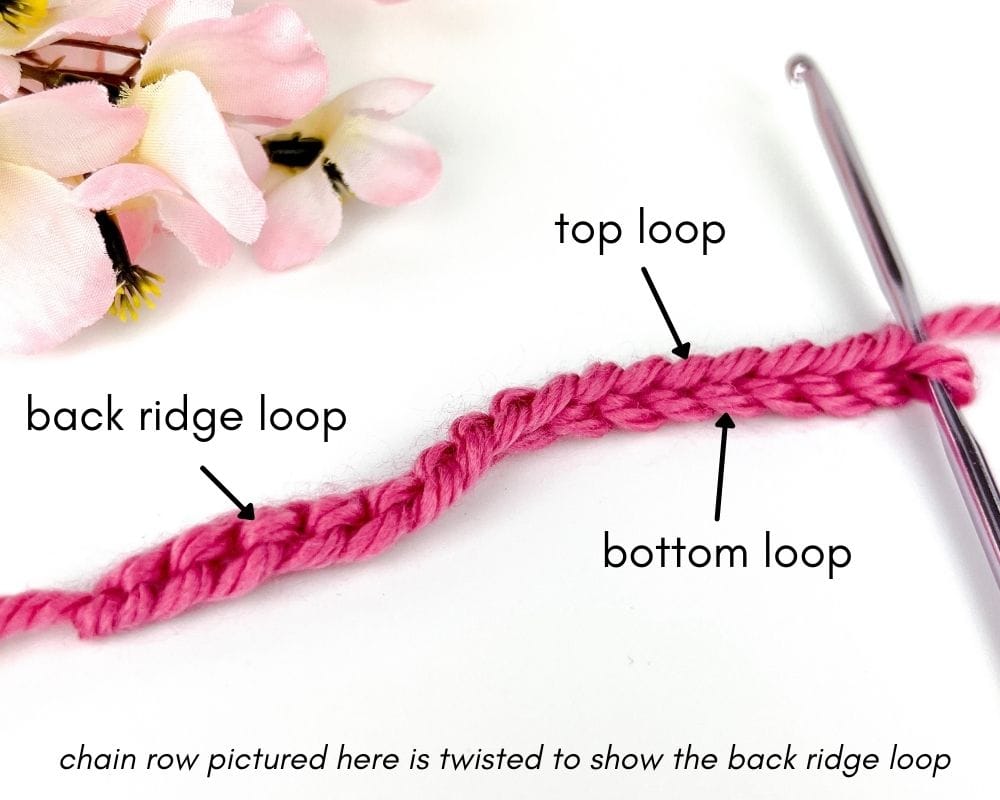
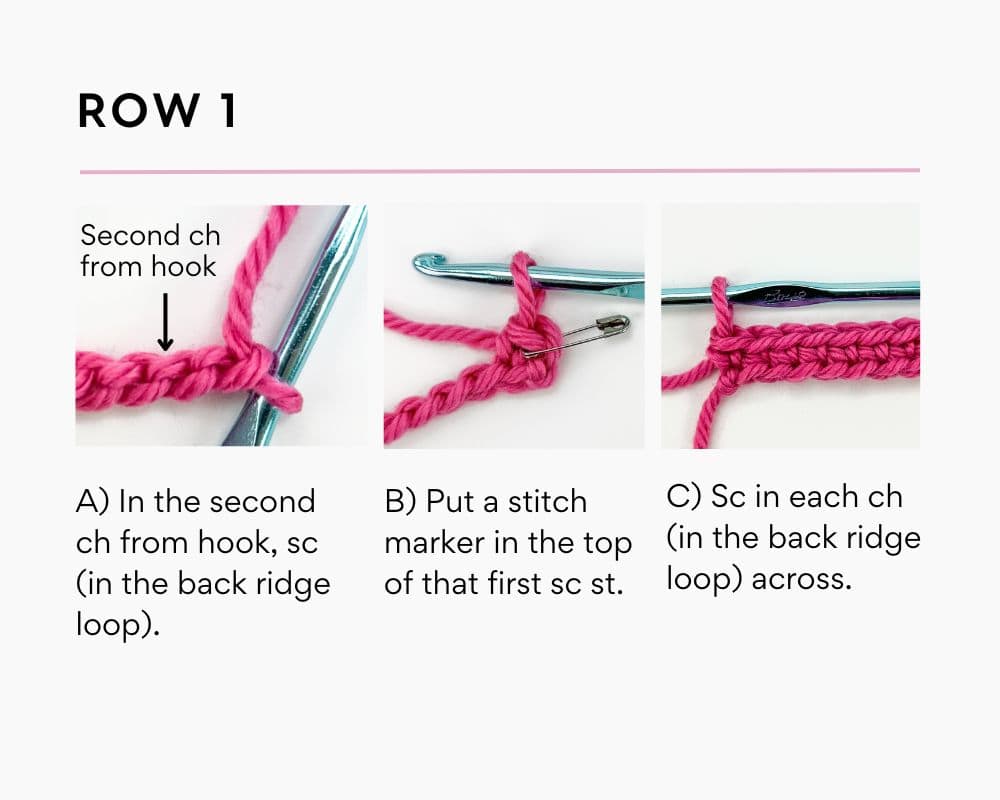
In the second chain (ch) from hook, single crochet (sc) in the back ridge loop.
What this means is to find the second chain from the hook and rotate it so you can see the “bumps” along the back. Insert your hook into the second back ridge loop from the hook and single crochet. Here’s how to single crochet including how to work in the back ridge loop of the second chain from the hook.
Place a stitch marker in the top of that first sc stitch made.
Sc in each ch (in the back ridge loop) across.
What this means is to work into the next chain (in the back bump) and single crochet. Then work into the next chain (in the back bump) and single crochet. And continue making a single crochet stitch into each back bump all the way across the row.
Row 1 Stitch Count:
At the end of the row, you will have 1 less single crochet stitch made than your number of starting chains. Why? Because we skipped the first chain. This skipped chain does not count as a stitch.
If you made 95 starting chains, you should have 94 sc stitches (sts).
Row 2
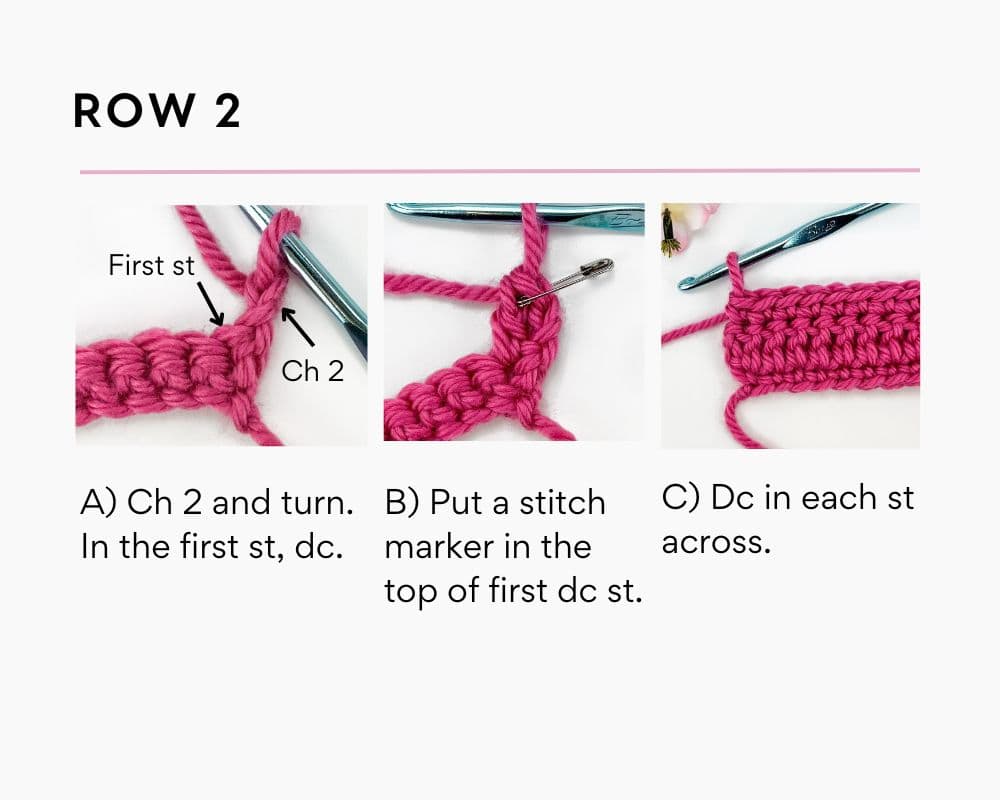
Ch 2 and turn.
What this means is to make 2 chain stitches and turn your work like you are flipping a page in a book. The back of your work will now be facing you.
In the first stitch (st) (the st attached to the ch), double crochet (dc).
Here is a photo tutorial on how to double crochet.
Put a stitch marker in the top of that first dc st.
Dc in each st across.
Your last st of the row is the st with the stitch marker from the previous row. Remove the stitch maker and make a dc into that stitch.
Row 2 Stitch Count:
At the end of the row, you should have 94 dc sts. Reminder: chains never count as stitches so we don’t count the ch 2 we made at the beginning of the row as a stitch.
Row 3
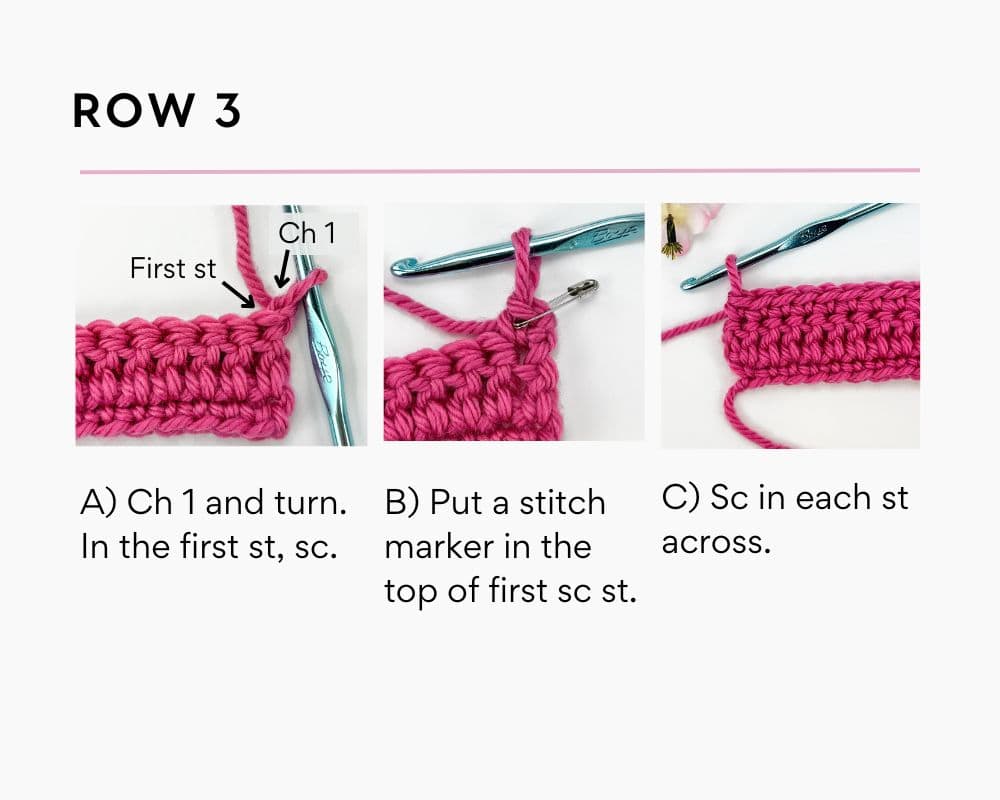
Ch 1 and turn.
In the first st (the st attached to the ch), sc.
Put a stitch marker in the top of that first sc st.
Sc in each st across.
Your last st of the row is the st with the stitch marker from the previous row. Remove the stitch marker and make a sc into that stitch.
Row 3 Stitch Count:
At the end of the row, you should have 94 sc sts.
Row 4 and on
Repeat Rows 2 and 3 consecutively until your work measures approx. 32”, which is approx. 79 rows in total. (Or your desired height). The last row before starting the border should be a Row 3.
Note: It’s okay if your blanket body curls slightly. The border will fix this.
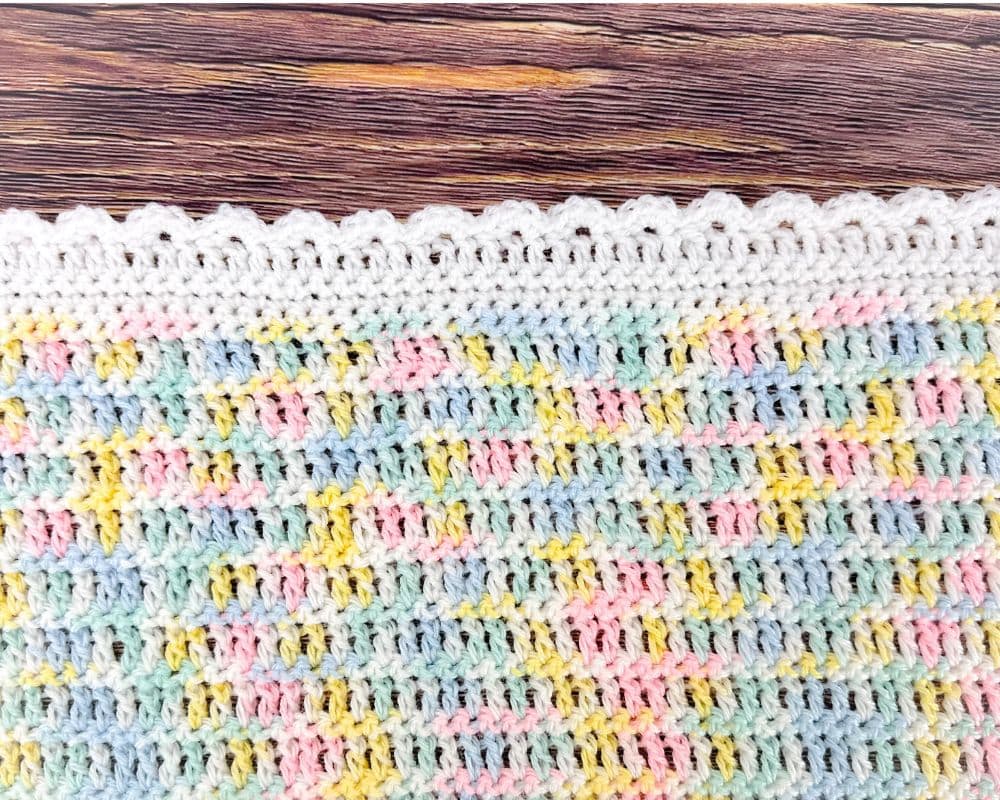
How to Crochet a Border on a Baby Blanket
Now we are going to learn how to crochet a border on a baby blanket. Unlike the blanket body where we made rows, the border instructions are now for “rounds” because we are going to be working around the blanket.
If you are having any trouble with the border, the video tutorial for this Beginner Baby Blanket shows you step-by-step how to complete each round.
Changing Colors for the Border (Optional):
If you are using a new color for the border, attach the new color by placing the new color on your hook and pulling it through the loop of the current color that is on your hook. Fasten off the old color (meaning to cut the yarn leaving a tail that is approx. 8” long).
If you are using the same color for the border, you don’t need to do anything.
Border Round 1
The instructions for Border Round 1 are:
Ch 1. Do not turn. Working down the side and around the blanket, sc evenly around, making 3 sc in each corner. Skip over the ch 1. Sl st into the first sc made in the round to join.
Help with Border Round 1
I often get asked for more clarity on this round so I have outlined step by step how I have completed Border Round 1 for this pattern.
Note: You don’t have to sc in the specific places suggested here or worry about the exact stitch count – you just want to ensure the sc sts are evenly spaced out. Also, when making 3 sc into the corner sts, you can choose which stitch or space is the corner.
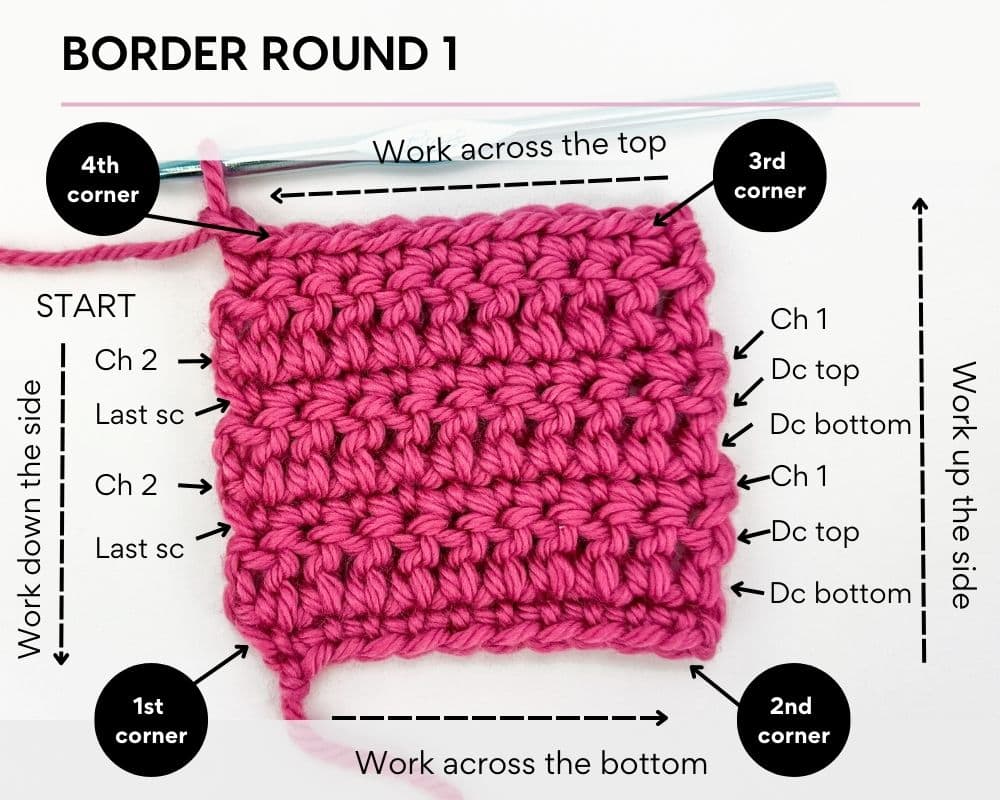
Work down the side. Insert your hook under the ch 2 that started the last row of dc sts and make 2 sc. Moving further down the side, insert your hook into the outermost loop of the last sc of the row below and make 1 sc. Repeat making 2 sc under each ch 2 and 1 sc into the last sc st of each row all the way down until the first row. In the last st (which is the last sc from the first row), make 3 sc in the same st (this is the first corner).
Work across the bottom. Insert your hook under both loops of the first chain st and sc. Repeat making 1 sc under both loops of each ch st across until the last ch st. In the last ch st, make 3 sc in the same st (this is the second corner).
Work up the side. Working into the last dc of the second row, insert your hook into the outermost loop of the bottom half of the dc and sc. Still working into the same last dc, insert your hook into the outermost loop of the top half of the dc and sc. Moving further up the side, insert your hook under the ch 1 that started the next (the third) row and sc. Repeat making 1 sc in the bottom half and 1 sc in the top half of the next dc and 1 sc under the next ch 1 all the way up. In the first sc st at the top, make 3 sc in the same st (this is the 3rd corner).
Work across the top. Make 1 sc in each st across the top until the last st. In the last st, make 3 sc in the same st (this is the 4th corner.
Skip over the ch 1 st that started the round and sl st into the first sc made in the round to join.
Border Round 2
Ch 1 and turn. Sc in the first st (the st attached to the ch) and in each st around, making 3 sc in each corner (the corner is the middle st of the 3 sc sts made in each corner in the previous round). Skip over the ch 1. Sl st into the first sc made in the round to join.
Border Rounds 3 & 4
Repeat Border Round 2
Border Round 5
Ch 2 and turn. Skip the first st (the st attached to the ch). Dc in each st around, making 3 dc in each corner. Skip over the ch 2. Sl st into the top of the first dc to join.
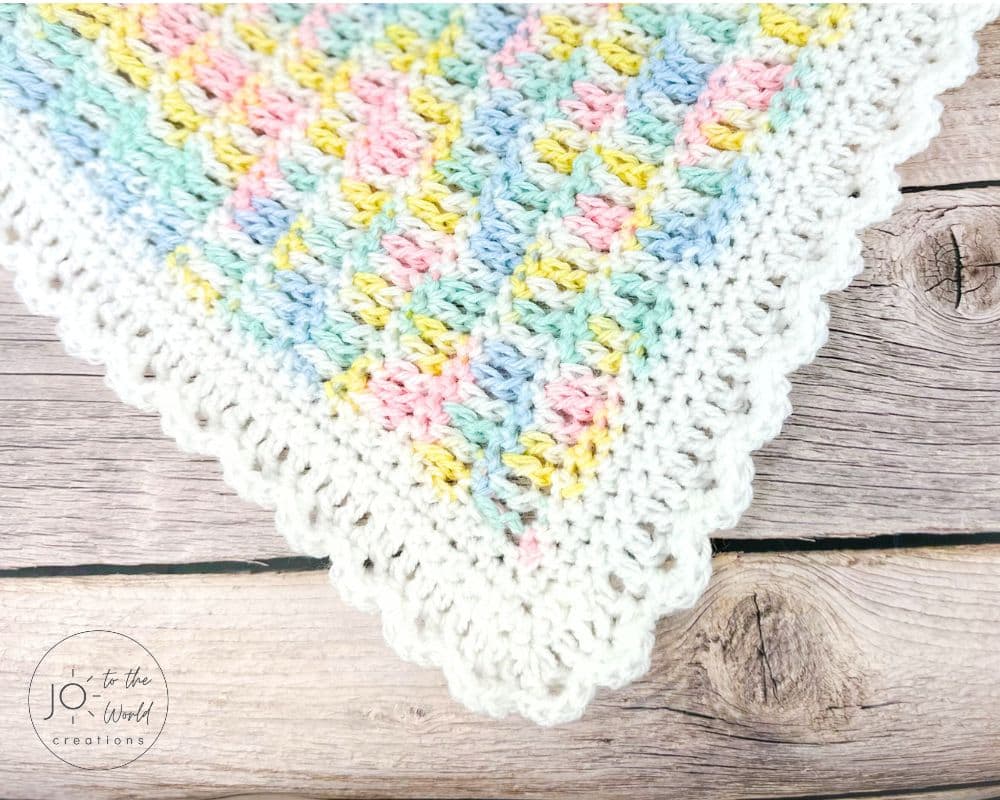
Border Round 6
Ch 1. Do not turn. Skip the first st (the st attached to the ch). *Sl st into the next st. Make 4 sc in the next st (shell created). Skip the next st.* Repeat from * to * around. (Nothing special happens at the corners).
As you approach the first shell made, you’ll want to have a sl st between it and your last shell. If you don’t have the right number of sts, back up and don’t skip a stitch after a shell to make it work.
After your last sl st, fasten off and weave in loose ends.
And now you have a new baby blanket!
Frequently Asked Questions
How Many Starting Chains Do I Need to Make a Different Size Blanket?
I often get asked how many starting chains are required to make a blanket that has a width of 20”, 40”, 50” etc.. As much as I wish I could help, I’ve designed this blanket to be the size that it is and other than making it again for every size in the world, unfortunately, I can’t tell you how many starting chains are needed. What I can do is share how you can make this blanket to be any size you would like.
- Follow the instruction for making a gauge swatch (outlined below). Even if you aren’t concerned with matching the size of my gauge, this is an important step.
- Count how many stitches are in 4” measured horizontally.
- Divide that number of stitches by 4. That’s the number of stitches per inch.
For example, let’s pretend you have 10 stitches within 4”. If you divide 10 by 4, you will have 2.5. That means you have 2.5 stitches per inch.
Now you can multiply the number of stitches per inch by the width you want your blanket to be.
If you wanted your blanket to be 50” for example and you had 2.5 stitches per inch, you would multiply 50 x 2.5 = 125.
The number you get after multiplying (the number of stitches per inch) X (the width you want your blanket to be) = the number of stitches you will need. Now add 1 to that number because we skip the first starting chain when we begin Row 1.
Using my example numbers, you would need 125 + 1 = 126 starting chains to have a blanket that is approx. 50” wide.
These measurements are without the border. Remember that making 95 starting chains creates a blanket that is approx. 28” wide without the border and 32” wide with the border. Take the border into account when calculating the width you would like for your blanket.
What is the Gauge for this Pattern?
The gauge for this Beginner Baby Blanket Crochet Pattern is 4” x 4” = 12 sts and 10 rows following the pattern.
The gauge of your work is the number of stitches and rows in a designated area. The gauge is most important when you want your work to be the exact same size as the designer. This is critical when making items that need to fit such as garments, pillows and tissue box covers, for example. For things like scarves and blankets, the gauge is not as important because the sizing doesn’t need to be exact. You may want to make a gauge swatch for a blanket if you want to adjust the size and want to see how many chains you will need to do that. Learn more in this Guide to Crochet Gauge.
As stated above, the gauge for this pattern is 4” x 4” = 12 sts and 10 rows following the pattern.
What this means is to make a small sample of the pattern (called a gauge swatch) and count the number of stitches and rows within a 4” by 4” area.
When making a gauge swatch, you always want to make a few more stitches and rows than what is stated for the pattern’s gauge.
For this pattern, there are 12 stitches within 4”, measured horizontally so we will add 3 stitches to that and make a gauge swatch with 15 stitches across.
The gauge says there are 10 rows within 4”, measured vertically so we will make 3 more rows before we measure our swatch so a total of 13 rows.
To make our gauge swatch, we are going to follow the pattern but instead of making all the starting chains we need for the blanket, we are only going to make 15 + 1 = 16 chains (since the pattern says we can adjust the number of starting chains in multiples of any number + 1).
Unless you know for sure that you are a very tight crocheter or a very loose crocheter, always do your first gauge with the recommended hook size. In this pattern, the recommended hook size for size 3 yarn is I/9 (5.50 mm). If you don’t have this size hook, use the closest hook size you have.
For our gauge swatch, we are going to chain 16. Then follow the instructions for the pattern.
- At the end of Row 1, we will have 15 sts. This is because we worked in the second chain the from hook so we skipped the first chain.
- At the end of Rows 2 & 3, we will also have 15 sts since chains in this pattern don’t count as stitches.
- Repeat Rows 2 & 3 of the pattern consecutively until you have 13 rows in total.
Now we take our measuring tape and hold it parallel to the row. (If you are using a gauge ruler, place it in the middle of your swatch). Count the number of stitches within 4”. As a reminder, half stitches count too so if it is half a stitch or more, count it as a stitch. Make note of how many stitches you have in that 4” area.
Next, we will measure the number of rows. Hold the measuring tape vertically, parallel to the two sides. (If you are using a gauge ruler, keep it in the middle of your swatch). Count the number of rows within 4”. Half rows count too so if there is half a row or more, count it as a row. Make note of how many rows you have.
Since the gauge swatch doesn’t specify, we count both rows of single crochet stitches and double crochet stitches and it doesn’t matter which row starts and ends.
Compare your stitches and rows to the gauge listed on the pattern. The pattern states that there should be 12 sts and 10 rows. If you have the same, great! You can now make the blanket.
- If you have MORE stitches and/or rows than what the pattern gauge states, your finished item will be too small and might not fit (plus you’ll have lots of leftover yarn). Redo your swatch with a LARGER hook.
- If you have FEWER stitches and/or rows than what the pattern gauge states, your finished item will be too big and you might not have enough yarn. Redo your swatch with a SMALLER hook.
What if you have the same number of stitches but not the same number of rows? That means that you crochet slightly differently than the designer. For this blanket that is absolutely okay. It just means you might need to make fewer or more rows and you may require less or more yarn to complete the blanket. In other patterns, where sizing is more important you may need to try additional techniques to achieve the stitch height as the designer.
Can I Use Size 4 (Medium) / Worsted Weight Yarn?
I have designed and tested this blanket using size 3 (light) yarn. Using a different yarn weight can sometimes significantly change the size, look and feel of the design as well as the amount of yarn required.
With that said, you are welcome to try it! I unfortunately can’t provide recommendations for what hook size to use or how much yarn you’ll need as this blanket was designed and tested using size 3 (light) yarn.
If you are looking for easy baby blanket patterns that use size 4 (medium) yarn, you may like these:
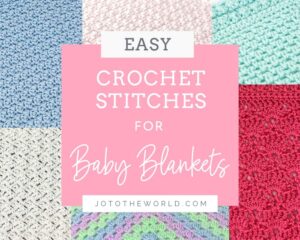
What is the Best Stitch for a Baby Blanket?
There are so many crochet stitches that make beautiful baby blankets. I’ve put together a collection of my favorite simple stitches in this Easy Crochet Stitches for Baby Blankets.
Do You Have More Crochet Patterns for Beginners?
I sure do! Here are more patterns for beginners you might like (and they all have full video tutorials):

And you can find more easy patterns in this collection of 70+ Crochet Patterns for Beginners.

I’m Jo, the designer behind Jo to the World Creations, and I’m dedicated to helping you make the perfect crochet gift! I love designing and sharing free crochet patterns that you can make for every gift occasion.
About →Let’s Connect
Download. Print. Keep.
Get Instant Access to ALL Printable Patterns
Make your crocheting more enjoyable, relaxing and productive with printable PDF patterns.
- 100+ premium crochet patterns.
- Download, save and print from any device.
- No ads or popups!
Not sure yet? Take a look at the Pattern Library and see all the patterns you can download once you’re a member.
Save with Pattern Bundles
For a limited time, I’ve grouped some of my most popular crochet patterns and I’m offering them as pattern bundles where you can get the printable versions for one low, discounted price. Check out these incredible Crochet Pattern Bundles.
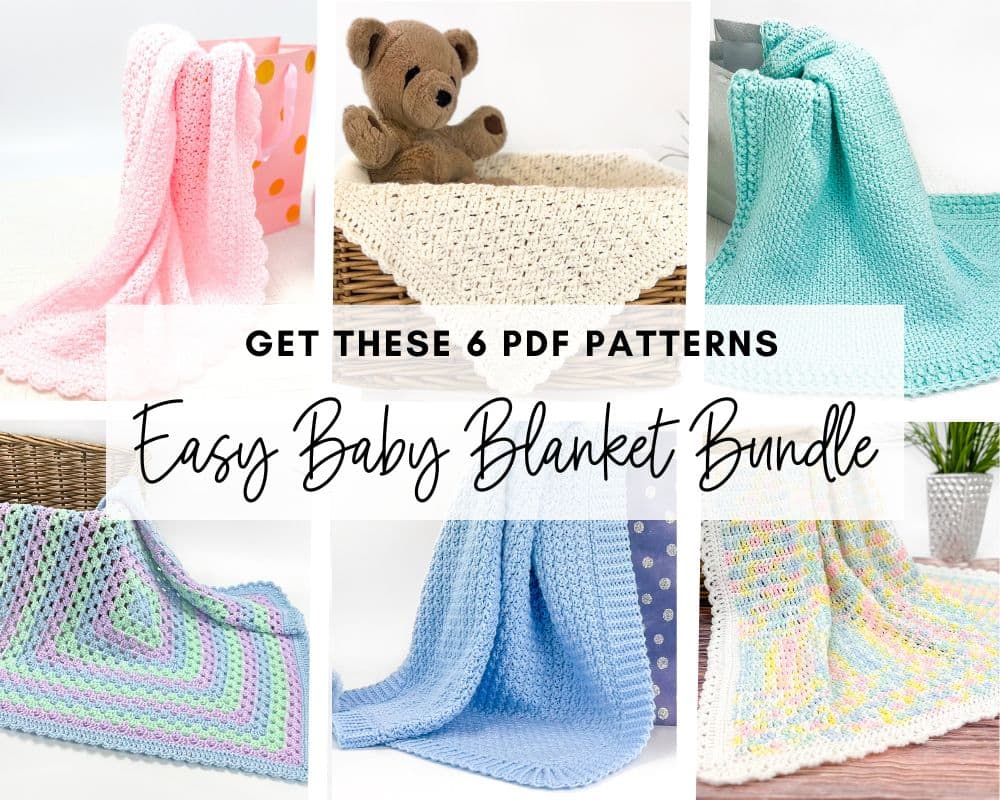
Easy Baby Blanket Bundle
With this Easy Baby Blanket Bundle, you’ll get SIX easy crochet baby blankets as printable downloads. Each pattern includes step-by-step instructions and a full video tutorial.
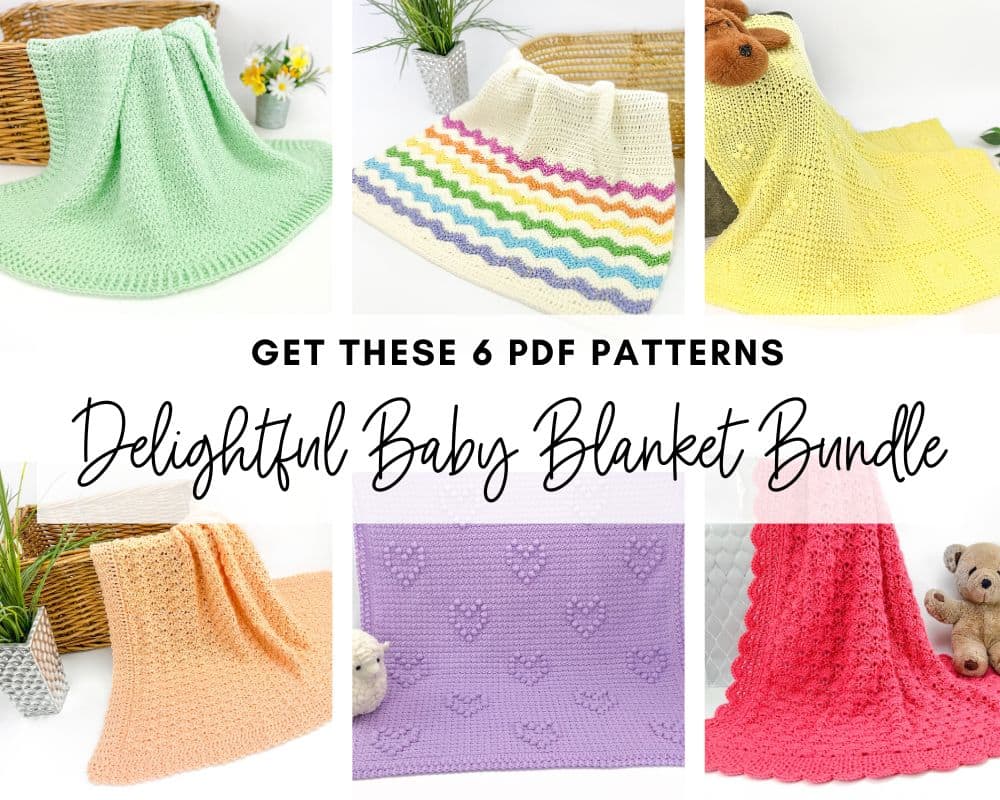
Delightful Baby Blanket Bundle
This incredible deal includes six SIX blanket patterns that are a delight to make and create truly stunning blankets – all as printable PDFs for one low, discounted price.
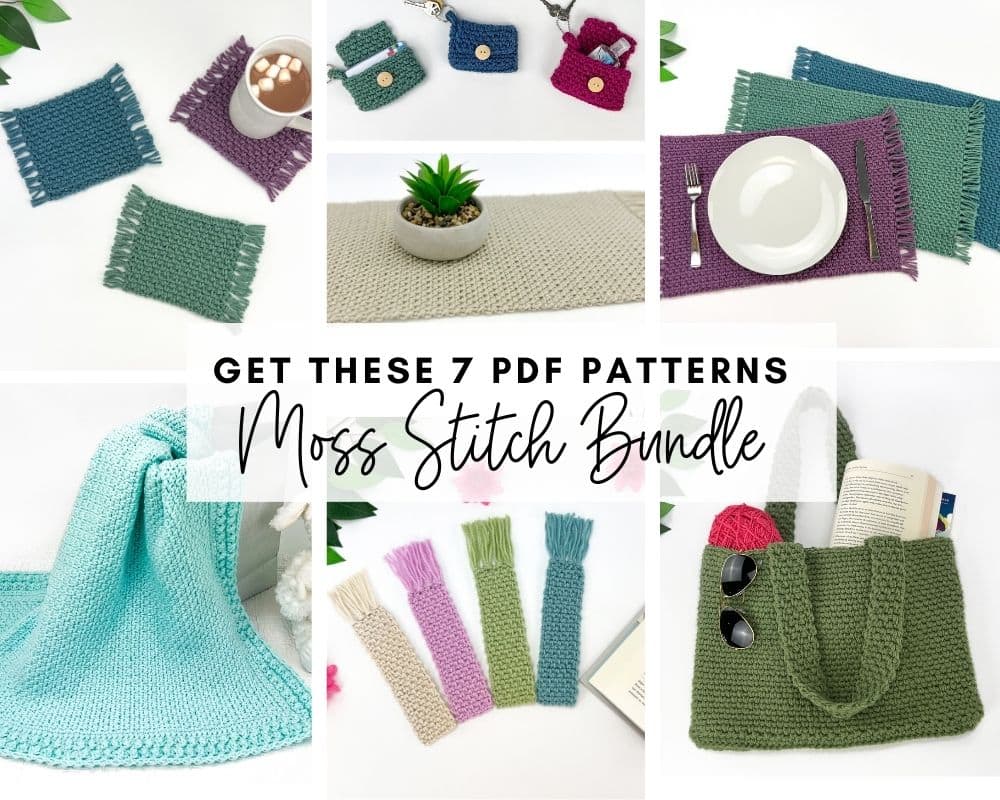
Moss Stitch Pattern Bundle
All your favorite Moss Stitch patterns in one bundle! Get SEVEN easy Moss Stitch crochet patterns as ad-free, print-ready PDFs to print, save and keep forever.
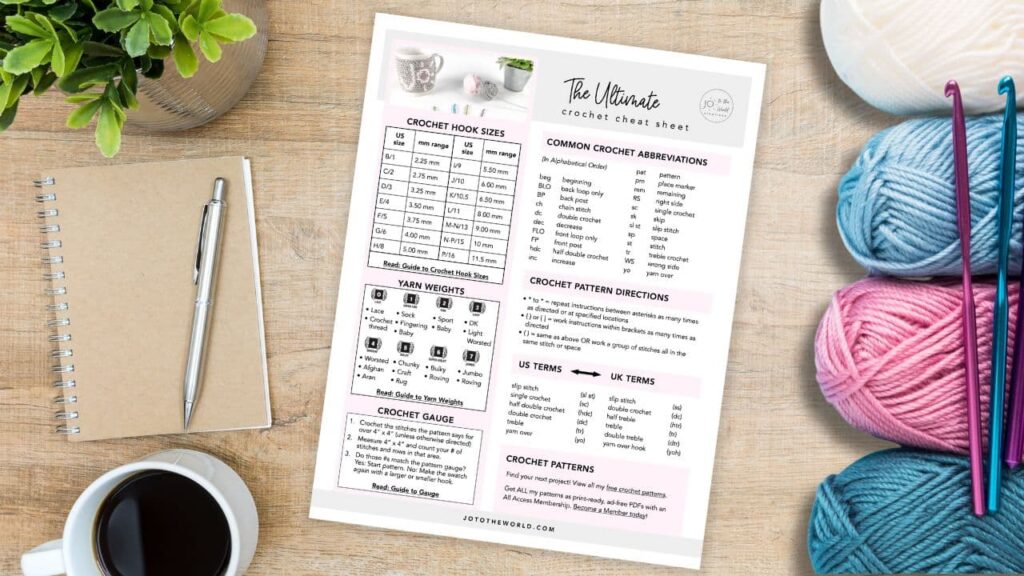
Free Crochet Cheat Sheet
Get instant access to this Ultimate Crochet Cheat Sheet! Plus you’ll receive free patterns for crochet gifts delivered right to your inbox!
Featured Crochet Patterns
Pattern Collections

Free Patterns for Crochet Gifts
Never miss a pattern! Get all my secrets to making incredible crochet gifts as well as new free crochet patterns and exclusive deals when you sign up for my newsletter (it’s free!).